Table of contents
Open Table of contents
Article body
This documentation already explains this in detail; these notes are supplementary.
- Add the following properties to the properties element in the POM.
        <!--  MyBatis Generator  -->
        <!--  Java interfaces and entity classes  -->
        <targetJavaProject>${basedir}/src/main/java</targetJavaProject>
        <!--Output package for generated mapper interfaces-->
        <targetMapperPackage>tk.mybatis.mapper.mapper</targetMapperPackage>
        <!--Output package for generated model entities-->
        <targetModelPackage>tk.mybatis.mapper.model</targetModelPackage>
        <!--  XML output path  -->

     <targetResourcesProject>${basedir}/src/main/resources</targetResourcesProject>
        <targetXMLPackage>mapper</targetXMLPackage>
        <!--  Dependency versions  -->
        <mapper.version>4.0.4</mapper.version>
<mysql.version>5.1.31</mysql.version>- Locate the plugin section in the POM, as shown below:
<build>
   <pluginManagement>
      <plugins>
          <plugin>
           Plugin 1
          </plugin>
          <plugin>
           Plugin 2
          </plugin>
          ....
       </plugins>
    </pluginManagement>
</build>
Add the following inside
<plugin>
                    <groupId>org.mybatis.generator</groupId>
                    <artifactId>mybatis-generator-maven-plugin</artifactId>
                    <version>1.3.7</version>
              <configuration>
                        <configurationFile>${basedir}/src/main/resources/generatorConfig.xml
                        </configurationFile>
                        <overwrite>true</overwrite>
                        <verbose>true</verbose>
              </configuration>
                    <dependencies>
                        <dependency>
                            <groupId>mysql</groupId>
                            <artifactId>mysql-connector-java</artifactId>
                            <version>${mysql.version}</version>
                        </dependency>
                        <dependency>
                            <groupId>tk.mybatis</groupId>
                            <artifactId>mapper</artifactId>
                            <version>${mapper.version}</version>
                        </dependency>
                    </dependencies>
 </plugin>
Make sure the path in configurationFile is correct; otherwise, Maven may report an error such as “can not resolve entry class.” Also, the directory in src/main/resources needs to be named resources. My web project originally used a resource directory, and configuring src/main/resource still failed. Renaming it to resources resolved the issue. If you do not encounter this problem, you can ignore this note.
- Write generatorConfig.xml to specify output locations and the tables to process.
<?xml version="1.0" encoding="UTF-8"?>
<!DOCTYPE generatorConfiguration
        PUBLIC "-//mybatis.org//DTD MyBatis Generator Configuration 1.0//EN"
        "http://mybatis.org/dtd/mybatis-generator-config_1_0.dtd">

<generatorConfiguration>
    <properties resource="config.properties"/>

    <context id="Mysql" targetRuntime="MyBatis3Simple" defaultModelType="flat">
        <property name="beginningDelimiter" value="`"/>
        <property name="endingDelimiter" value="`"/>

        <plugin type="${mapper.plugin}">
            <property name="mappers" value="${mapper.Mapper}"/>
        </plugin>

        <jdbcConnection driverClass="${jdbc.driverClass}"
                        connectionURL="${jdbc.url}"
                        userId="${jdbc.user}"
                        password="${jdbc.password}">
        </jdbcConnection>

        <javaModelGenerator targetPackage="${targetModelPackage}" targetProject="${targetJavaProject}"/>

        <sqlMapGenerator targetPackage="${targetXMLPackage}"  targetProject="${targetResourcesProject}"/>

        <javaClientGenerator targetPackage="${targetMapperPackage}" targetProject="${targetJavaProject}" type="XMLMAPPER" />

        <!--Specify a tableName or use "%" to process all tables in the current database-->
        <table tableName="user" >
            <generatedKey column="id" sqlStatement="Mysql" identity="true"/>
        </table>
    </context>
</generatorConfiguration>- Write config.properties, referenced by the file in step 3.
# Database configuration
jdbc.driverClass = com.mysql.jdbc.Driver
jdbc.url = jdbc:mysql://localhost:3306/ssm
jdbc.user = root
jdbc.password =12345

#c3p0
jdbc.maxPoolSize=50
jdbc.minPoolSize=10
jdbc.maxStatements=100
jdbc.testConnection=true

# Generic Mapper configuration
mapper.plugin = tk.mybatis.mapper.generator.MapperPlugin
#mapper.Mapper = tk.mybatis.mapper.common.Mapper
#Use our custom Mapper rather than the default one here.
mapper.Mapper = upload.mapper.CustomMapper
Here I use my own Mapper rather than the default tk Mapper. My custom Mapper extends theirs and serves as the parent for my generic mappers, which is why the configuration points to it. If you do not have a custom Mapper, use the default one provided by tk.
- Run the Maven generation command.
Tip: after configuring the plugin in the POM, its name should appear in the Maven view in IntelliJ IDEA.
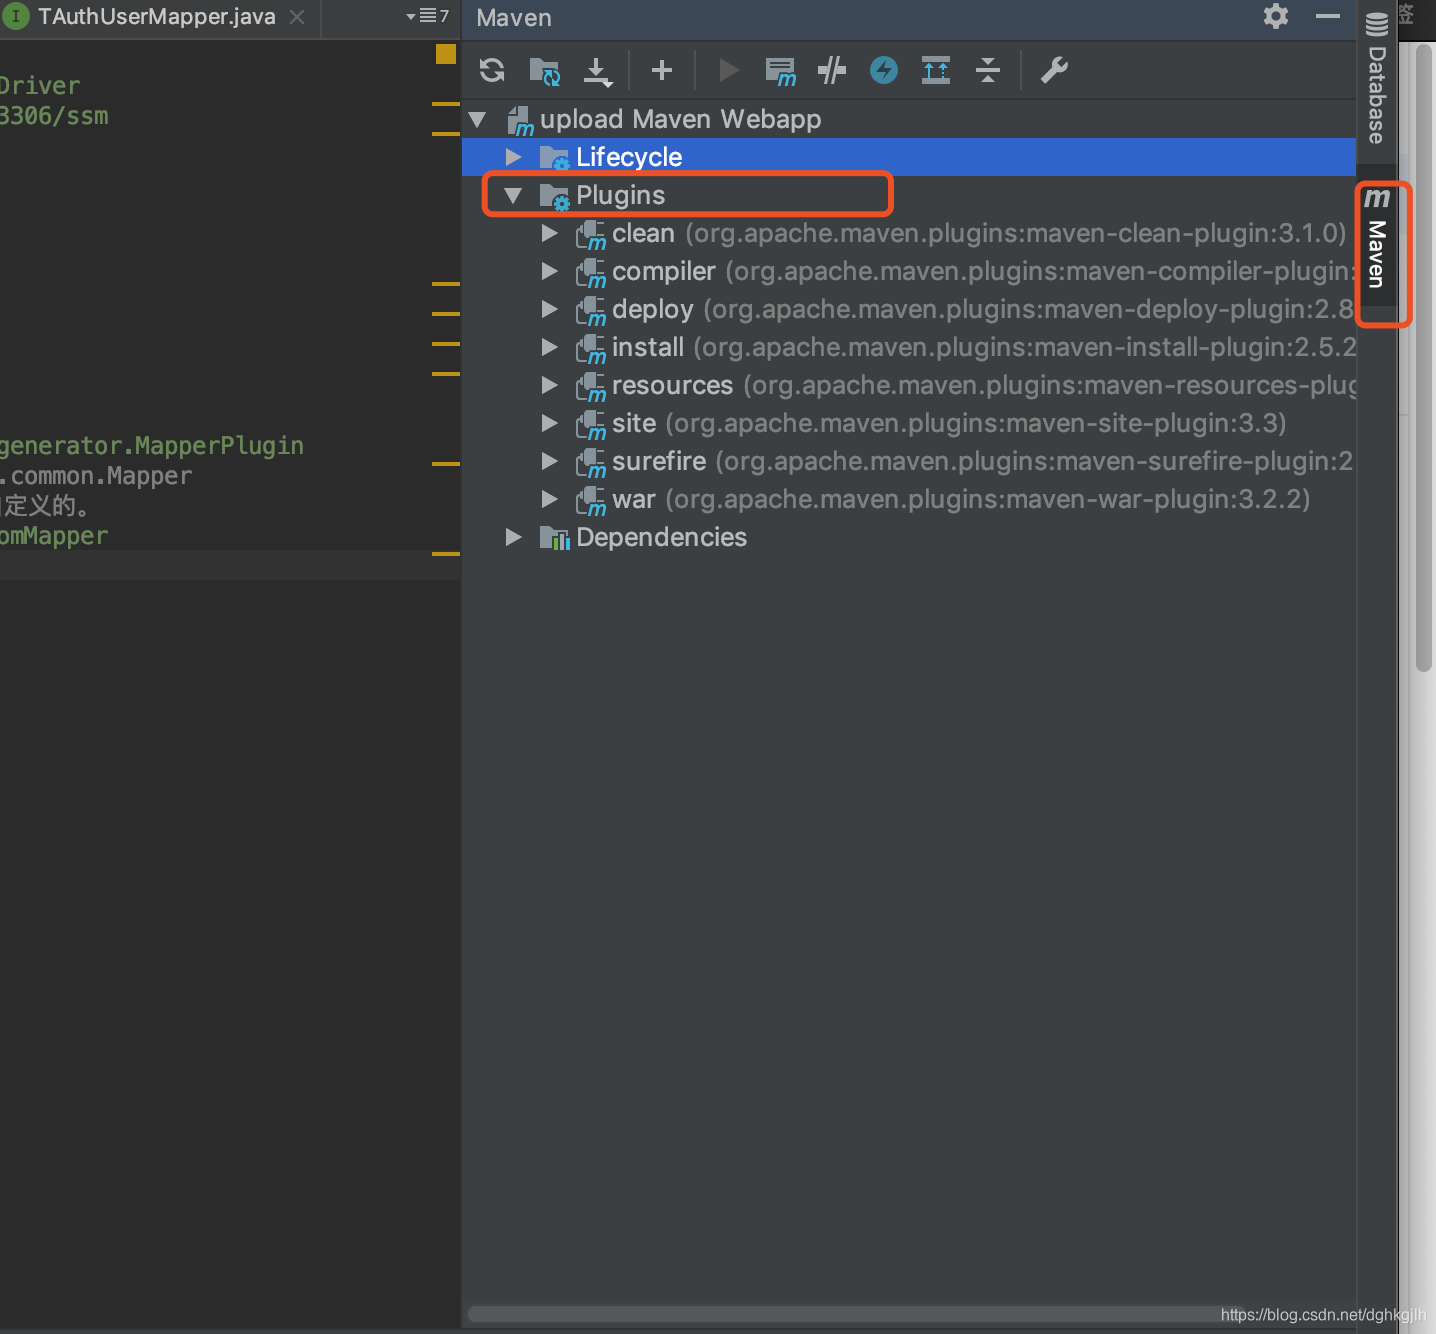
It should appear under this section, but it did not appear for me. I have not found the cause yet. If you know why, please leave a comment—thanks.
If it appears there, double-click it to run the Maven task automatically.
If it does not, create a Maven run configuration in the run/server configuration area, as shown:
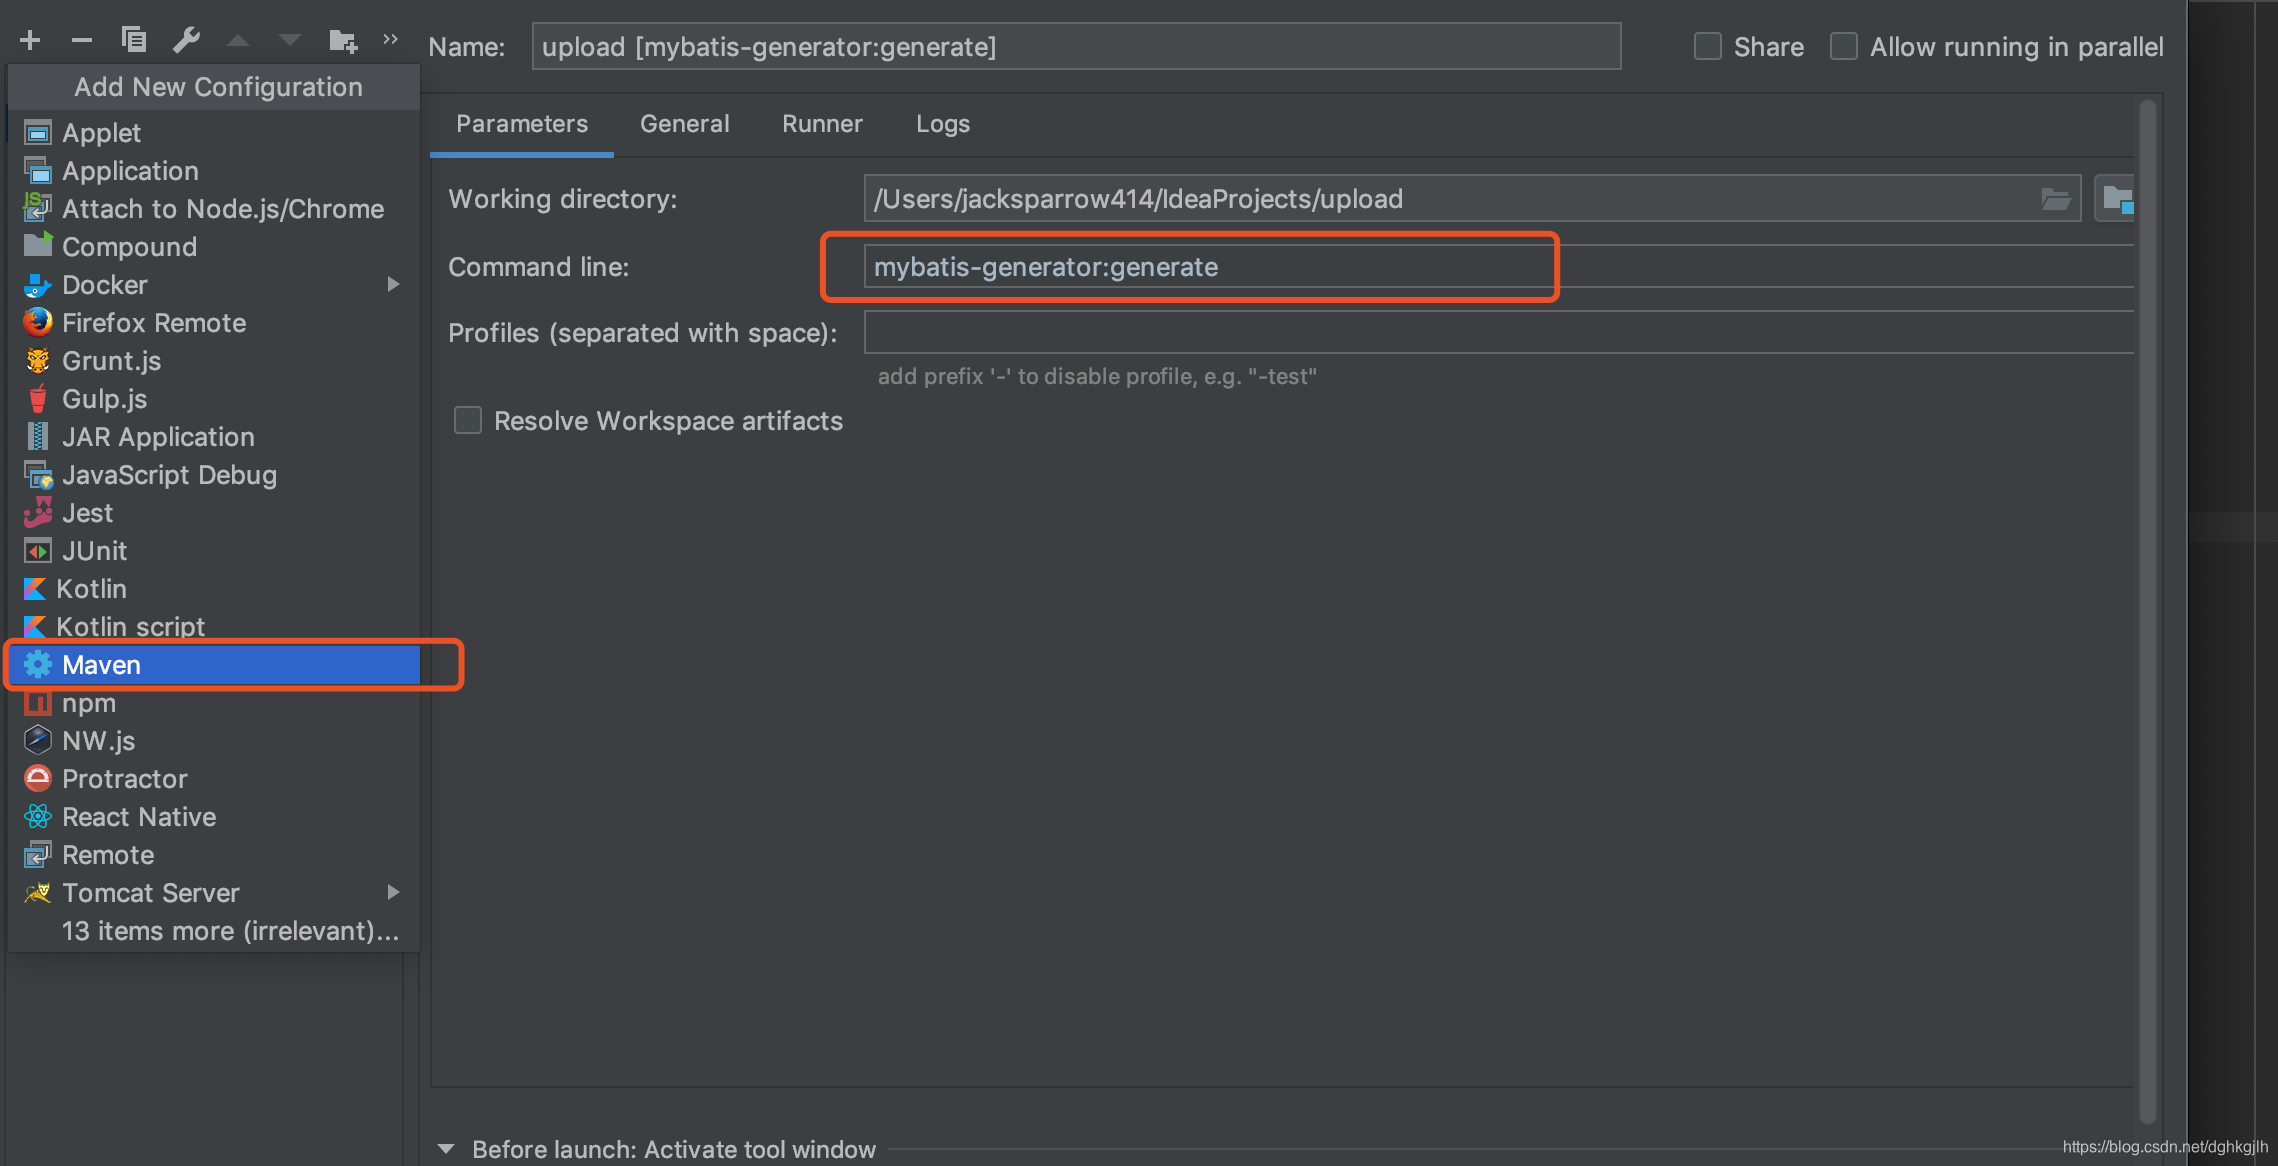
Note: the command in the documentation is mvn mybatis-generator:generate. When running it from this IDEA configuration, omit mvn; otherwise it reports an error.
After configuring it, click Apply, return to the main window, and click Run. Also make sure the corresponding MySQL or Oracle database is running before executing Maven; otherwise it reports a “Communition link false” error.
P.S. The documentation linked at the start is the main reference. This post is only a supplement and a record of my own experience.