Table of contents
Open Table of contents
A Simple Java EE Application
A very simple Java EE application.
Prerequisites
What You Need to Know
- This article uses Java EE 8.
- The Java EE server is GlassFish 5.
- The database is H2.
Installing GlassFish
GlassFish is a Java EE server, whereas ordinary Tomcat is a Java SE server. You can also choose TomEE.
Download
Download, then install it.
Startup
Use asadmin in the bin folder of the GlassFish installation. Choose the appropriate .bat script for your platform or double-click it. Run the command in a terminal or DOS window:
start-domainStart the GlassFish server. The default domain name is domain1.
After successful startup, the administration console defaults to port 4848.
localhost:4848
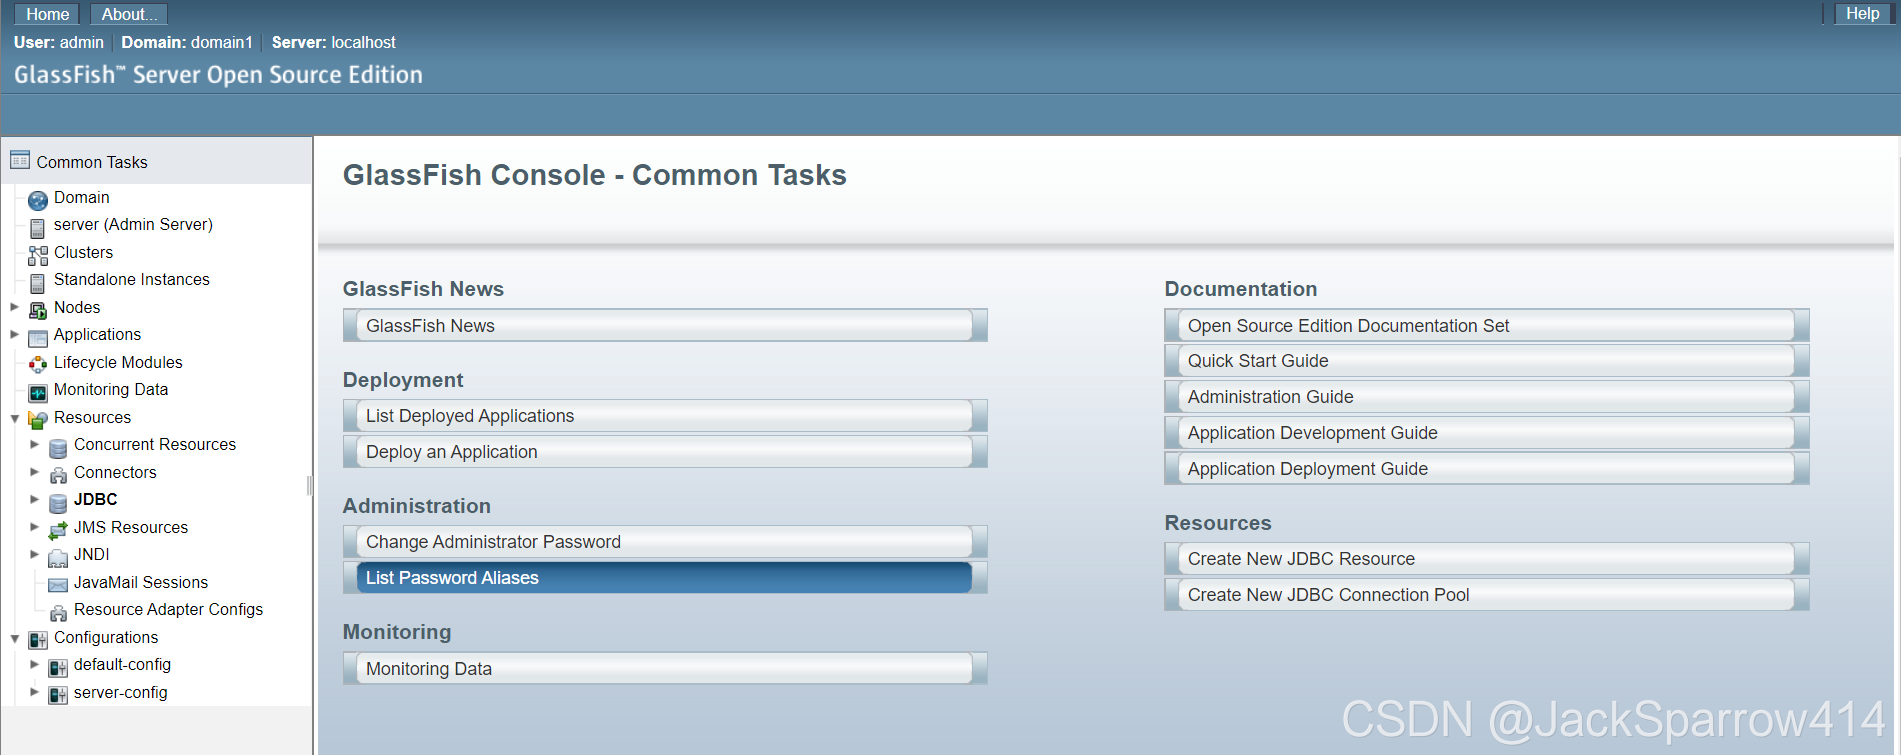
Viewing Logs
If startup fails, inspect the logs at:
/domains/domain1/logs under the GlassFish server home.
Shutdown
Stop the server:
stop-domainInstalling H2
Download
Startup
Run h2 in the bin directory of the H2 installation, choosing .sh or .bat for your platform. The console defaults to port 8082.
localhost:8082
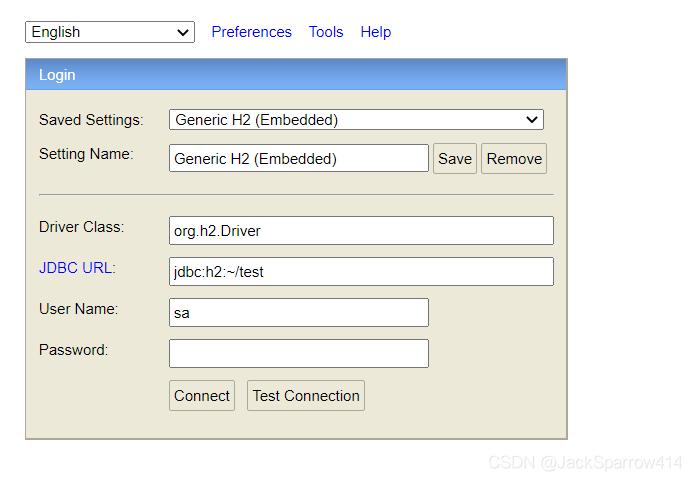
Configuring an H2 In-Memory Database
An H2 in-memory database URL looks like this; db1 is a custom database name.
jdbc:h2:mem:db1;DB_CLOSE_DELAY=-1
For other H2 questions or further learning, see the official documentation above.
Configuring a JNDI Data Source
Why configure a JNDI data source? “I normally configure it directly in Spring Boot and have never seen a JNDI data source…” Questions like this need to be answered in the context of Java EE rather than Spring. Some Java EE background is therefore useful.
JNDI Data Source Documentation
Configuring a JDBC Connection Pool in GlassFish
For Oracle or MySQL, see the GlassFish data-source documentation or this tutorial. This article uses H2, so there are some differences.
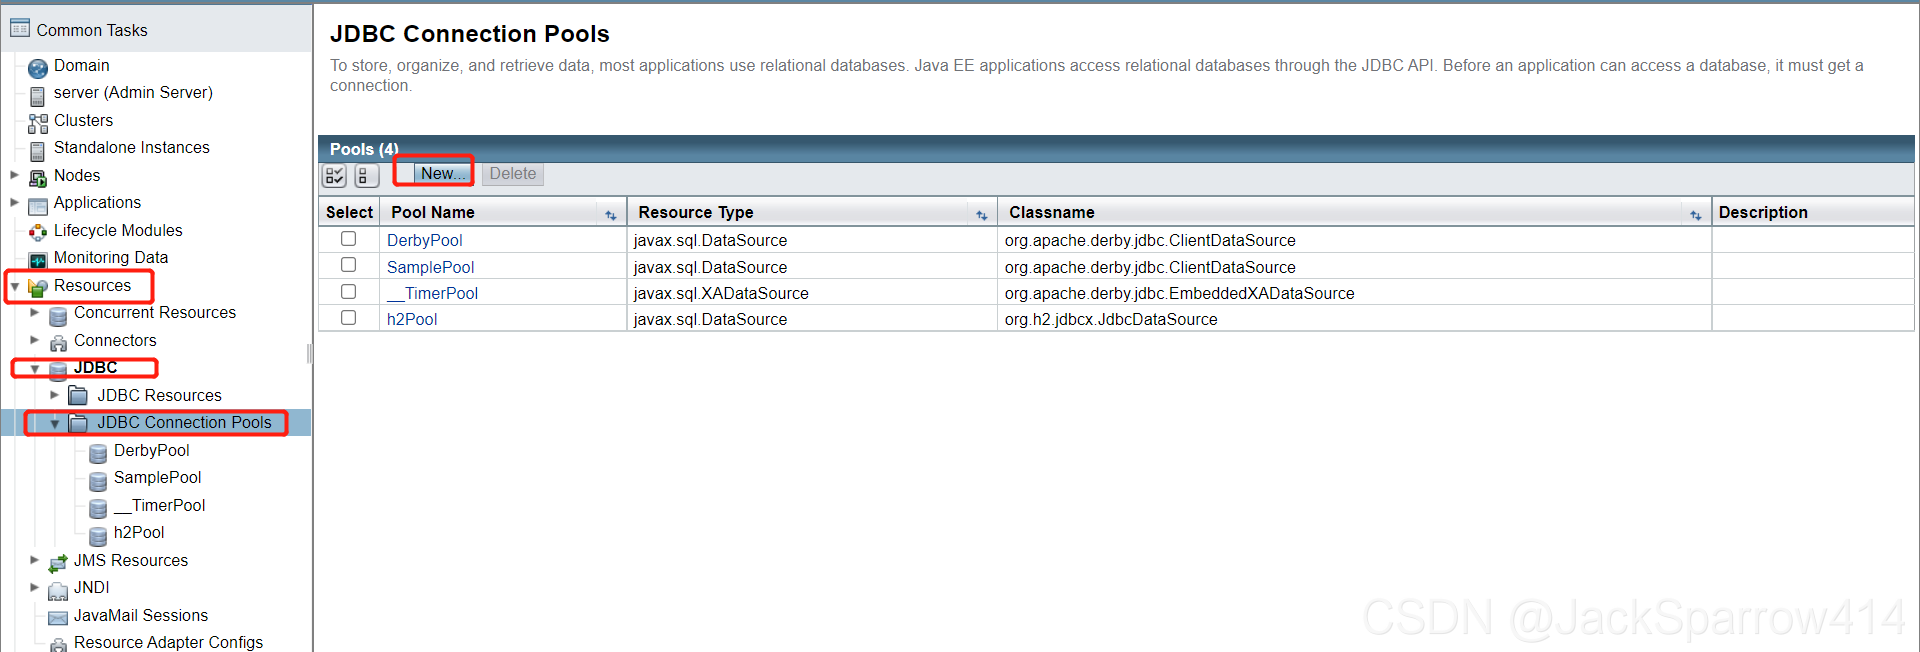
Find JDBC Connection Pools in the GlassFish console and click New.
Enter a name and select javax.sql.DataSource as ResourceType.
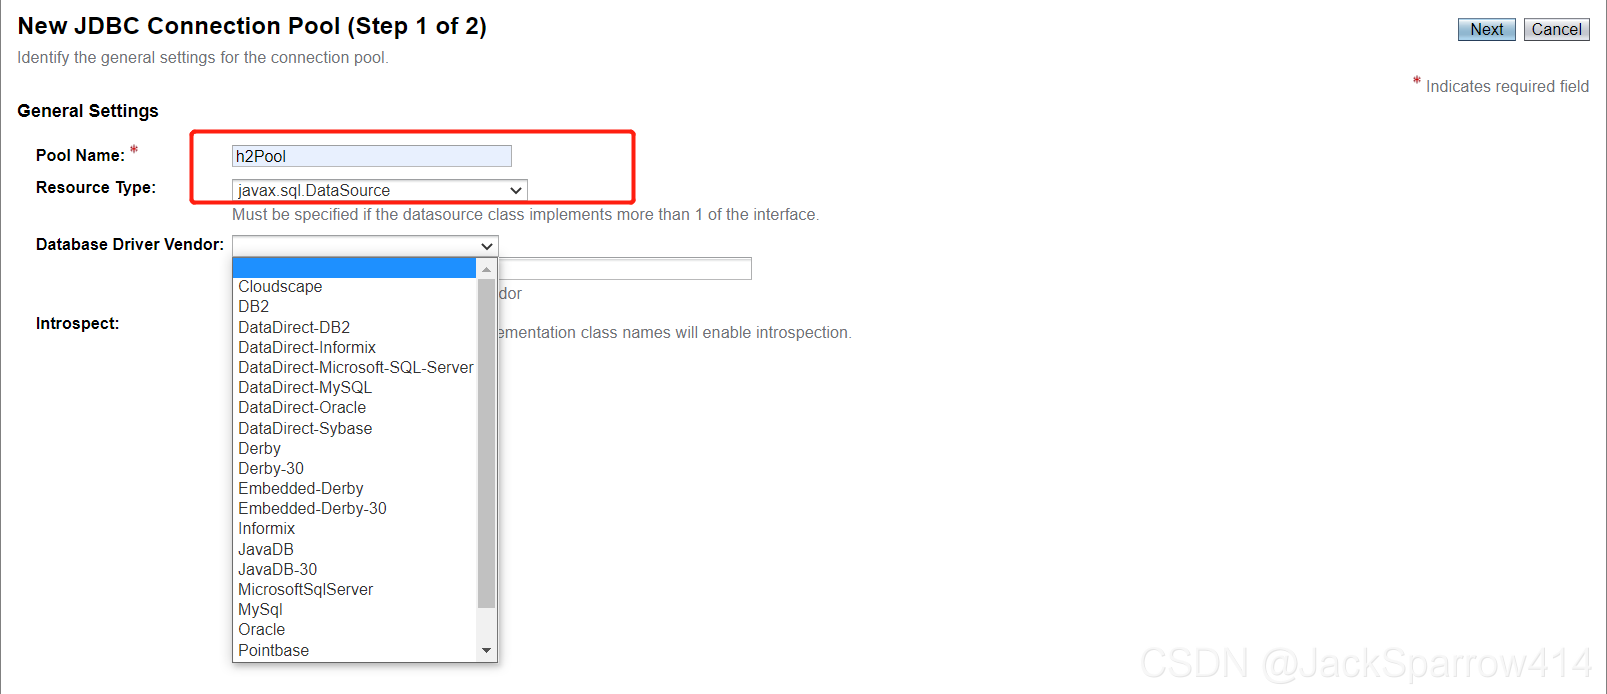
The screenshot shows no H2 option, so we need to integrate it. Download the H2 driver JAR and place it in:
/domains/domain1/lib under the GlassFish server home.
Restart GlassFish and follow the steps above to return to this page.
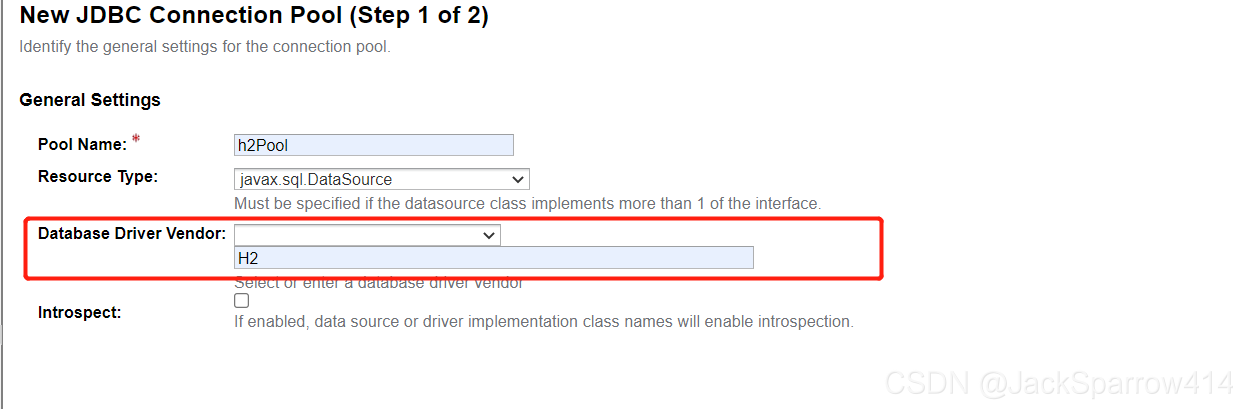 Enter H2 under Vendor and click Next. At the bottom of the next page, configure url, user, and password.

Note:
This in-memory database actually has no password, but some value still needs to be entered. A Stack Overflow answer suggested entering:
()
However, that did not work for me.
After configuration, click Ping to check whether it succeeds.
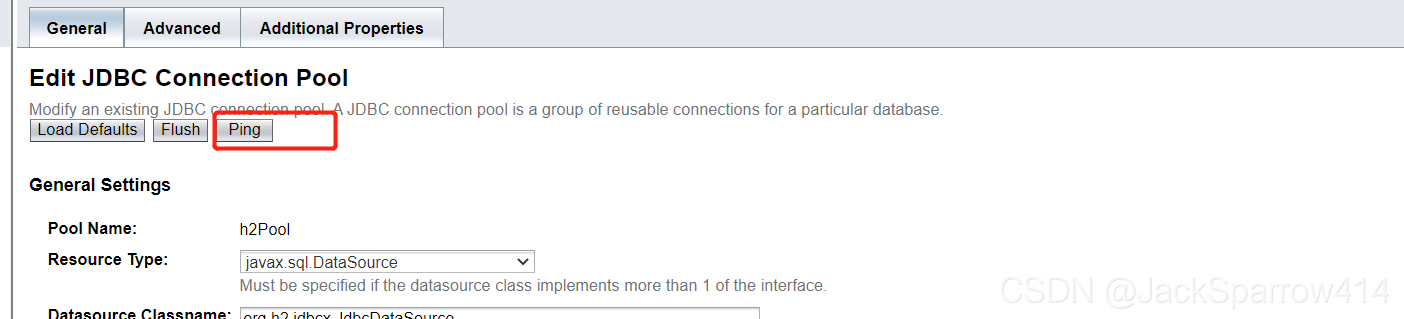
If there is an error, find its details in the logs described above.
You can also inspect it in the asadmin command line.
list-jdbc-connection-pools
Configuring a JDBC Resource in GlassFish
After configuring the connection pool, configure the JDBC resource.
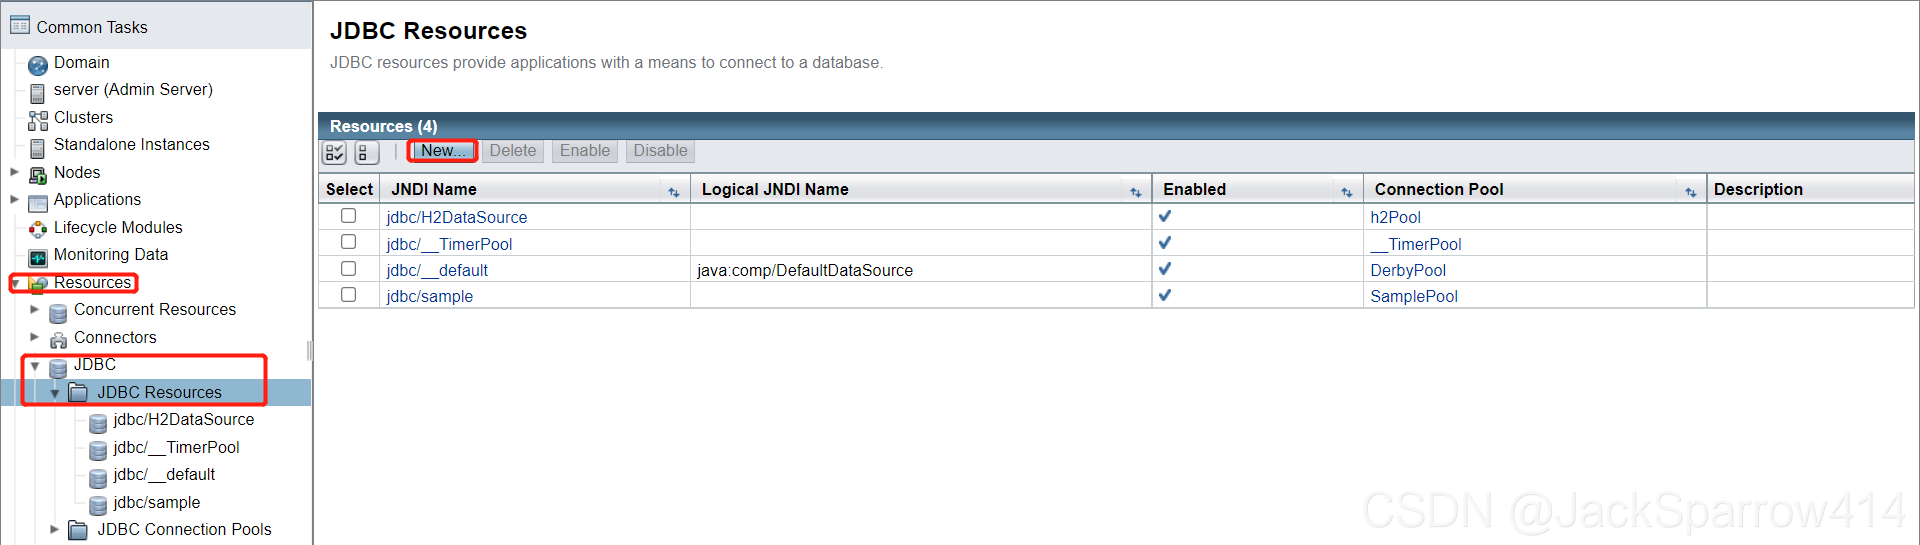
On the creation page, enter a name (this is the JNDI name) and select the DataSource Pool created in the previous step.
After creation, it can also be found through the asadmin command line.
list-jdbc-resources
If the configuration above is correct, you can also find the generated settings in domain.xml, usually located at:
Glassfish Server home/domains/domain1/config
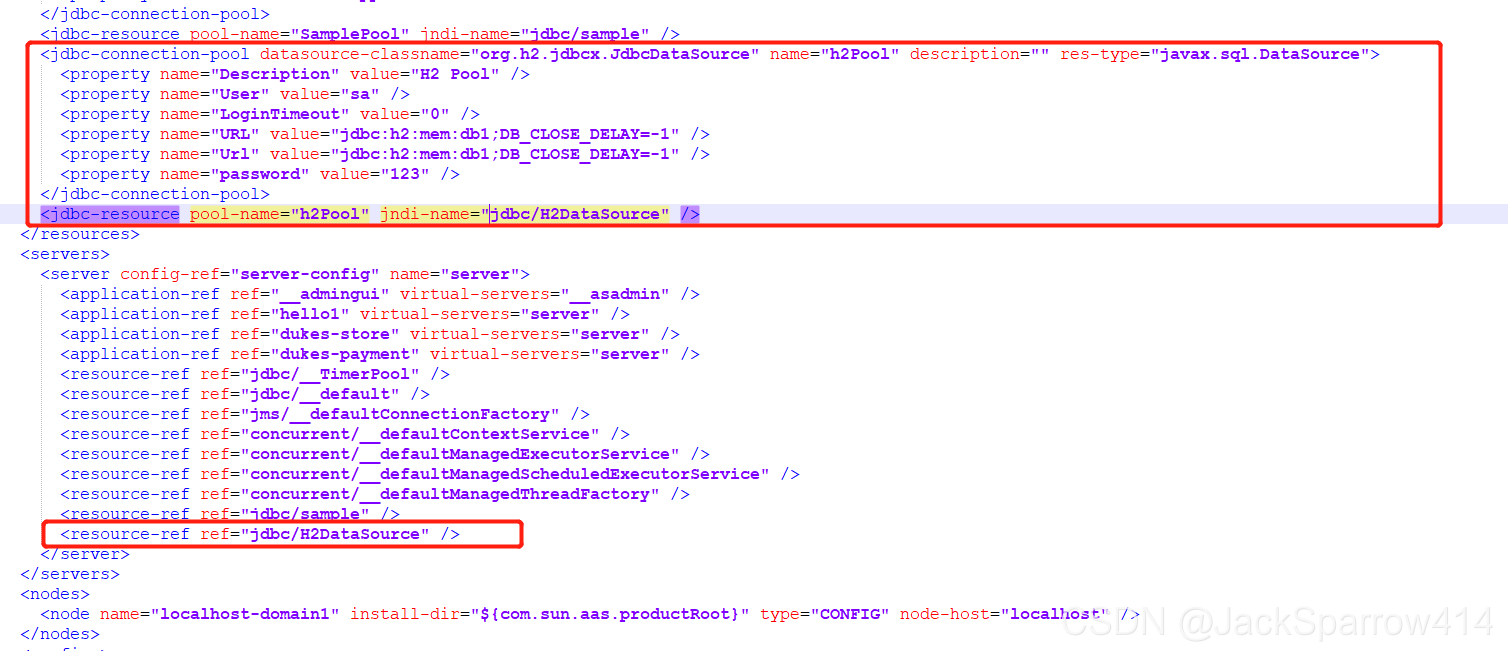
Running the Application
Installing the Example Code
Clone the code with git clone, then import it into IntelliJ IDEA.
Configuring GlassFish in IntelliJ IDEA
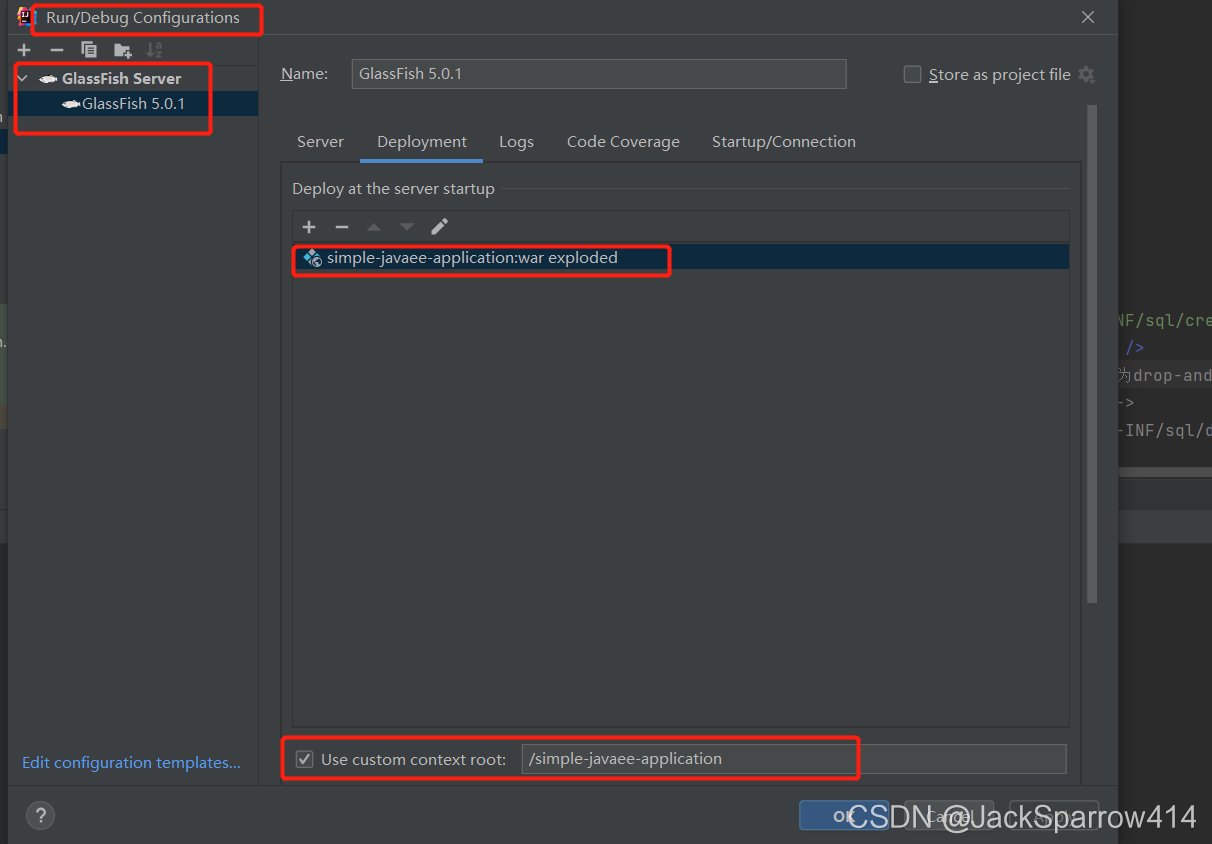
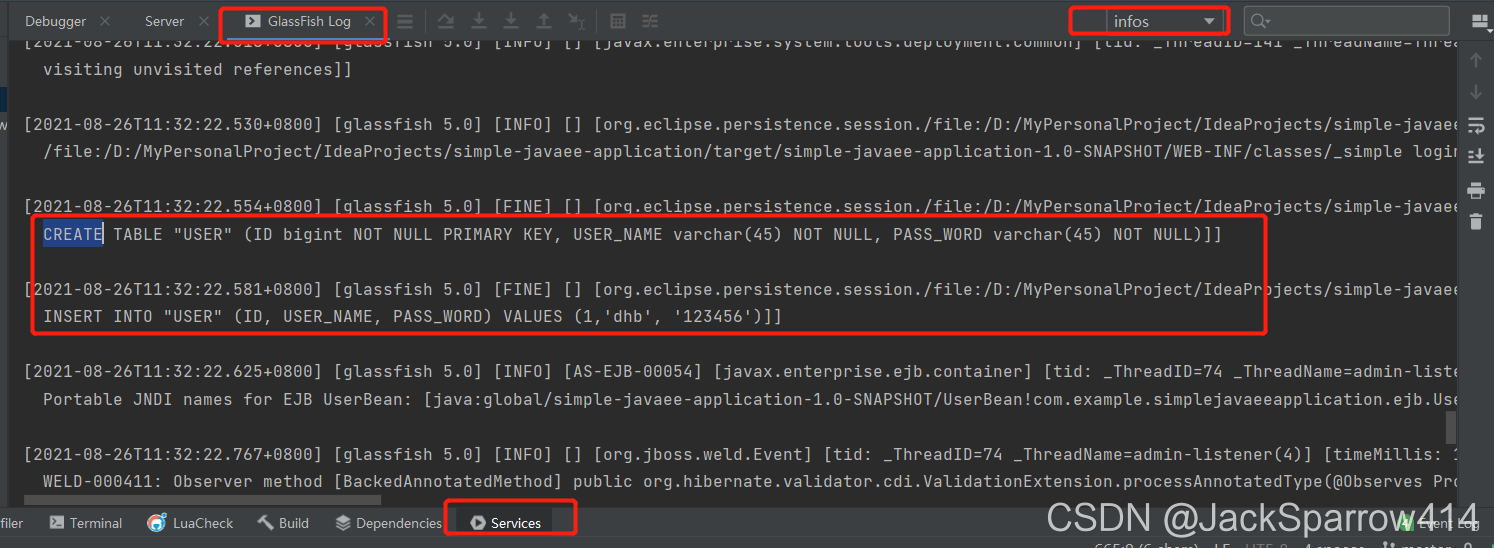
Viewing Server Logs
After configuration, the server logs are visible directly in IntelliJ IDEA.
Application Screenshots
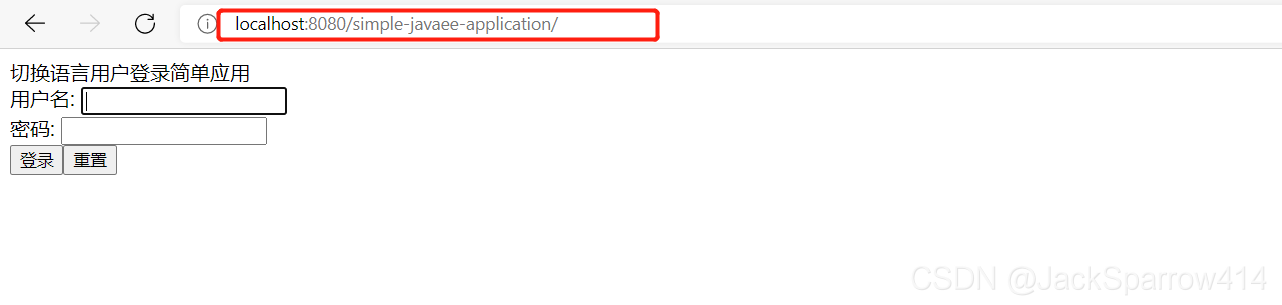 Default username: dhb.
Password: 123456.
Click to log in.
Reader Questions
-
Question: why use Java EE technologies? Aren’t Spring and Spring Boot good enough?
Answer: technologies are not inherently good or bad; what matters is whether they solve the problem. Choose what suits your organization.
-
Question: how can I learn more about Java EE?
Answer: I recommend the Java EE 8 tutorial and running its example applications.
Resources
- A diagram of the relationships among JPA components.
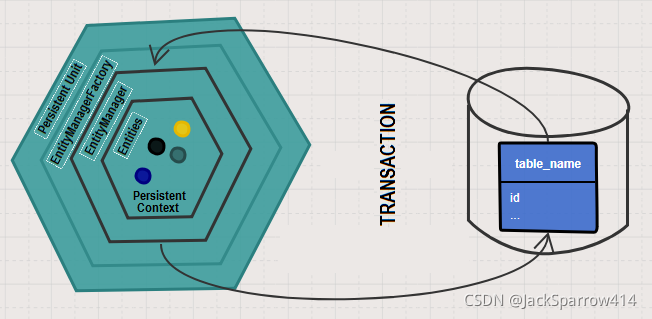
- An article on choosing JTA or RESOURCE_LOCAL for transaction-type.