Table of contents
Open Table of contents
Getting Started with RESTEasy
Spring Boot and Spring MVC are probably the frameworks we use most often for RESTful applications. Another approach uses frameworks that implement the Java EE standards, now renamed Jakarta EE. This post discusses frameworks that implement the relevant Java EE JSR specifications, without introducing Spring.
Background
How did Java EE (Java Enterprise Edition) applications handle HTTP requests in the past?
They used Servlets: the controller layer handled requests by extending HttpServlet. For example:
Traditional Servlets
public class indexServlet extends HttpServlet {

  @Override
    protected void doGet(final HttpServletRequest req, final HttpServletResponse resp) throws ServletException, IOException {
      // handle request
      req.getParameter("parameterName");
      ......
       // return response
       resp.getWriter().write("something");
    }
}
web.xml configuration:
<?xml version="1.0" encoding="UTF-8" ?>
<web-app
        xmlns="http://xmlns.jcp.org/xml/ns/javaee"
        xmlns:xsi="http://www.w3.org/2001/XMLSchema-instance"
        xsi:schemaLocation="http://xmlns.jcp.org/xml/ns/javaee http://xmlns.jcp.org/xml/ns/javaee/web-app_4_0.xsd"
        version="4.0">
  <servlet>
        <servlet-name>indexServlet</servlet-name>
        <servlet-class>IndexServlet</servlet-class>
    </servlet>
    <servlet-mapping>
        <servlet-name>indexServlet</servlet-name>
        <url-pattern>index/*</url-pattern>
    </servlet-mapping>
</web-app>
Later, @WebServlet could provide the same behavior.
As the RESTful architectural style became mainstream, however, the Java industry had not yet standardized how to build RESTful applications in Java EE.
JAX-RS and JSRs
JAX-RS is part of Java EE. Its latest corresponding JSR (Java Specification Request) is JSR 370, which specifies JAX-RS 2.1.
Read JSR 370 online here.
You can also read the specification on the Jakarta EE website. I recommend this approach, since Java EE has moved to Jakarta EE.
Why Read the Specification?
- Before using a framework that implements a JSR, understanding the specification helps us understand the framework’s principles and design.
- JSR specifications generally define interfaces. Knowing those interfaces helps us quickly locate the relevant implementation in a framework. For example, if we know that interface A handles Servlet initialization, we can find its implementation and quickly identify the framework class we need. Understanding the interfaces also helps us decide which interface and implementation to use, rather than repeatedly searching online for how to perform a particular task.
A Brief Reading of JSR 370
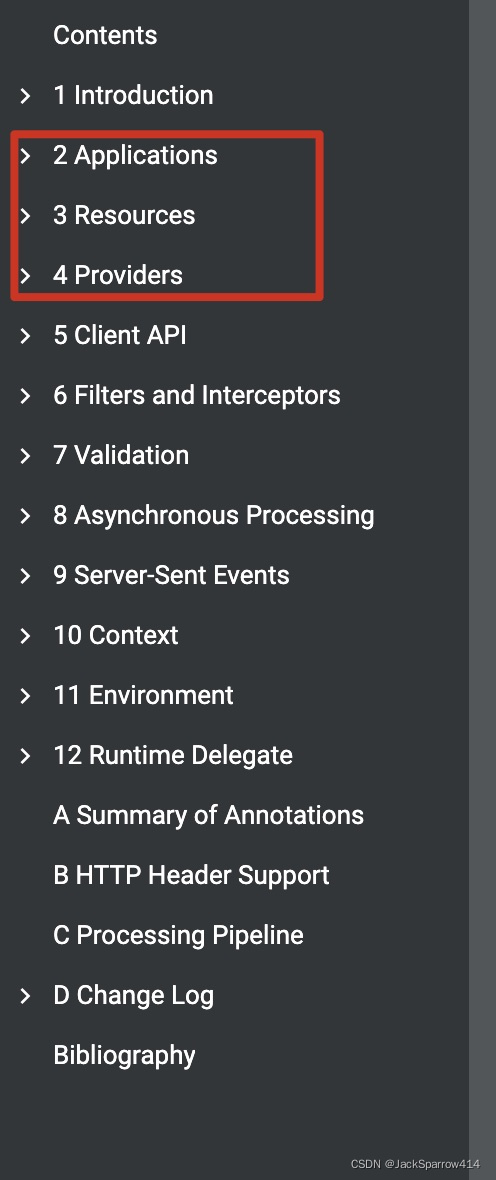
The JSR 370 table of contents has roughly 12 chapters. To get started, a basic understanding of Chapters 2, 3, and 4 is sufficient.
Applications
A JAX-RS application consists of one or more resources (see Chapter 3) and zero or more providers (see Chapter 4). This chapter describes aspects of JAX-RS that apply to an application as a whole, subsequent chapters describe particular aspects of a JAX-RS application and requirements on JAX-RS implementations
JAX-RS positions an Application as primarily comprising Resources and Providers. We can think of it as a global servlet that serves as the HTTP entry point.
Usage:
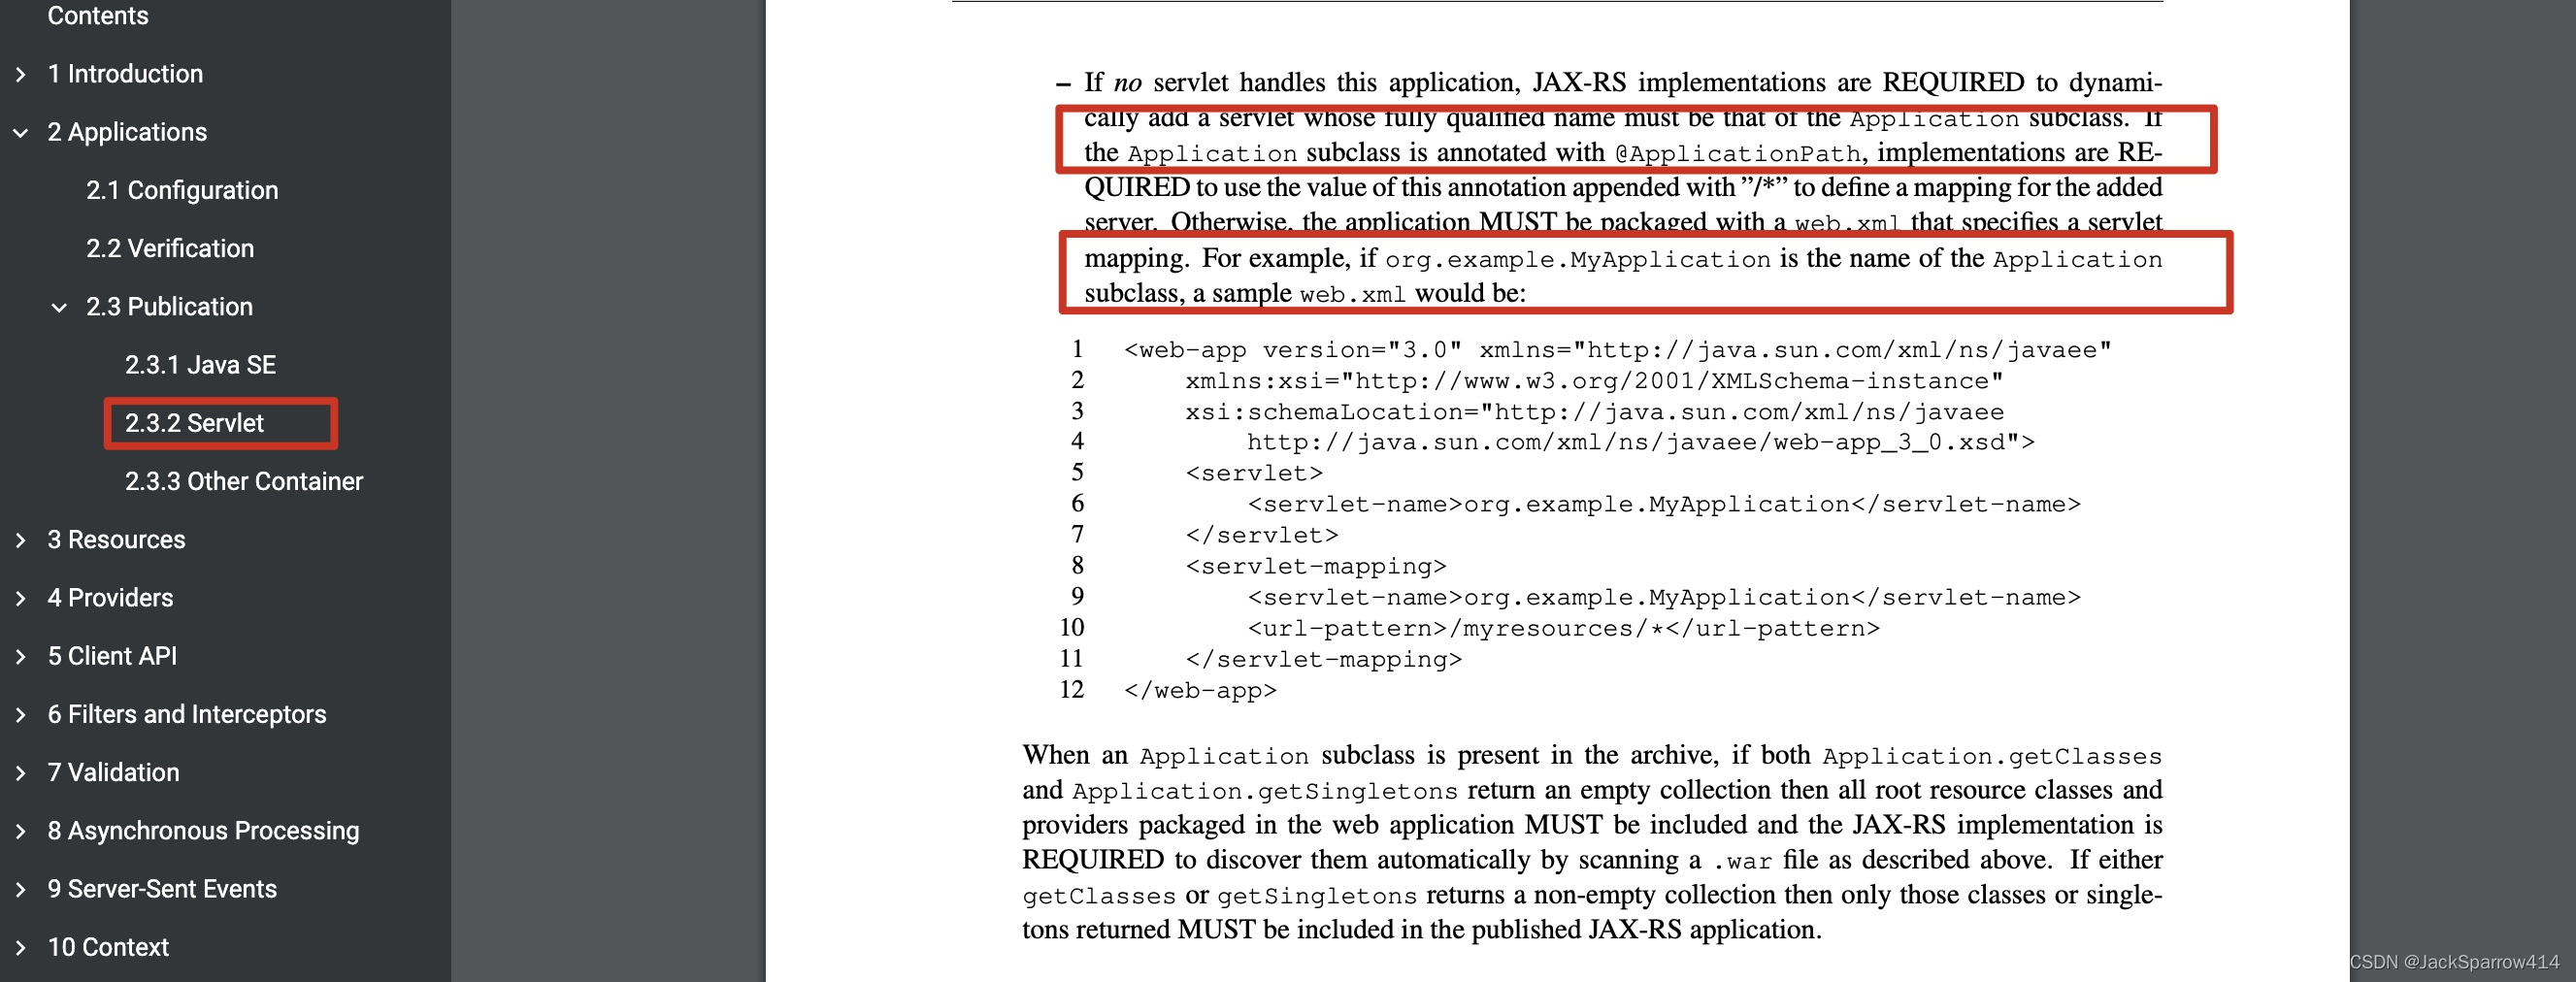
- Extend Application.
- Declare it in web.xml.
There is only one servlet here. In a traditional Servlet project, each controller requires a separate servlet configuration in web.xml.
Resources
Resources in one sentence:
A resource class is a Java class that uses JAX-RS annotations to implement a corresponding Web resource. Resource classes are POJOs that have at least one method annotated with @Path or a request method designator
A resource class contains methods annotated with @Path. If you have used Spring MVC, this should be familiar; the annotations are broadly similar.
For example, @GET, @POST, @PUT, @DELETE, @PATCH, @HEAD, and @OPTIONS identify the HTTP method.
@QueryParam and @PathParam receive URL query parameters and path parameters.
@Produces and @Consumes specify the response type and the accepted request type, respectively.
These annotations are enough to get started. For more details, see Sections 3.2 and 3.5 of the online JSR 370 PDF.
Providers
Providers in JAX-RS are responsible for various cross-cutting concerns such as filtering requests, converting representations into Java objects, mapping exceptions to responses, etc. A provider can be either pre-packaged in the JAX-RS runtime or supplied by an application. All application-supplied providers implement interfaces in the JAX-RS API and MAY be annotated with @Provider for automatic discovery purposes; the integration of pre-packaged providers into the JAX-RS runtime is implementation dependent. This chapter introduces some of the basic JAX-RS providers; other providers are introduced in Chapter 5 and Chapter 6
Providers handle shared application functionality: filters and request/response processing, such as converting JSON into an entity. How would a traditional Servlet application handle different Content-Types? We would typically add a filter to intercept requests or responses, then manually process them for each scenario using methods such as HttpServletRequest.getParameters. JAX-RS provides the basic interfaces for this. To implement JAX-RS ourselves, we would implement those interfaces and handle the different cases in this way to meet application requirements. That would also qualify as an implementation of the JAX-RS standard.
We can implement JAX-RS interfaces ourselves and annotate them with @Provider to create custom providers.
Basic RESTEasy Usage
As mentioned above, JAX-RS provides the fundamental interfaces: they express an agreed contract, but must be implemented before applications can use them. If every developer implemented them independently, each RESTful application would require a great deal of code. With a basic Servlet, for example, we have only request and response objects; supporting different requests and responses means parsing the requests and adapting the response output ourselves. RESTEasy reduces this work so developers can focus on business logic. It fully implements JSR 370, handling request conversion and response processing so application developers can build the functionality they need on top of it.
Create a RESTful Java EE Application
This example deploys the Java EE application on Tomcat 9. Tomcat is a Servlet container rather than a full Java EE container, but with a few additions it can deploy Java EE applications too.
Tomcat 9 supports Servlet 4, and RESTEasy is easy to configure on Servlet 3 and later. That is why this example uses Tomcat 9.
@ApplicationPath("/auth")
public class AuthorizationServerApplication extends Application {
}
The single line above lets RESTEasy automatically initialize the RESTful application. A traditional Servlet application might still require web.xml configuration.
ApplicationPath specifies the web application’s base path.
Note: some introductory articles tell readers to configure the fully qualified name of the class annotated with ApplicationPath in web.xml, as in the Application example above. Those instructions target web applications before Servlet 3. When using RESTEasy in a container supporting Servlet 3 or later, this configuration is unnecessary. For details, see the official Servlet container configuration documentation.
How Does RESTEasy Take Over the Application?
RESTEasy implements the ServletContainerInitializer interface.
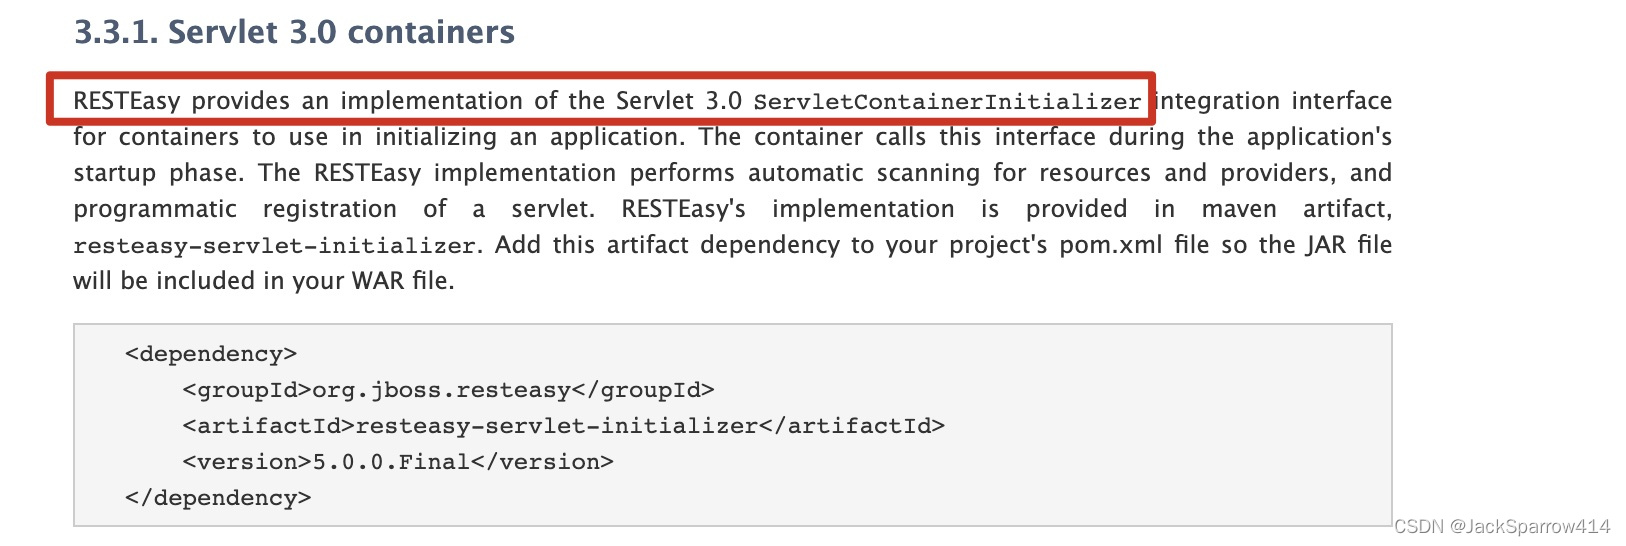
This interface was added in Servlet 3.0. See Chapter 4, Servlet Context, in the latest Servlet 4.0 specification.
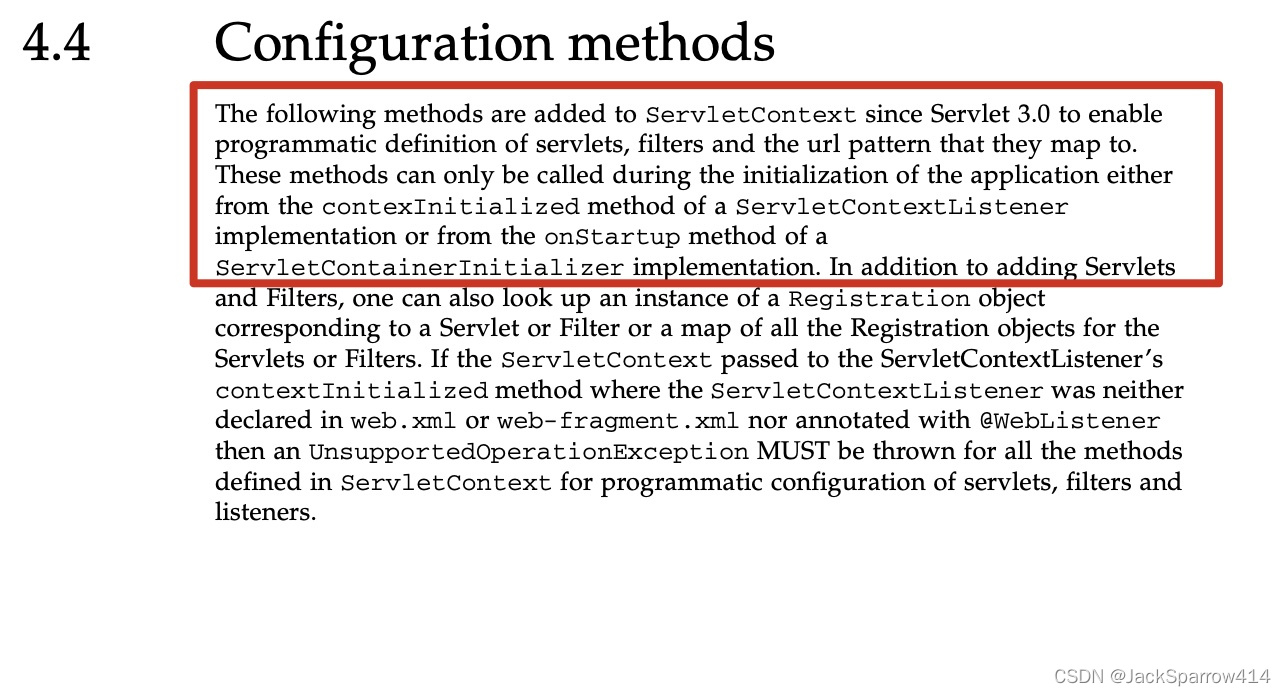
It can be understood as a hook for work during Servlet container initialization. See the detailed Javadoc.
Here are a few screenshots showing what ResteasyServletInitializer does:
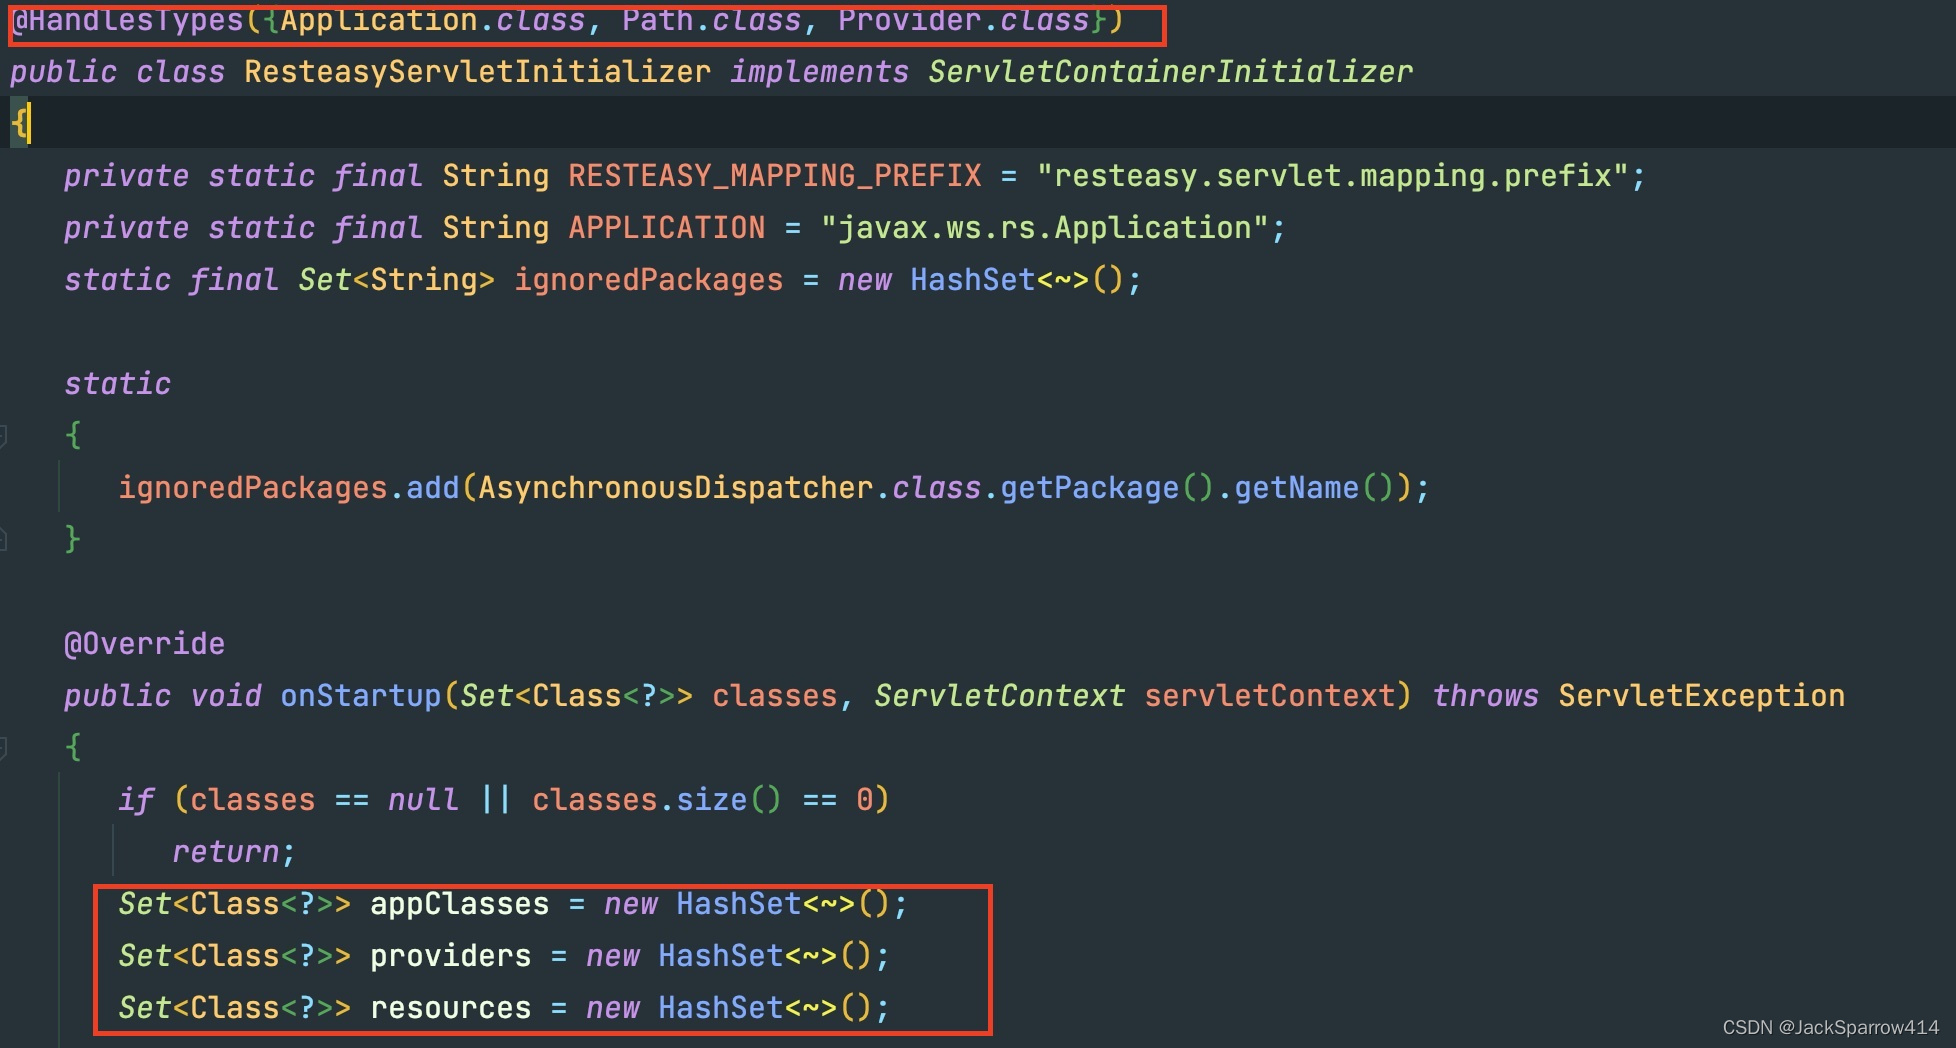

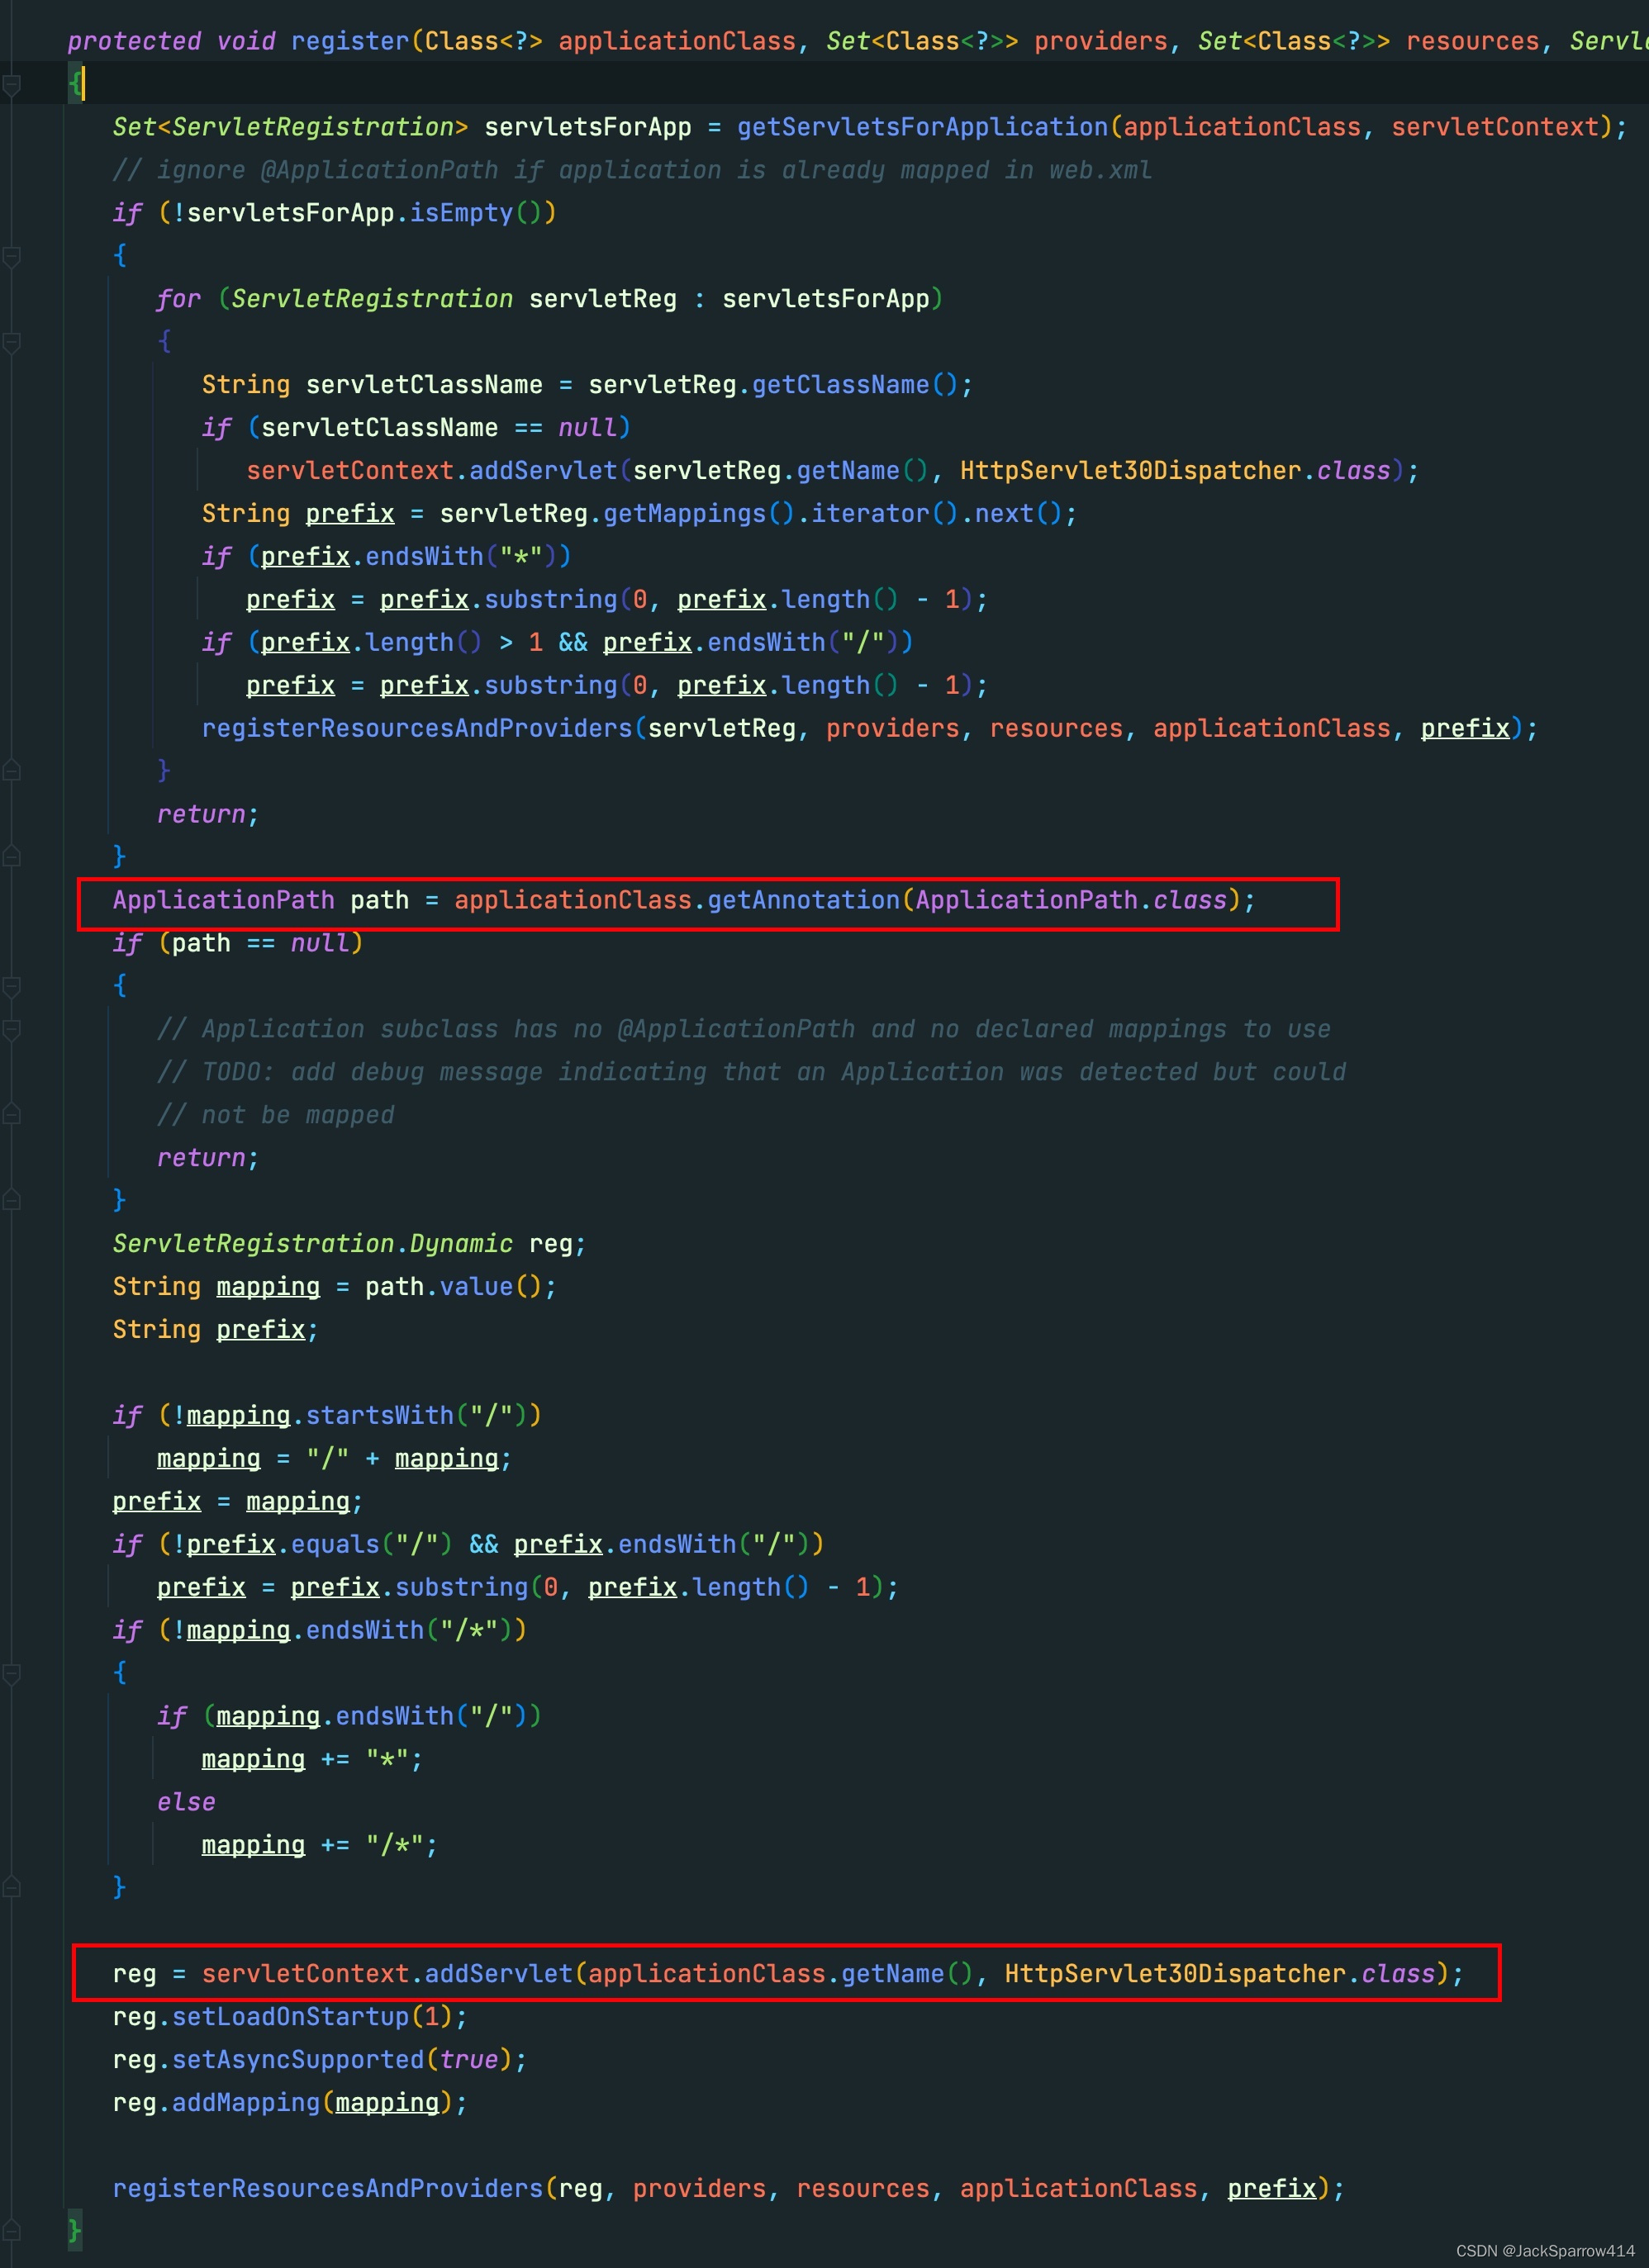
They show that ResteasyServletInitializer registers Resources and Providers and adds a Servlet.
For more details, read the ResteasyServletInitializer source. It is straightforward and under 200 lines. RESTEasy registers it through SPI.
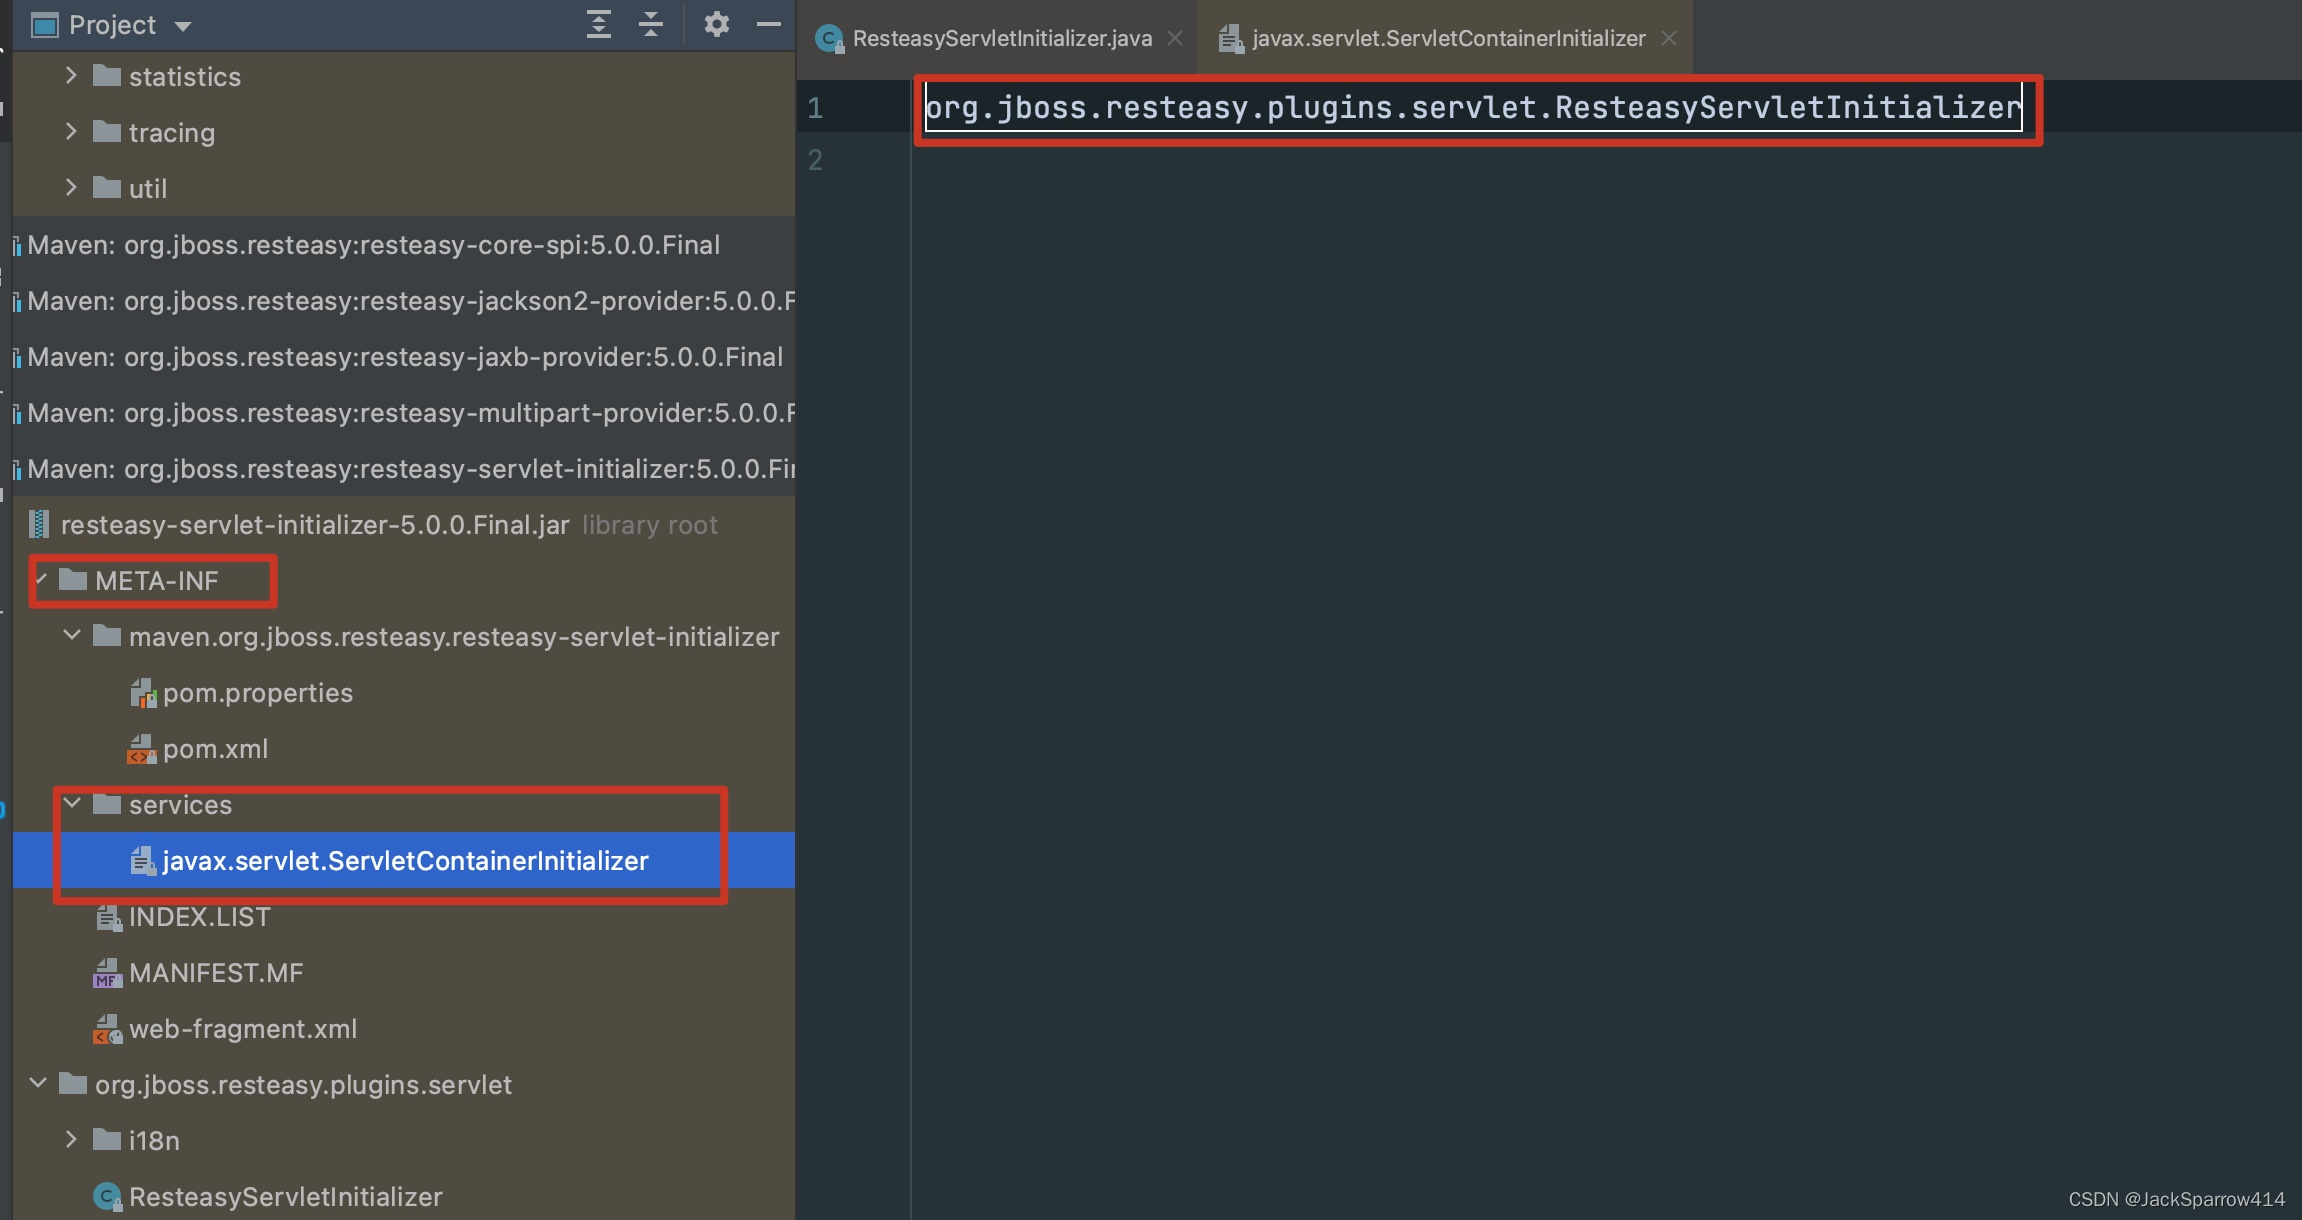
By the time container startup finishes, Resources and Providers have been registered, along with one servlet that handles HTTP requests globally.
Further exploration:
- Spring Web also implements this interface. Look at SpringServletContainerInitializer, together with the important SpringBootServletInitializer class, if you are interested.
- See this example of a custom ServletContainerInitializer.
- The purpose of javax.servlet.Registration#setInitParameter.
Handle RESTful HTTP Requests
In JAX-RS, methods annotated with @Path are defined as Resources. An HTTP request made through a browser or another tool, such as curl, is treated as access to a resource.
The following basic RESTEasy examples demonstrate the annotations. They should be easy to follow if you have used Spring MVC.
Basic Usage
The basic examples cover ordinary GET, POST, and DELETE requests.
/**
 * basic use for RestEasy
 */
@Log
@Path("hello")
public class HelloResource {

    private static List<UserVO> users = new ArrayList<>();

    /**
     * curl http:localhost:8080/auth/hello/jack
     */
    @GET
    @Path("{name}")
    @Produces(MediaType.TEXT_PLAIN)
    public String hello(@PathParam("name") String name) {
        return "Hello " + name.toUpperCase();
    }

    /**
     * RESTEasy provides an advanced @PathParam annotation that does not require an explicit path value if the variable name matches the path variable.
     * <a href="https://docs.jboss.org/resteasy/docs/3.8.1.Final/userguide/html/_NewParam.html">Usage documentation</a>
     * Use it with the Maven Compiler Plugin.
     *  curl http:localhost:8080/auth/hello/advanced/jack
     */
    @GET
    @Path("advanced/{name}")
    @Produces(MediaType.TEXT_PLAIN)
    @DenyAll
    public String helloRestEasy(@org.jboss.resteasy.annotations.jaxrs.PathParam String name) {
        return "Hi,there " + name;
    }

    /**
     * curl -X POST -H 'Content-Type: application/json' -d '{"userName":"jack", "age":18"}' http://localhost:8080/auth/hello/users
     */
    @POST
    @Path("users")
    @Consumes(MediaType.APPLICATION_JSON)
    @Produces(MediaType.APPLICATION_JSON)
    public Response createUser(@Valid UserVO userVO) {
        users.add(userVO);
        return Response.ok().entity(userVO).build();
    }

    /**
     * curl http:localhost:8080/auth/hello/users/0
     */
    @GET
    @Path("users/{index}")
    @Produces(MediaType.APPLICATION_JSON)
    public Response queryUser(@PathParam("index") Integer index) {
        checkParameter(index);
        UserVO targetUser = users.get(index);
        return Response.ok().entity(targetUser).build();
    }

    /**
     * curl -X DELETE http://localhost:8080/auth/hello/users/0
     */
    @DELETE
    @Path("users/{index}")
    public Response deleteUser(@PathParam("index") Integer index) {
        checkParameter(index);
        users.remove(index);
        return Response.ok().build();
    }

    private void checkParameter(Integer index) {
        if (users.size() == 0 || Objects.isNull(index) ||  index < 0 || index >= users.size()) {
            throw new WebApplicationException("user Not Found, please enter valid index", Response.Status.NOT_FOUND);
        }
    }
}
Advanced Usage
The advanced examples cover form handling and file uploads and downloads.
    private final String UPLOADED_FILE_PATH = "D:\\tmp\\";

    /**
     * Receive form data.
     * curl -X POST -d 'username=jack&age=18' http://localhost/auth/hello/users
     */
    @POST
    @Path("users")
    @Consumes(MediaType.APPLICATION_FORM_URLENCODED)
    public Response createFromFrom(@Form UserVO userVO) {
        if (Objects.isNull(userVO)) {
            throw new WebApplicationException(Status.BAD_REQUEST);
        }
        users.add(userVO);
        return Response.ok().build();
    }

    /**
     * Receive one or more files.
     * curl -F 'fileName=@pictureLocation/upload.png' http://localhost:8080/auth/hello/file
     */
    @POST
    @Path("file")
    @Consumes(MediaType.MULTIPART_FORM_DATA)
    public Response uploadImage(MultipartFormDataInput input) {
        //Get API input data
        Map<String, List<InputPart>> uploadForm = input.getFormDataMap();
        List<InputPart> inputParts = uploadForm.get("fileName");
        if (Objects.isNull(inputParts)) {
            throw new WebApplicationException("no upload file, please upload file", Status.BAD_REQUEST);
        }
        StringBuilder uploadFileName = new StringBuilder();
        for (InputPart inputPart : inputParts) {
            // convert the uploaded file to inputstream
            try(InputStream inputStream = inputPart.getBody(InputStream.class, null)) {
                //Use this header for extra processing if required
                MultivaluedMap<String, String> header = inputPart.getHeaders();
                String fileName = getFileName(header);
                uploadFileName.append(fileName).append(",");
                // Risks running out of memory
                byte[] bytes = IOUtils.toByteArray(inputStream);
                // constructs upload file path
                fileName = UPLOADED_FILE_PATH + fileName;
                writeFile(bytes, fileName);
                log.info("Success !!!!!");
            } catch (Exception e) {
                log.log(Level.WARNING, "upload file failed", e);
                throw new WebApplicationException(e.getMessage(), Status.INTERNAL_SERVER_ERROR);
            }
        }
        return Response.status(200)
            .entity("File uploaded successfully.Uploaded file name : "+ uploadFileName.substring(0, uploadFileName.length()-1)).build();
    }

    /**
     * header sample
     * {
     * 	Content-Type=[image/png],
     * 	Content-Disposition=[form-data; name="file"; filename="filename.extension"]
     * }
     **/
    private String getFileName(MultivaluedMap<String, String> header) {
        String[] contentDisposition = header.getFirst("Content-Disposition").split(";");
        for (String filename : contentDisposition) {
            if ((filename.trim().startsWith("filename"))) {
                String[] name = filename.split("=");
                return name[1].trim().replaceAll("\"", "");
            }
        }
        return "unknown";
    }

    private void writeFile(byte[] content, String filename) throws IOException {
        File file = new File(filename);
        if (!file.exists()) {
            file.createNewFile();
        }
        FileOutputStream fop = new FileOutputStream(file);
        fop.write(content);
        fop.flush();
        fop.close();
    }

    /**
     * curl -o download.png http://localhost:8080/auth/hello/file/upload.png
     * @param fileName
     * @return
     */
    @GET
    @Path("file/{fileName}")
    @Produces("image/png")
    public Response downLoadImage(@org.jboss.resteasy.annotations.jaxrs.PathParam String fileName) {
        if(fileName == null || fileName.isEmpty()) {
            ResponseBuilder response = Response.status(Status.BAD_REQUEST);
            return response.build();
        }
        //Prepare a file object with file to return
        File file = new File(UPLOADED_FILE_PATH + fileName);
        ResponseBuilder response = Response.ok(file);
        response.header("Content-Disposition", "attachment; filename="+fileName);
        return response.build();
    }
What if we return a stream directly? Traditional Servlets write data through ServletOutputStream, while JAX-RS specifies StreamingOutput. Here is a simple example that writes a Properties object to the client through ObjectOutputStream.
    @POST
    @Produces(MediaType.APPLICATION_OCTET_STREAM)
    @Path("getStream")
    public Response getStream() {
        Properties props = new Properties();
        props.put("test", "test");
        // Example
        StreamingOutput streamingOutput = output -> {
            ObjectOutputStream objectOutputStream = new ObjectOutputStream(output);
            objectOutputStream.writeObject(props);
        };
        // When returning a PrintWriter, use this approach and set the content encoding
        StreamingOutput streamingOutput = output -> {
            PrintWriter writer = new PrintWriter(new BufferedWriter(new OutputStreamWriter(output, StandardCharsets.UTF_8)));
            writer.wtrite("<h1>test</h1>")
        };
        // Traditional Servlet approach; also set the content encoding
        response.setContentType("text/plain; charset=UTF-8")
        PrintWriter writer = response.getWriter();

        return Response.ok().entity(streamingOutput).build();
    }
Test:
public class StreamControllerTest {

    @SneakyThrows
    @Test
    public void assetGetStream() {
        Properties propsRet;
        URL url = new URL("http://localhost:8080/mvc-demo/mvc/stream/getStream");
        HttpURLConnection connection = (HttpURLConnection) url.openConnection();
        connection.setRequestMethod("POST");
        connection.setRequestProperty("Content-Type", "application/x-www-form-urlencoded");
        InputStream in = connection.getInputStream();
        // Receive it with ObjectInputStream
        ObjectInputStream result = new ObjectInputStream(in);
        propsRet = (Properties) result.readObject();
        System.out.println(propsRet);
    }

}
After these examples, basic application development should be straightforward.
Global Exception Handling
In the examples above, we simply throw an exception for an invalid request. To give the client a useful response after an exception, we need an exception-handling mechanism. Spring Boot uses @ExceptionHandler and @RestControllerAdvice for global handling. JAX-RS offers a similar approach: implement ExceptionMapper and annotate it with @Provider. This example should also clarify the role of Providers in JAX-RS.
@Provider
public class GlobalWebExceptionMapper implements ExceptionMapper<WebApplicationException> {

    @Override
    public Response toResponse(WebApplicationException e) {
        return Response.status(e.getResponse().getStatus())
                .type(MediaType.APPLICATION_JSON)
                .entity(new ExceptionData(e.getMessage()))
                .build();
    }
}
Notes
- Complete example repository
- Read a JAR’s Javadoc online here. I used to find Javadoc rather dull. As I have written more code, however, I have found it a quick way to solve problems when using an unfamiliar JAR or looking for the interface or class needed for a feature.
Change Log
- The source code now uses JDK 11.
- Servlet 4 was upgraded to Servlet 6; all javax package names were changed to jakarta, and the web.xml descriptor was updated.
- JSTL was upgraded to 2.0.
- Tomcat 9 was upgraded to Tomcat 10.
- Hibernate and Jackson were upgraded.
- Weld CDI was upgraded to the latest version, with the corresponding configuration in webapp/META-INF/context.xml updated.