Table of contents
Open Table of contents
Using JWT (JSON Web Token)
Introduction
This article expands on Using JWT with Shiro, providing complete examples of JWT usage in detail.
If your understanding of RSA differs from mine while reading, please first read the RSA explanation later in the article. If you still disagree, comments and discussion are welcome.
JWT’s Purpose and Basic Format
This introduction is enough to get started. It explains what JWT is, what it does, its format and operation, and why to use it.
Basic Format
The documentation above explains the format. Briefly, JWT has three sections:
xxxxx.yyyyy.zzzzz
The first is the Header, which contains the signing algorithm and token type.
{
  "alg": "HS256",
  "typ": "JWT"
}
The Payload mainly contains token information such as issue and expiry times, plus custom information. A more complete payload example is:
{
  "sub": "1000",
  "aud": ["https://app-one.com", "https://app-two.com"],
  "nbf": 1638357246,
  "iss": "http://localhost:18080",
  "exp": 1638357846,
  "iat": 1638357246,
  "jti": "17fcfe5e-f705-481d-bf55-23368988f8d6",
  "scope": "read write"
}- iss: the issuer that generates the token.
- exp: expiration time.
- iat: the time the token was issued.
- nbf: the token must not be used before this time.
- aud: the intended audience or scope of use of the token.
- jti JWT ID
- subject: information such as userId.
- scope is our custom field. Add other fields according to your scenario.
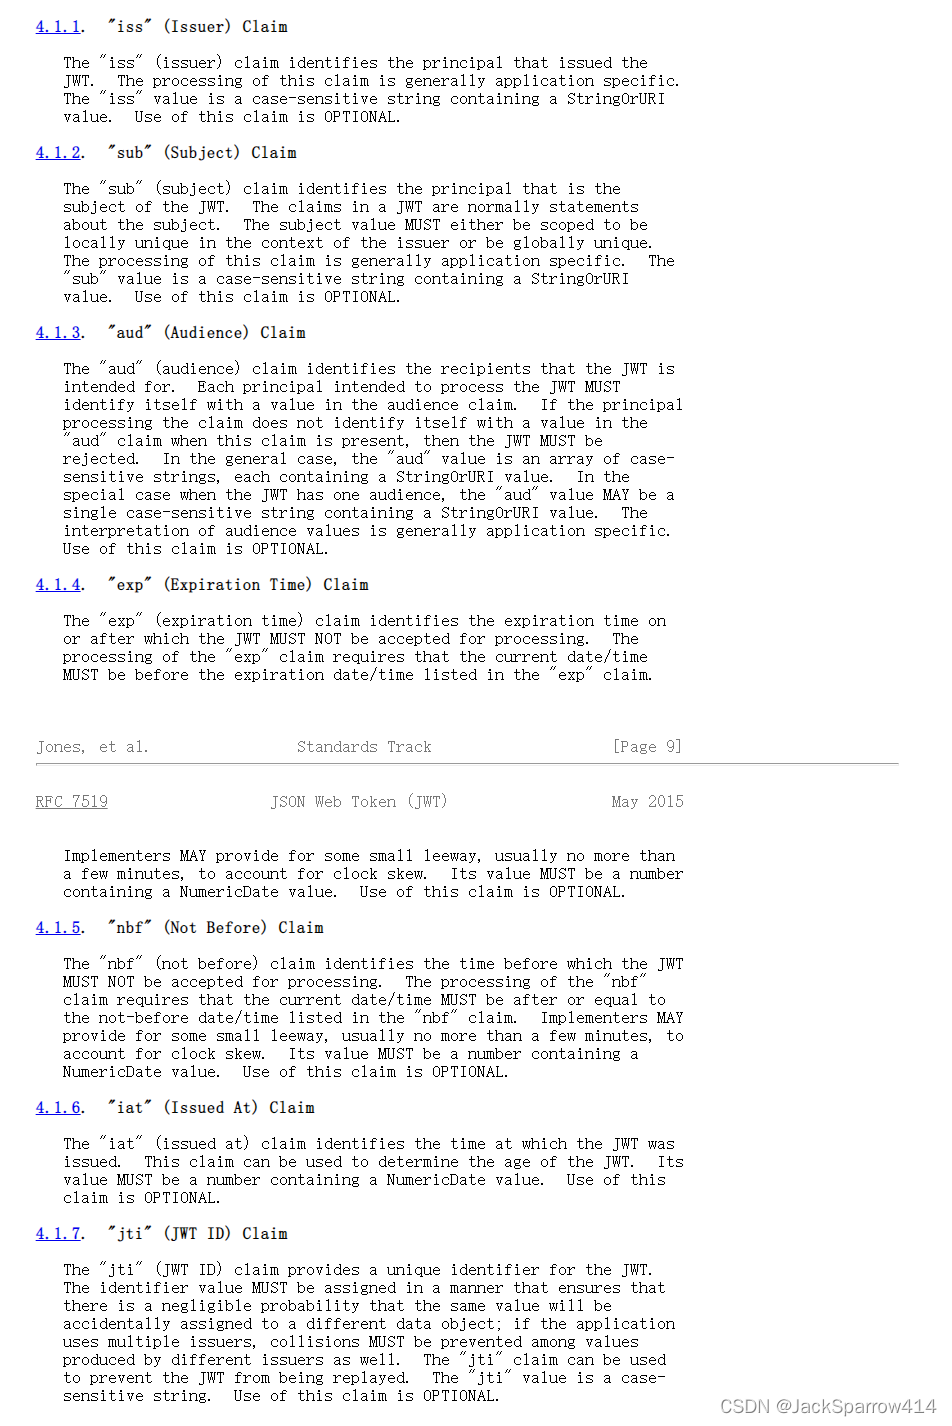
For complete explanations, see the specification.
The Signature signs the JWT. Specifically, the Base64-encoded Header and Payload are processed with the chosen cryptographic algorithm.
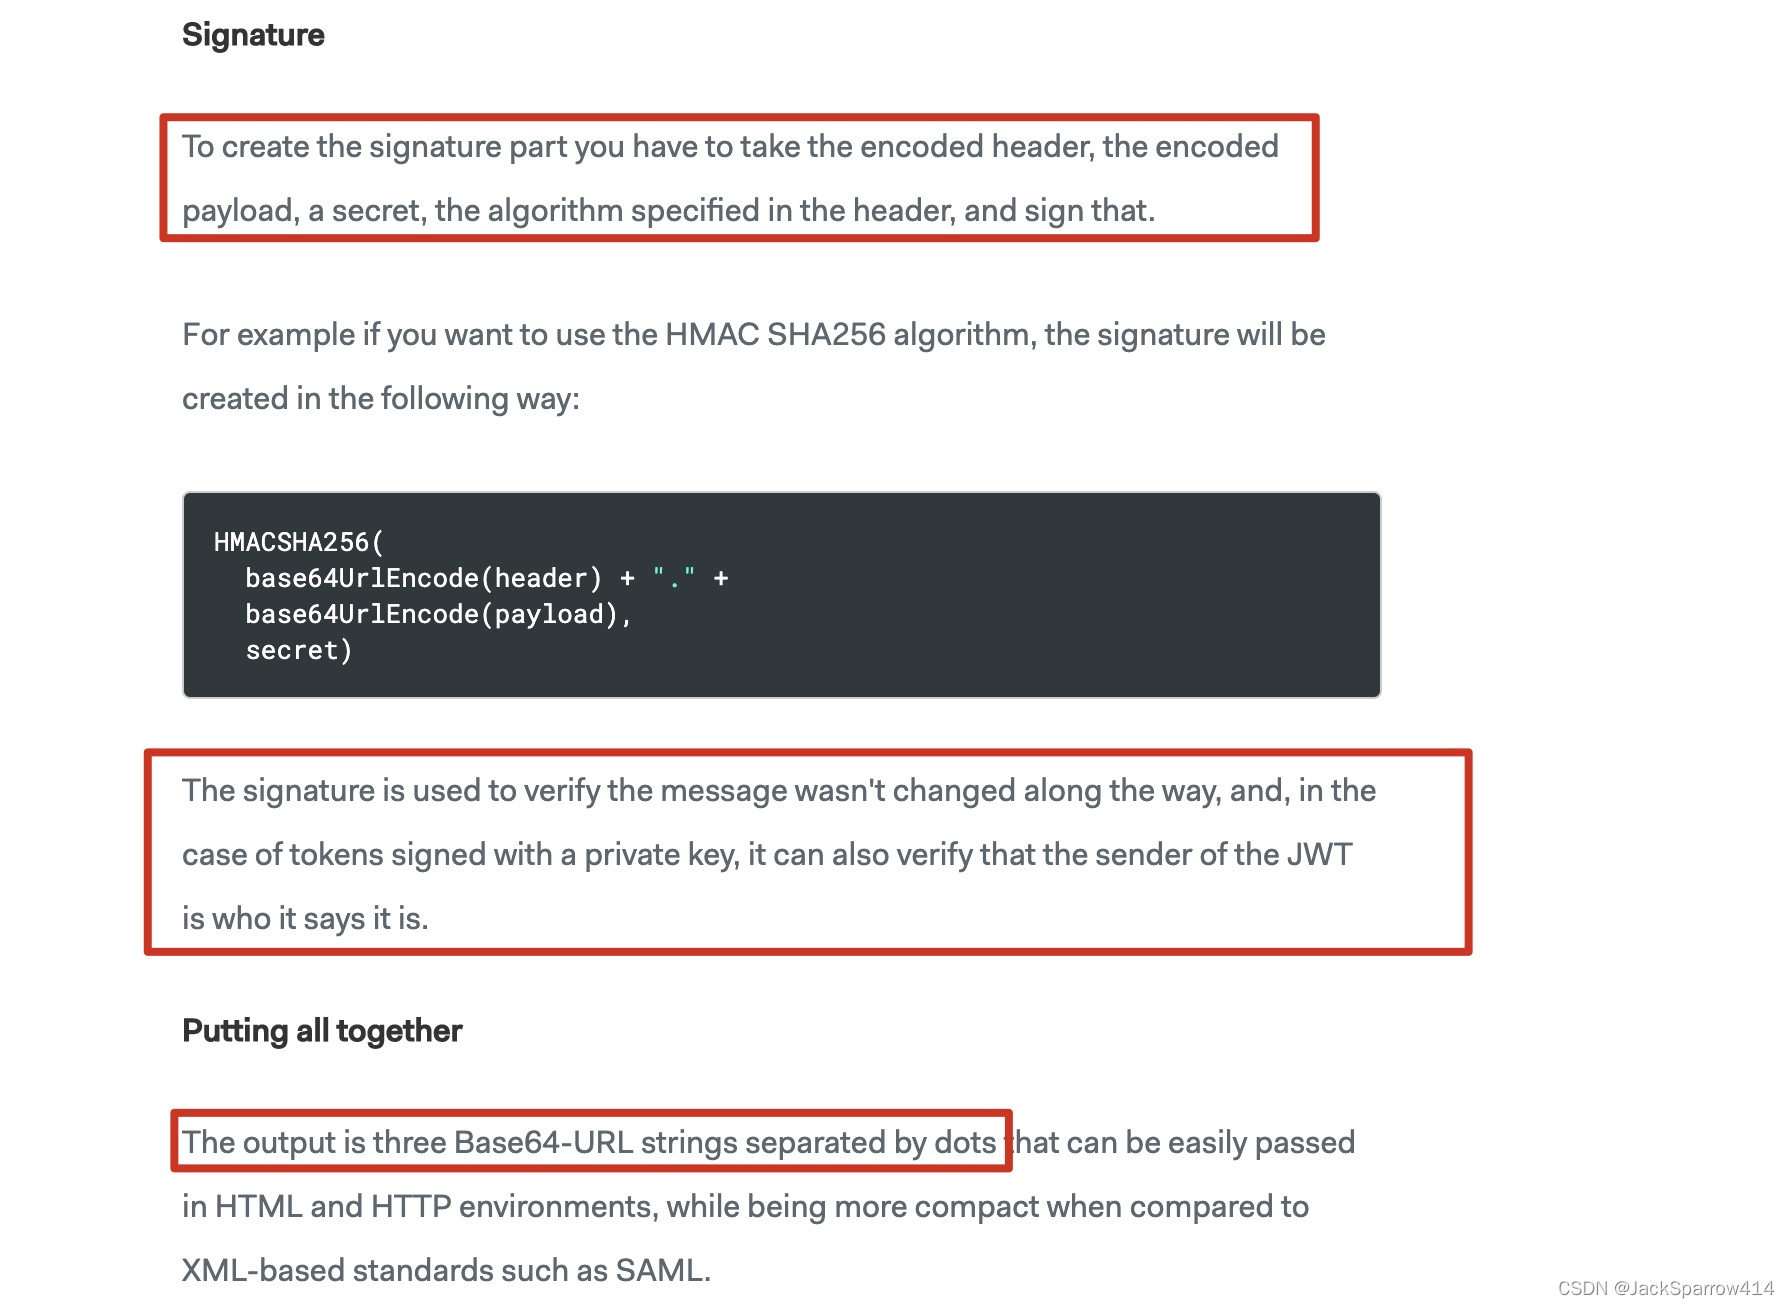
The final output is a Base64-encoded string separated by three dots (·). Decoding it reveals the payload, so sensitive information should not be placed there.
Why Is a Signature Needed?
The second red-highlighted section in the screenshot already explains this: a signature prevents JWT tampering. If the RSA private key is used to encrypt, the correct result can only be obtained by decrypting with the RSA public key on the server. This proves not only that the JWT signature was not altered, but also that this server issued it—another important point. HMAC is similar: the secret also remains server-side, and a matching result shows the JWT came from our server.
JWT Libraries
Common Java JWT libraries include nimbus-jose-jwt and io.jsonwebtoken. The JWT library list includes libraries for other languages too.
Using JWT with Shiro used io.jsonwebtoken and only showed basic code, without discussing library selection in detail.
This article uses nimbus-jose-jwt.
Choosing between nimbus-jose-jwt and jsonwebtoken
Stack Overflow already discusses this. The following two links can help you choose for your circumstances:
Briefly, nimbus-jose-jwt supports more features.
Using nimbus-jose-jwt
The official examples provide a quick introduction. Nimbus divides JWT usage into JWS and JWE. This article mainly explains JWS and introduces JWE as a starting point for readers to explore.
JWS
JSON Web Signature
JWS signs a JWT. As explained above, adding a signature:
- Prevents tampering with JWT contents and ensures integrity.
- Allows verification that this server issued the JWT.
Note: signatures are not limited to JWT. Digital signatures are also used in SSL; explore further if interested.
Signing algorithms include HMAC, RSA, and EC. For their use cases, see the algorithm-selection guide, which explains cryptographic goals and the algorithms appropriate to them.
HMAC
When to Use HMAC
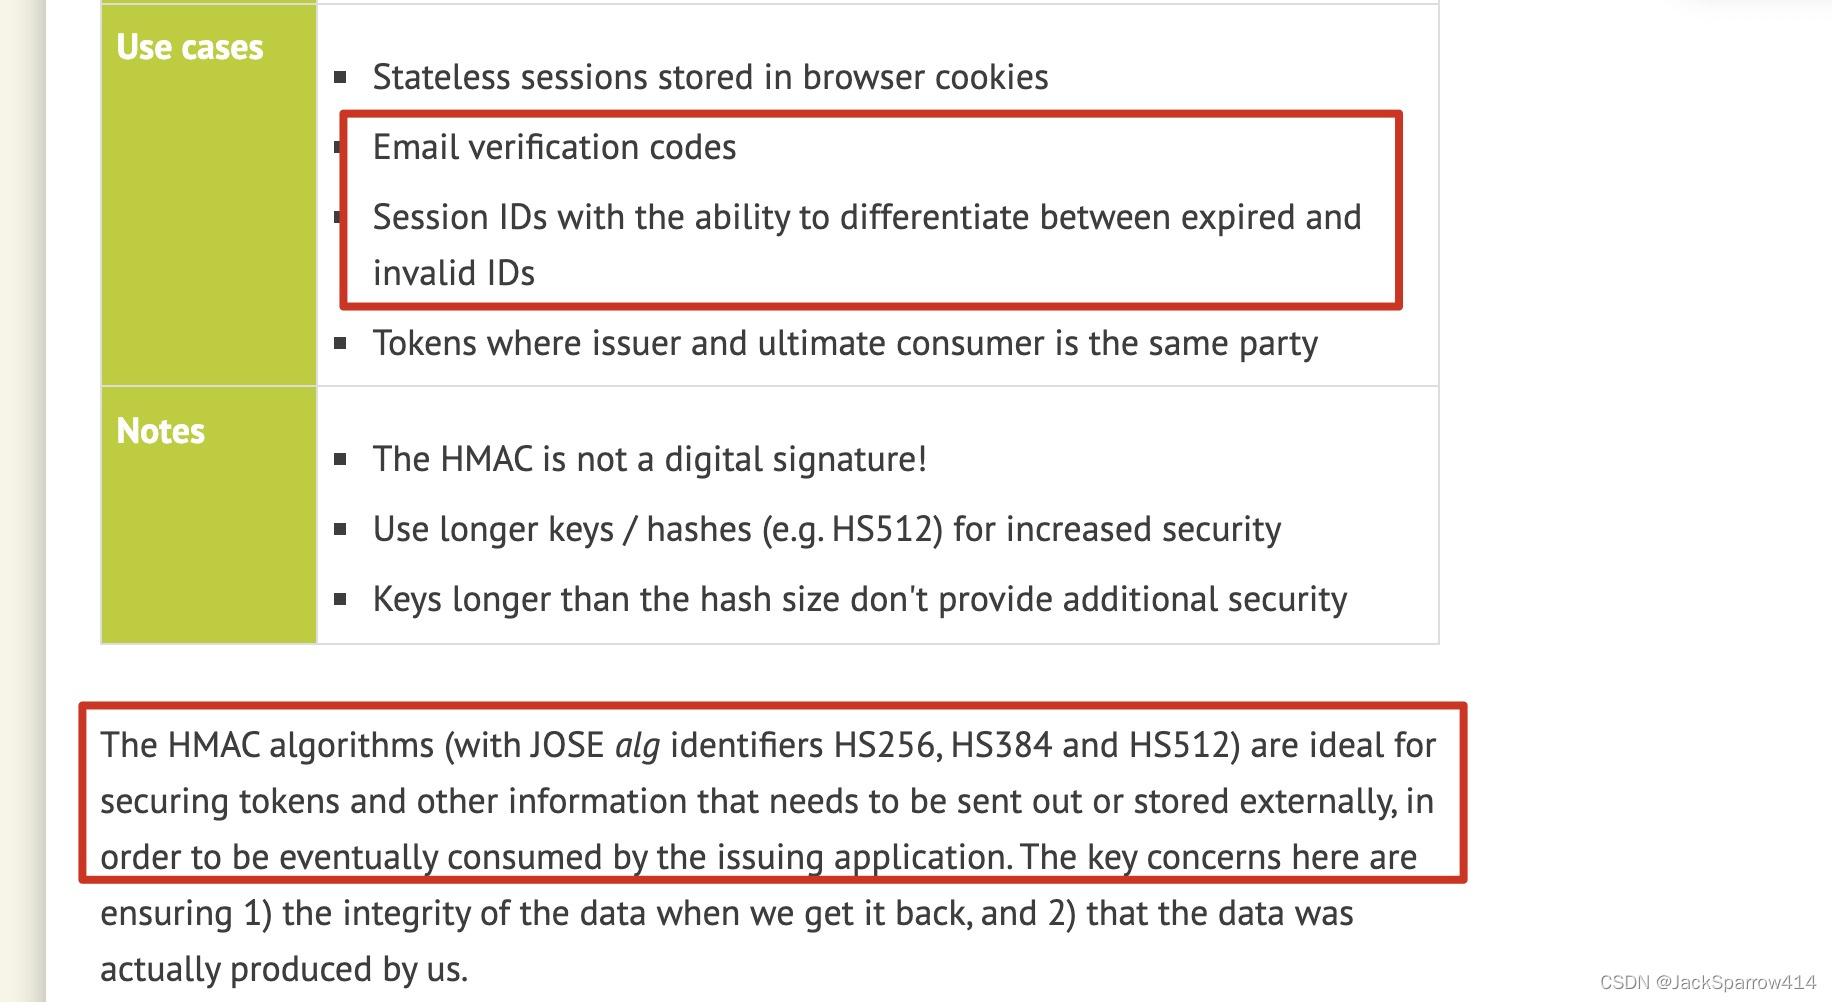
An example is an email verification code. The second red-highlighted section explains the best use case: data is sent outside the application and must later be recognized by it. The core idea is to ensure the data has not been altered and was generated by us.
A simple Spring Boot application demonstrates this.
Generating a JWT with HMAC
@Configuration
@Component
public class SignerAndVerifierConfiguration {

    private static final String sharedSecret = "31611159e7e6ff7843ea4627745e89225fc866621cfcfdbd40871af4413747cc";
    @Bean(name = "HmacSigner")
    @SneakyThrows
    public JWSSigner generateHmacJwsSigner() {
        SecureRandom random = new SecureRandom();
        random.nextBytes(sharedSecret.getBytes());
        return new MACSigner(sharedSecret);
    }

    @Bean(name = "HmacVerifier")
    @SneakyThrows
    public JWSVerifier getHmacJwsVerifier() {
        SecureRandom random = new SecureRandom();
        random.nextBytes(sharedSecret.getBytes());
        return new MACVerifier(sharedSecret);
    }
}
First configure the HMAC signer, JWSSigner, and verifier, JWSVerifier. Here we use a random string as the HMAC secret.
Then construct the JWT, beginning with the payload. The main API is JWTClaimsSet.Builder().
@Component
public class JWTClaimsSetFactory {

    public JWTClaimsSet buildJWTClaimsSet(String userId) {
        Calendar signTime = Calendar.getInstance();
        Date signTimeTime = signTime.getTime();
        signTime.add(Calendar.MINUTE, 10);
        Date expireTime = signTime.getTime();
        return new JWTClaimsSet.Builder()
                .issuer("http://localhost:18080")
                .subject(userId)
                .audience(Arrays.asList("https://app-one.com", "https://app-two.com"))
                .expirationTime(expireTime)
                .notBeforeTime(signTimeTime)
                .issueTime(signTimeTime)
                .jwtID(UUID.randomUUID().toString())
                .claim("scope", "read write")
                .build();
    }
}
After obtaining the payload, add the Header and sign it with the signer. The main class here is SignedJWT, representing the JWS we use.
@RestController
@RequestMapping("generate")
@Log
public class GenerateTokenController {

    @Autowired
    @Qualifier("HmacSigner")
    private JWSSigner hmacSigner;

    @Autowired
    private JWTClaimsSetFactory jwtClaimsSetFactory;

    @GetMapping("hmac")
    @SneakyThrows
    public String generateHMACToken() {
      // Pass in the header and payload.
        SignedJWT signedJWT = new SignedJWT(new JWSHeader.Builder(JWSAlgorithm.HS256).type(JOSEObjectType.JWT).build(), jwtClaimsSetFactory.buildJWTClaimsSet("ADMIN"));
        // Sign it.
        signedJWT.sign(hmacSigner);
        String result = signedJWT.serialize();
        log.info("HMAC token is: \n" + result);
        return result;
    }
}
Parsing a JWT with HMAC
@RestController
@RequestMapping("verify")
public class VerifyTokenController {

    @Autowired
    @Qualifier("HmacVerifier")
    private JWSVerifier hmacVerifier;

    @GetMapping("hmac")
    @SneakyThrows
    public boolean verifyHMACToken(@RequestHeader("Authorization") String token) {
        SignedJWT parse = SignedJWT.parse(token);
        if (!parse.verify(hmacVerifier)) {
            throw new RuntimeException("invalid token");
        }
        verifyClaimsSet(parse.getJWTClaimsSet());
        return true;
    }

    /**
     * Perform all verification here.
     * @param jwtClaimsSet
     */
    private void verifyClaimsSet(final JWTClaimsSet jwtClaimsSet) {
        boolean result = false;
        if (Calendar.getInstance().getTime().before(jwtClaimsSet.getExpirationTime())) {
            result = true;
        }
        if (!result) {
            throw new RuntimeException("token expired");
        }
    }
}
RSA
When to Use RSA
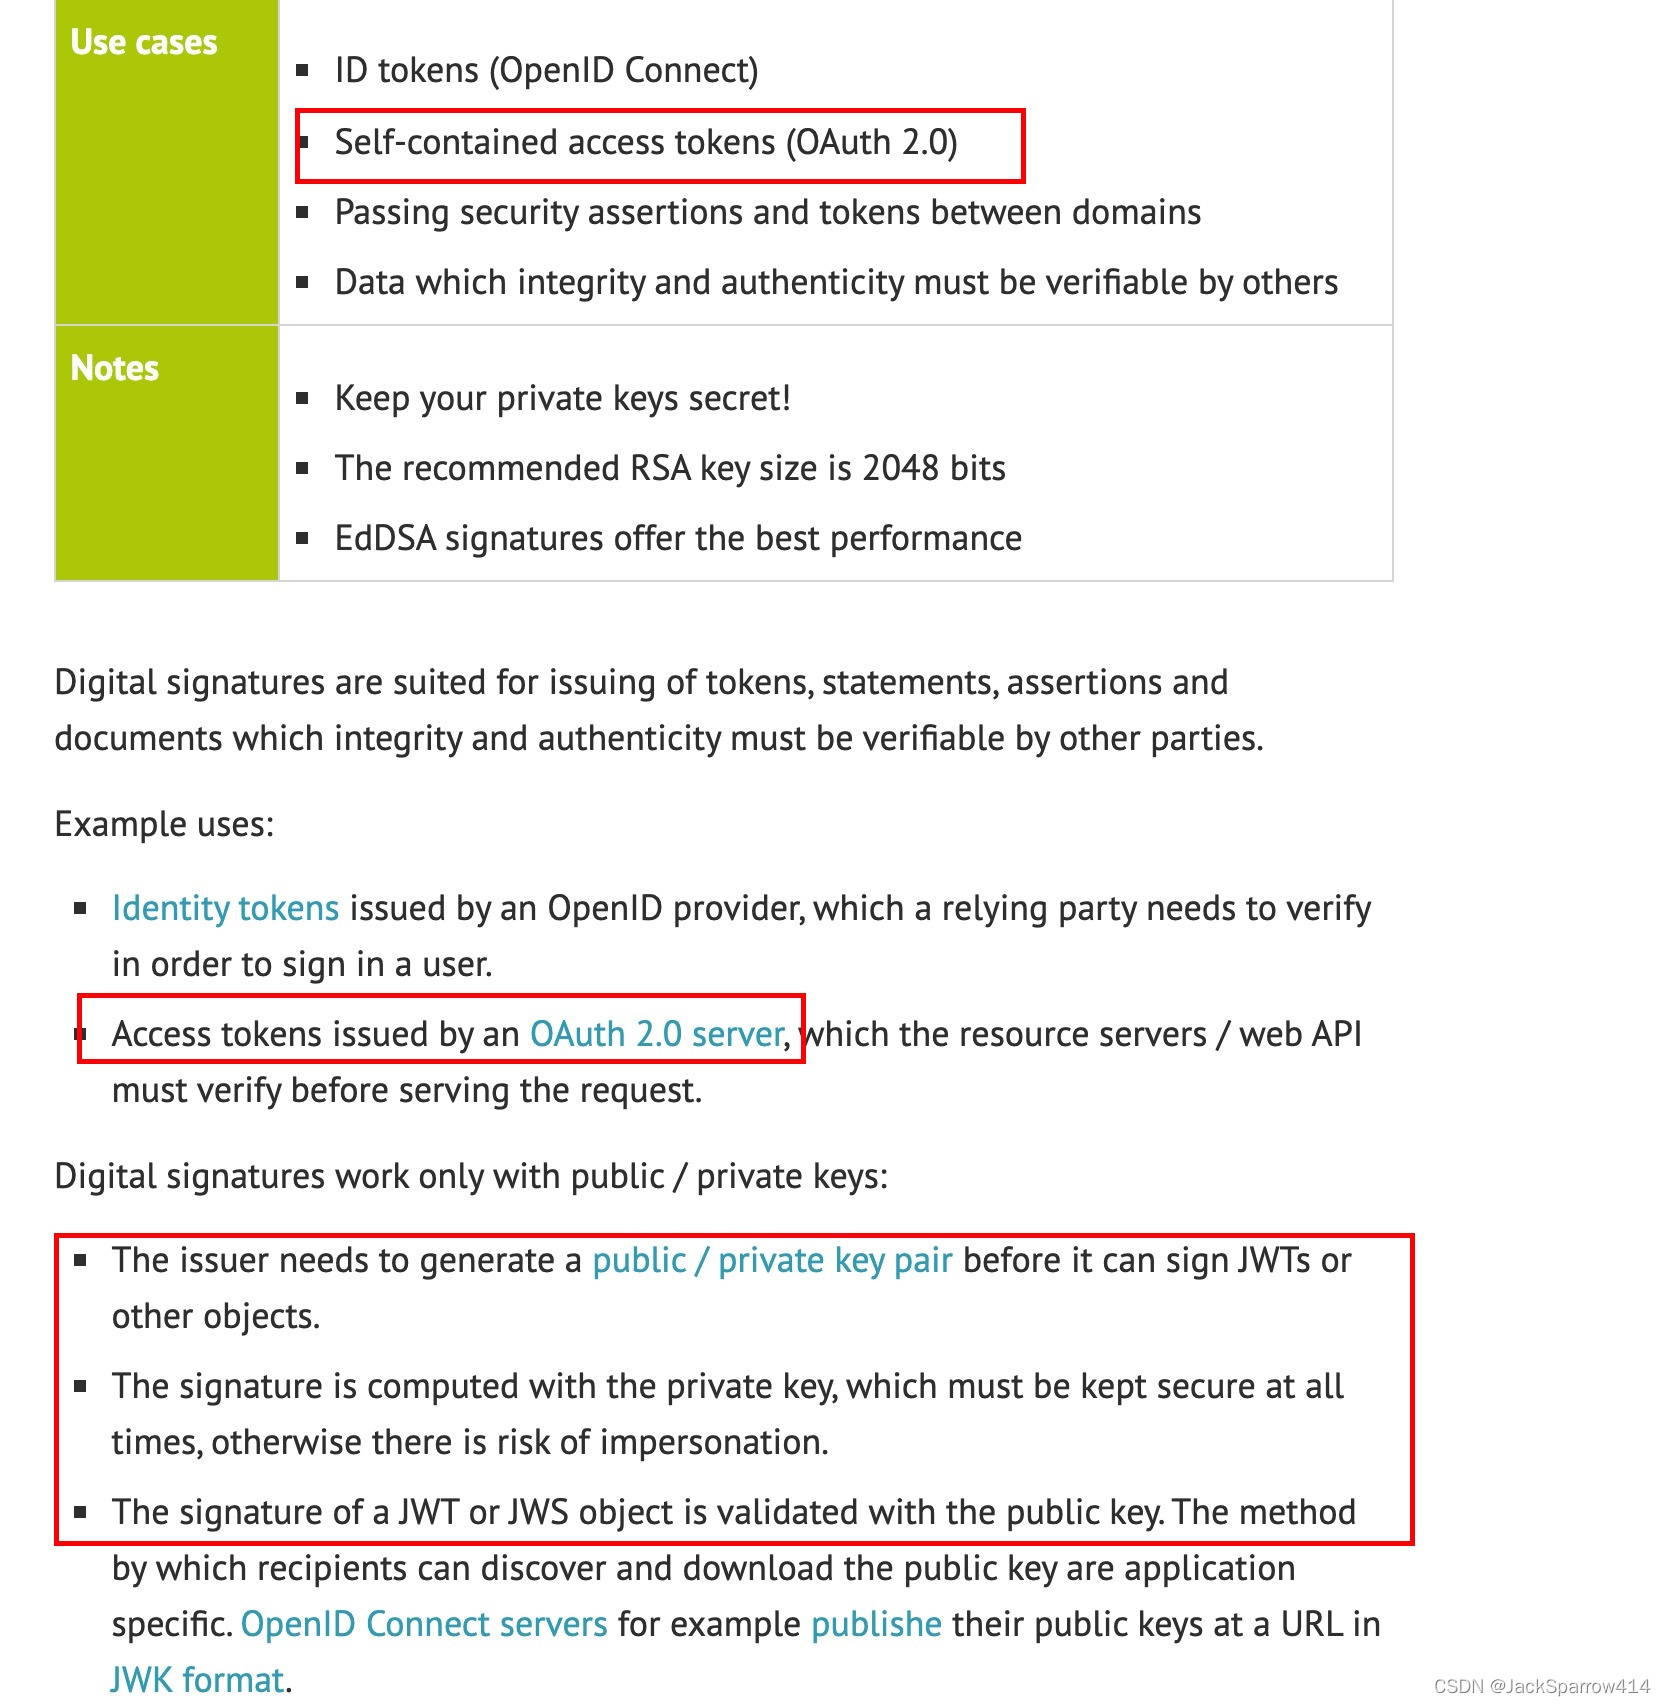
For example, an OAuth 2.0 server can use it when issuing access tokens. Generate a public/private key pair, sign with the private key, and verify with the public key.
Generating RSA Public and Private Keys Online
For demonstration, use an online RSA generator. In actual use, keys can be generated on the server with OpenSSL.
Put the generated public and private keys into publish-key.pem and private-key.pem respectively, creating the files if needed.
Generating a JWT with RSA
As with HMAC, configure a signer and verifier.
@Configuration
@Component
public class SignerAndVerifierConfiguration {

    @Bean(name = "RsaSigner")
    @SneakyThrows
    public JWSSigner generateRsaJwsSigner(){
        // Read the private key.
        String pemEncodedRSAPrivateKey = PEMKeyUtils.readKeyAsString("rsa/private-key.pem");
        RSAKey rsaKey = (RSAKey) JWK.parseFromPEMEncodedObjects(pemEncodedRSAPrivateKey);
        return new RSASSASigner(rsaKey.toRSAPrivateKey());
    }

    @Bean(name = "RsaVerifier")
    @SneakyThrows
    public JWSVerifier getRsaJWSVerifier() {
      // Read the public key.
        String pemEncodedRSAPublicKey = PEMKeyUtils.readKeyAsString("rsa/publish-key.pem");
        RSAKey rsaPublicKey = (RSAKey) JWK.parseFromPEMEncodedObjects(pemEncodedRSAPublicKey);
        return new RSASSAVerifier(rsaPublicKey);
    }
}
Place the two files under the project’s resources and read them when initializing the signer and verifier.
@RestController
@RequestMapping("generate")
@Log
public class GenerateTokenController {

    @Autowired
    @Qualifier("RsaSigner")
    private JWSSigner rsaSigner;

    @Autowired
    private JWTClaimsSetFactory jwtClaimsSetFactory;

    @GetMapping("{userId}")
    @SneakyThrows
    public String generateRSAToken(@PathVariable String userId) {
      // Choose RS256 for the header.
        SignedJWT signedJWT = new SignedJWT(new JWSHeader.Builder(JWSAlgorithm.RS256).type(JOSEObjectType.JWT).build(), jwtClaimsSetFactory.buildJWTClaimsSet(userId));
      // Sign it.
        signedJWT.sign(rsaSigner);
        String result = signedJWT.serialize();
        log.info("token is: \n" + result);
        return result;
    }
}
The payload construction is the same as in the example, so I will not repeat that code.
Parsing a JWT with RSA
@RestController
@RequestMapping("verify")
public class VerifyTokenController {

    @Autowired
    @Qualifier("RsaVerifier")
    private JWSVerifier rsaVerifier;

    @GetMapping
    @SneakyThrows
    public boolean verifyRSAToken(@RequestHeader("Authorization") String token) {
        SignedJWT parse = SignedJWT.parse(token);
        if (!parse.verify(rsaVerifier)) {
            throw new RuntimeException("invalid token");
        }
        verifyClaimsSet(parse.getJWTClaimsSet());
        return true;
    }
}
JWE
JWS uses a signature to prevent tampering, but decoding Base64 still reveals the payload. In practice, our JWT may only contain userId. With OAuth 2.0, it may also contain scope and similar information, but exposing these through decoding has little impact on us.
If you want to encrypt the payload so decoding does not reveal it, use JWE: JSON Web Encryption.
A reminder:
- JWS signs the content but does not encrypt it.
- JWE encrypts the content but does not sign it.
Encrypting Content with RSA
@Component
@Configuration
public class EncryptAndDecryptConfiguration {

    @Bean
    @SneakyThrows
    public JWEEncrypter generateRsaJweEncrypter() {
        String pemEncodedRSAPublicKey = PEMKeyUtils.readKeyAsString("rsa/publish-key.pem");
        RSAKey rsaPublicKey = (RSAKey) JWK.parseFromPEMEncodedObjects(pemEncodedRSAPublicKey);
        return new RSAEncrypter(rsaPublicKey);
    }

    @Bean
    @SneakyThrows
    public JWEDecrypter getRsaJweDecrypter() {
        String pemEncodedRSAPrivateKey = PEMKeyUtils.readKeyAsString("rsa/private-key.pem");
        RSAKey rsaKey = (RSAKey) JWK.parseFromPEMEncodedObjects(pemEncodedRSAPrivateKey);
        return new RSADecrypter(rsaKey);
    }
}
Configure JWEEncrypter and JWEDecrypter.
@RestController
@RequestMapping("secret")
@Log
public class SecretController {

    @Autowired
    private JWEEncrypter jweEncrypter;

    @Autowired
    private JWTClaimsSetFactory jwtClaimsSetFactory;

    @GetMapping("{userId}")
    @SneakyThrows
    public String secretToken(@PathVariable final String userId) {
      // Set the JWE header.
        JWEHeader header = new JWEHeader(JWEAlgorithm.RSA_OAEP_256, EncryptionMethod.A128GCM);
        EncryptedJWT encryptedJWT = new EncryptedJWT(header, jwtClaimsSetFactory.buildJWTClaimsSet(userId));
      // Encrypt with publishKey.
        encryptedJWT.encrypt(jweEncrypter);
        String result = encryptedJWT.serialize();
        log.info("encrypt token is: \n" + result);
        return result;
    }
}
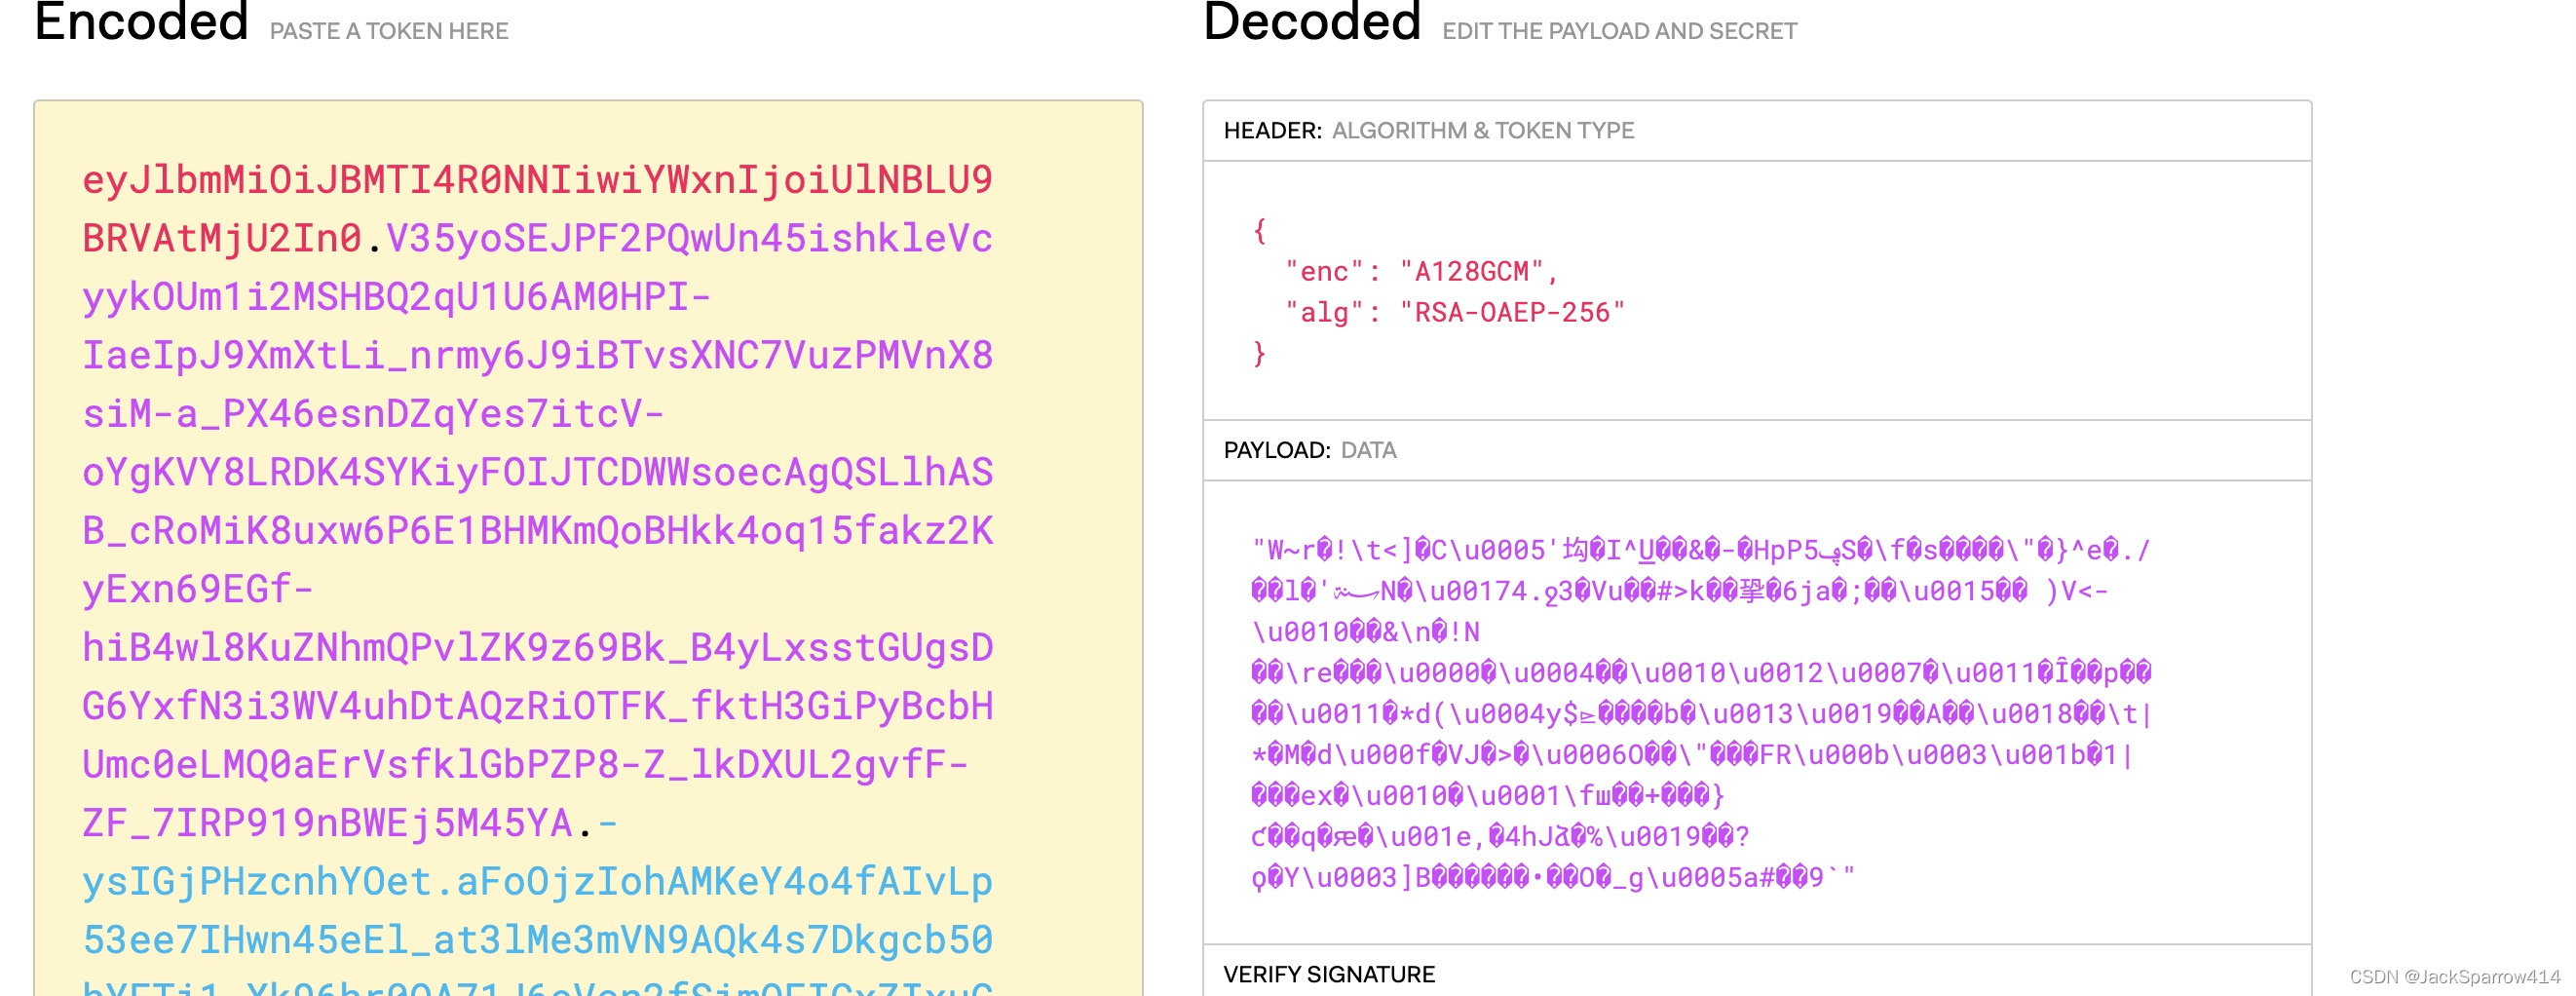
Decode the generated JWT’s Base64 string again: the payload contents are no longer visible.
Decrypt it:
    @GetMapping("decrypt")
    @SneakyThrows
    public void decryptRSASecretToken(@RequestHeader("Authorization") String token) {
        EncryptedJWT encryptedJWT = EncryptedJWT.parse(token);
       // Decrypt with the private key.
        encryptedJWT.decrypt(jweDecrypter);
    }
JWS + JWE
You might now wonder whether signing and encryption can be combined. Of course they can. See Nimbus’s signed and encrypted JWT example. I will not expand on it here.
The documentation recommends signing first and then encrypting. The first line of the example explains why.
Some Explanations of RSA
Readers familiar with RSA may be puzzled by how I used it for JWS above. Questions might include:
-
RSA asymmetric encryption uses public/private key pairs. Why does only the server have both keys here?
Answer: the token-issuing server communicates with the browser. The browser does not need to decrypt the token; it only includes it in the request header next time. It therefore does not need to maintain its own RSA key pair here.
-
Why encrypt with the RSA private key and decrypt with the public key? Isn’t it normally public-key encryption and private-key decryption?
Answer: public-key encryption and private-key decryption apply to content encryption. Our JWS scenario signs content. In practice, use RSA according to your requirement. Briefly:
First usage: public-key encryption and private-key decryption—for encryption/decryption. Second usage: private-key signing and public-key verification—for signatures.
If this seems confusing, do not memorize it mechanically. Think this way: Simply ask yourself: With encryption, I do not want others to know my message, so only I should be able to decrypt it. The public key encrypts, and the private key decrypts. With signing, I do not want others to impersonate me. Only I should be able to produce the signature, so the private key signs and the public key verifies.
Here is another way to say the same thing: Public and private keys form a pair. Either can be used for encryption/decryption in this description; which does what depends on the scenario. In the signing scenario, the private key encrypts and the public key decrypts, allowing all public-key holders to verify the private-key holder’s identity and prevent alteration of the published content. It does not keep the content secret. In the encryption scenario, the public key encrypts and the private key decrypts, allowing information to be sent to the key owner. Others may alter the information, but cannot read it.
For example, in an encryption scenario: If A wants to send B confidential data securely, both should have private keys. A first encrypts the data with B’s public key, then encrypts that encrypted data with A’s private key before sending it to B. This ensures the content cannot be read or altered.
This explanation clearly describes using public and private keys together in different scenarios. It comes from this author; thank you for the explanation.
-
In OAuth 2.0, does the Authorization Server use the public or private key when issuing tokens?
Answer: the example and Question 2 already explain it. Sign tokens with the private key to establish that the signature comes from the Authorization Server. In OAuth 2.0, the authorization server issues tokens, but token validation can be delegated to other servers to reduce its load. Copy the public key to the server cluster that parses the tokens. This is also shown in the red-highlighted RSA JWS screenshot.
-
Any recommended reading on digital signatures and content encryption?
Answer: read explanations on reliable websites. Ruan Yifeng’s website probably has related material, although I have not looked for it. Or use Google more and Baidu less, if at all.