Table of contents
Open Table of contents
Article body
Updated 2021-01-24:
Homebrew has removed the script below, so this method may no longer work. I also could not get the USTC mirror’s instructions to work, so I am providing the Tsinghua mirror’s installation guide here.
Homebrew installation guide for the Tsinghua mirror
-
The simplest approach is to visit the Homebrew website, copy its command, paste it into the terminal, and run it. If everything works, you do not need to read further.
-
If installation is extremely slow and ultimately fails, try the following.
First: copy curl -fsSL https://raw.githubusercontent.com/Homebrew/install/master/install >> brew_instal into the terminal and run it.
Afterward, look in the current directory on your Mac for a file named brew_instal.
The purpose of this step and the next is:
The official command runs too slowly. Before installing, we replace the address in the official install script with the USTC mirror, intended for mainland China.
Next: open the file and change BREW_REPO = “https://github.com/Homebrew/brew”.freeze to BREW_REPO = “git://mirrors.ustc.edu.cn/brew.git”.freeze.
Then: run /usr/bin/ruby ./brew_install in the terminal. Installation is much faster than before, but it ends with this error:
fatal: unable to access ‘https://github.com/Homebrew/homebrew-core/’: LibreSSL SSL_read: SSL_ERROR_SYSCALL, errno 54
Error: Failure while executing: git clone https://github.com/Homebrew/homebrew-core /usr/local/Homebrew/Library/Taps/homebrew/homebrew-core —depth=1
Error: Failure while executing: /usr/local/bin/brew tap homebrew/core
Finally: run the following commands to replace the sources:
1.cd "$(brew --repo)"
2.git remote set-url origin git://mirrors.ustc.edu.cn/brew.git
3.cd "$(brew --repo)/Library/Taps/homebrew/homebrew-core"
4.git remote set-url origin git://mirrors.ustc.edu.cn/homebrew-core.git
cask is not installed by default. Replace its source if needed (the following steps are optional).
cd "$(brew --repo)/Library/Taps/homebrew/homebrew-cask"
git remote set-url origin git://mirrors.ustc.edu.cn/homebrew-cask.git
The final step is to replace the Bintray mirror:
1.echo 'export HOMEBREW_BOTTLE_DOMAIN=https://mirrors.ustc.edu.cn/homebrew-bottles' >> ~/.bash_profile
2.source ~/.bash_profile
Homebrew is now installed on your Mac. Check it with brew -v. For anything you want to install next, look up the corresponding command.
These steps essentially change Git upstream addresses. After installing Homebrew, the hidden .git folder under /usr/local/Homebrew shows it is a Git repository. Homebrew’s three core repositories—homebrew-core, homebrew-cask, and homebrew-services—are under /usr/local/Homebrew/Library/Tags/homebrew, each in its own directory. The commands above simply change the origin address for those repositories to the USTC Git mirrors.
Explanation:
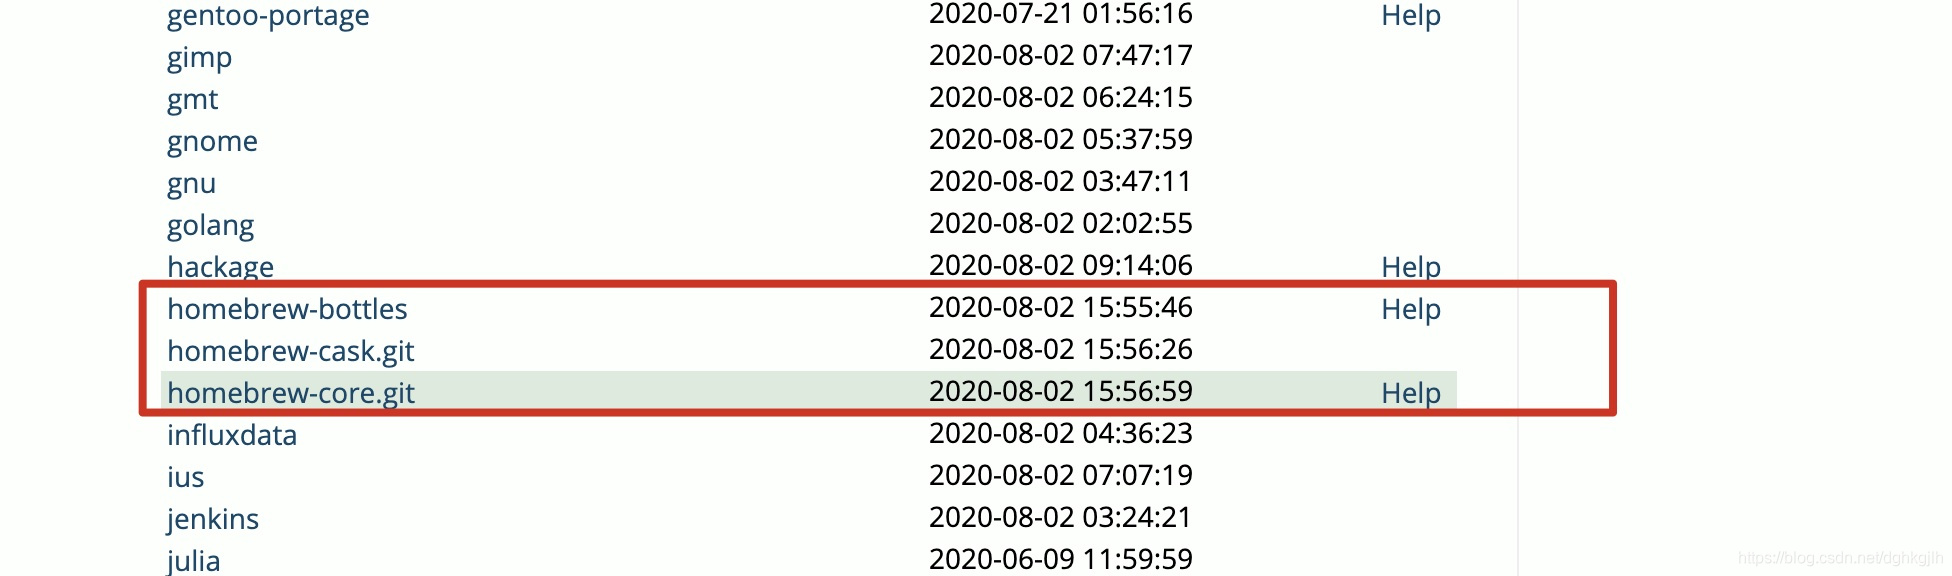
The mirror used here is the USTC mirror, following its instructions. Search its website for the source you need, then click help to see the procedure.
Notes:
I also recommend Cakebrew, a graphical tool. Install it with:
brew cask install cakebrew
Or:
brew install cakebrew
To prevent Homebrew from prompting updates for a particular formula, use:
brew pin <formula>To restore updates, use:
brew unpin <formula>Official explanation: FAQ (Frequently Asked Questions) — Homebrew Documentation
Questions and answers:
Question: how do brew and brew cask differ?
Answer: roughly speaking, brew installs command-line software, while brew cask installs graphical applications. The official GitHub documentation also explains this clearly and concisely.
Updated 2022-12-23: in practice, simply use brew. brew install can also install cask applications.
Question: what does brew tap do? Command documentation
Answer: some software cannot be included in Homebrew for various reasons. Developers can manually let brew track and manage it. brew tap lists the repositories currently available. Developers provide a repository URL in the form https://github.com/user/REPOSITORY_NAME, where the name must begin with homebrew-.
For example, the Elasticsearch repository is not included by brew itself, so Elasticsearch provides a GitHub repository named homebrew-tap. We can install Elasticsearch from the command line like this:
brew tap elastic/tap

brew install elastic/tap/elasticsearch-full
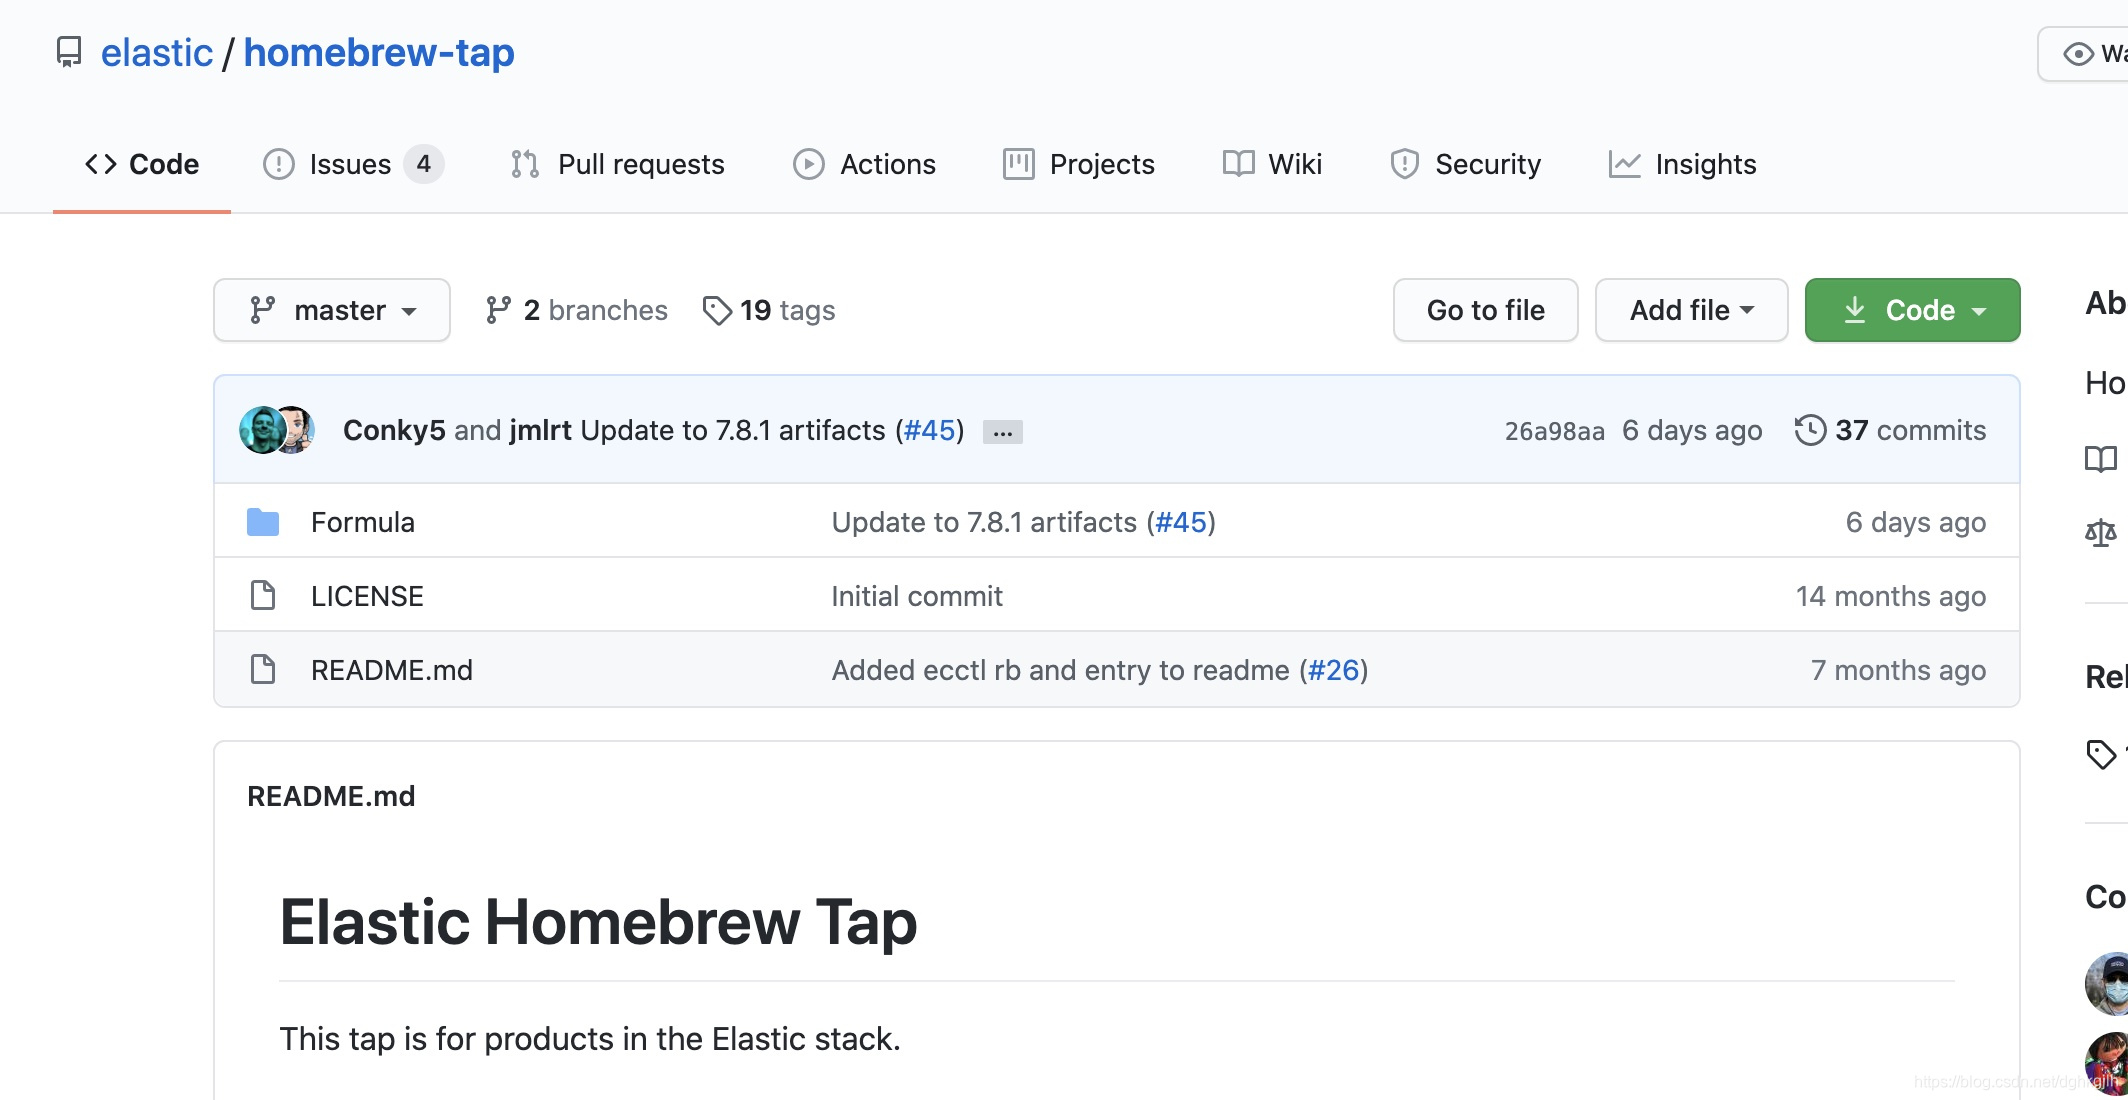
Elasticsearch’s repository follows Homebrew’s conventions.
Question: why not use brew tap elastic/homewbrew-tap when adding the Elasticsearch repository?
Answer: brew tap automatically adds the homebrew- prefix.
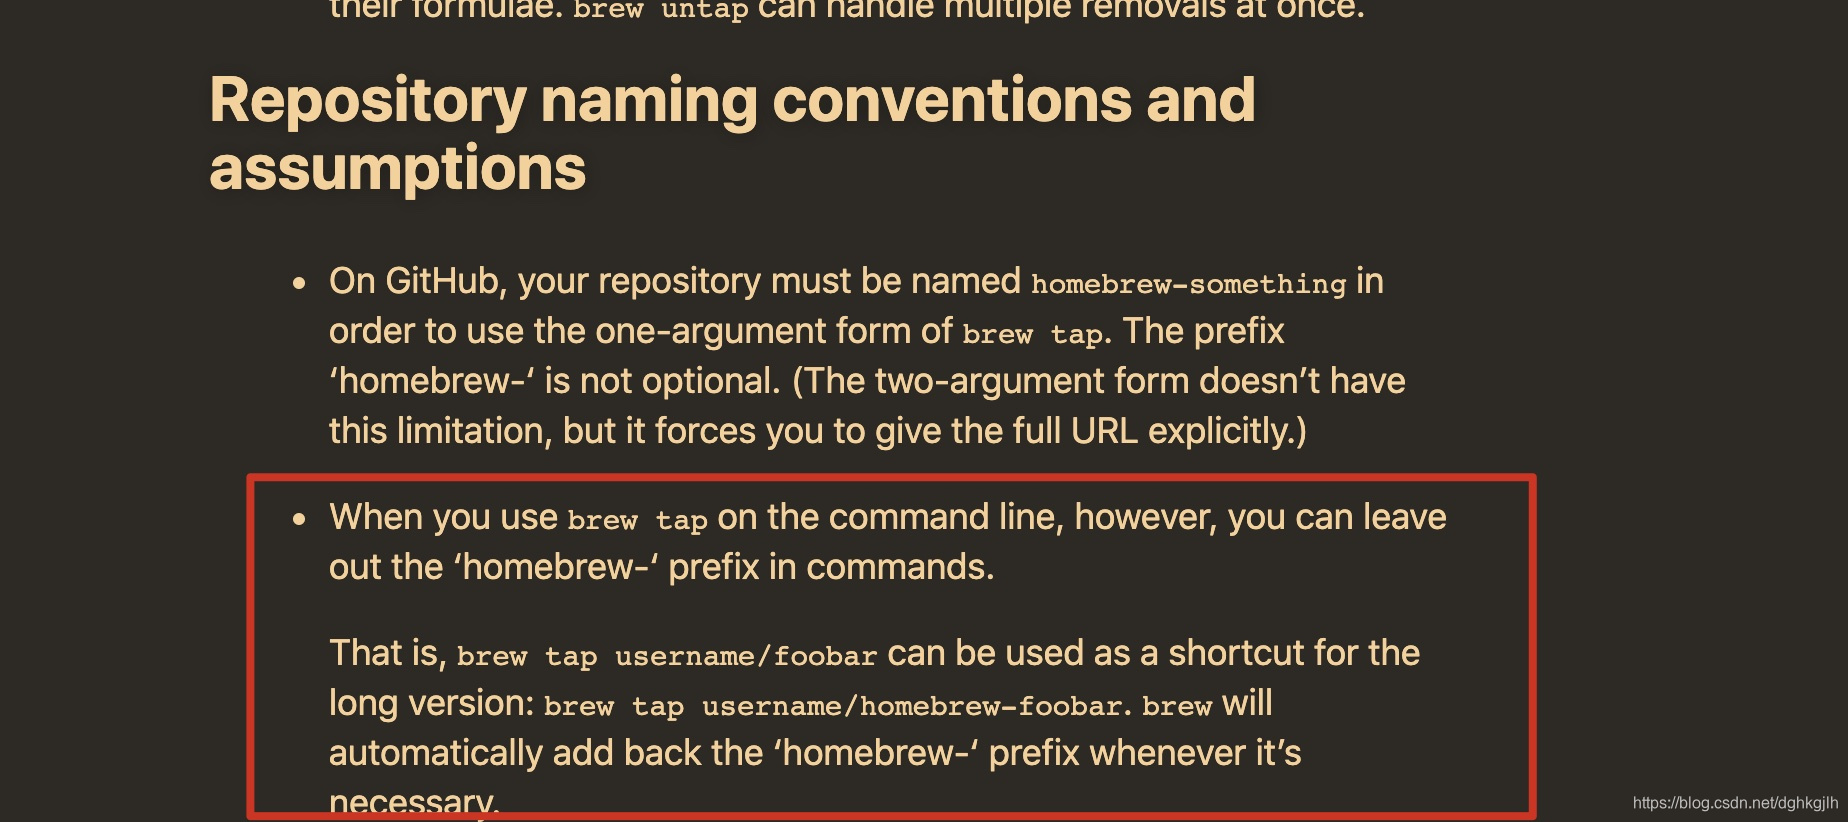
GitHub is the default location for brew tap. To use another location, use the second form with a URL.
Question: how do I install a fixed software version?
Answer: use brew search. If multiple versions are available in a brew repository, select the desired one directly. Otherwise, handle the following cases separately.
First case:
If the version you want is not in a brew repository, use brew create to create its .rb formula: brew create followed by the actual download URL. See the official brew create documentation or the documentation on the official homepage. You can also read Creating a Custom Homebrew Formula — Huang Yunkun
and Publishing Your Own App on Homebrew — Liam.
Second case:
If a brew repository has the software but only its latest version, how can you install an older one?
Visit the official homebrew-core GitHub repository and find the software, such as zookeeper. Clone the repository locally, inspect zookeeper.rb’s commit history, and locate the commit for 3.4.14. Copy its contents to replace the current zookeeper.rb at /usr/local/Homebrew/Libraay/Taps/homebrew/homewbrew-core/.
Run this again:
brew install zoopkeeperYou can then install version 3.4.14.
Because ZooKeeper 3.5 and later have a JDK 8 issue, we keep ZooKeeper pinned at 3.4.14 without updating.
brew pin zookeeper