Table of contents
Open Table of contents
Changing Log4j2 Log Levels at Runtime
In production, we generally configure logging at INFO, WARN, or above. If a business operation suddenly fails and the WARN logs provide no clues, it is useful to switch from WARN to DEBUG without restarting the server, so that we can inspect more logs and understand what is happening.
This requires the ability to adjust Log4j2 log levels at runtime.
Using JMX
Log4j2 officially provides JMX support, which makes configuration changes convenient.
Steps
-
Start the application.
-
Start JConsole and click the MBeans tab.
-
Locate the Log4j2 MBean and use getConfigText to retrieve the current configuration.
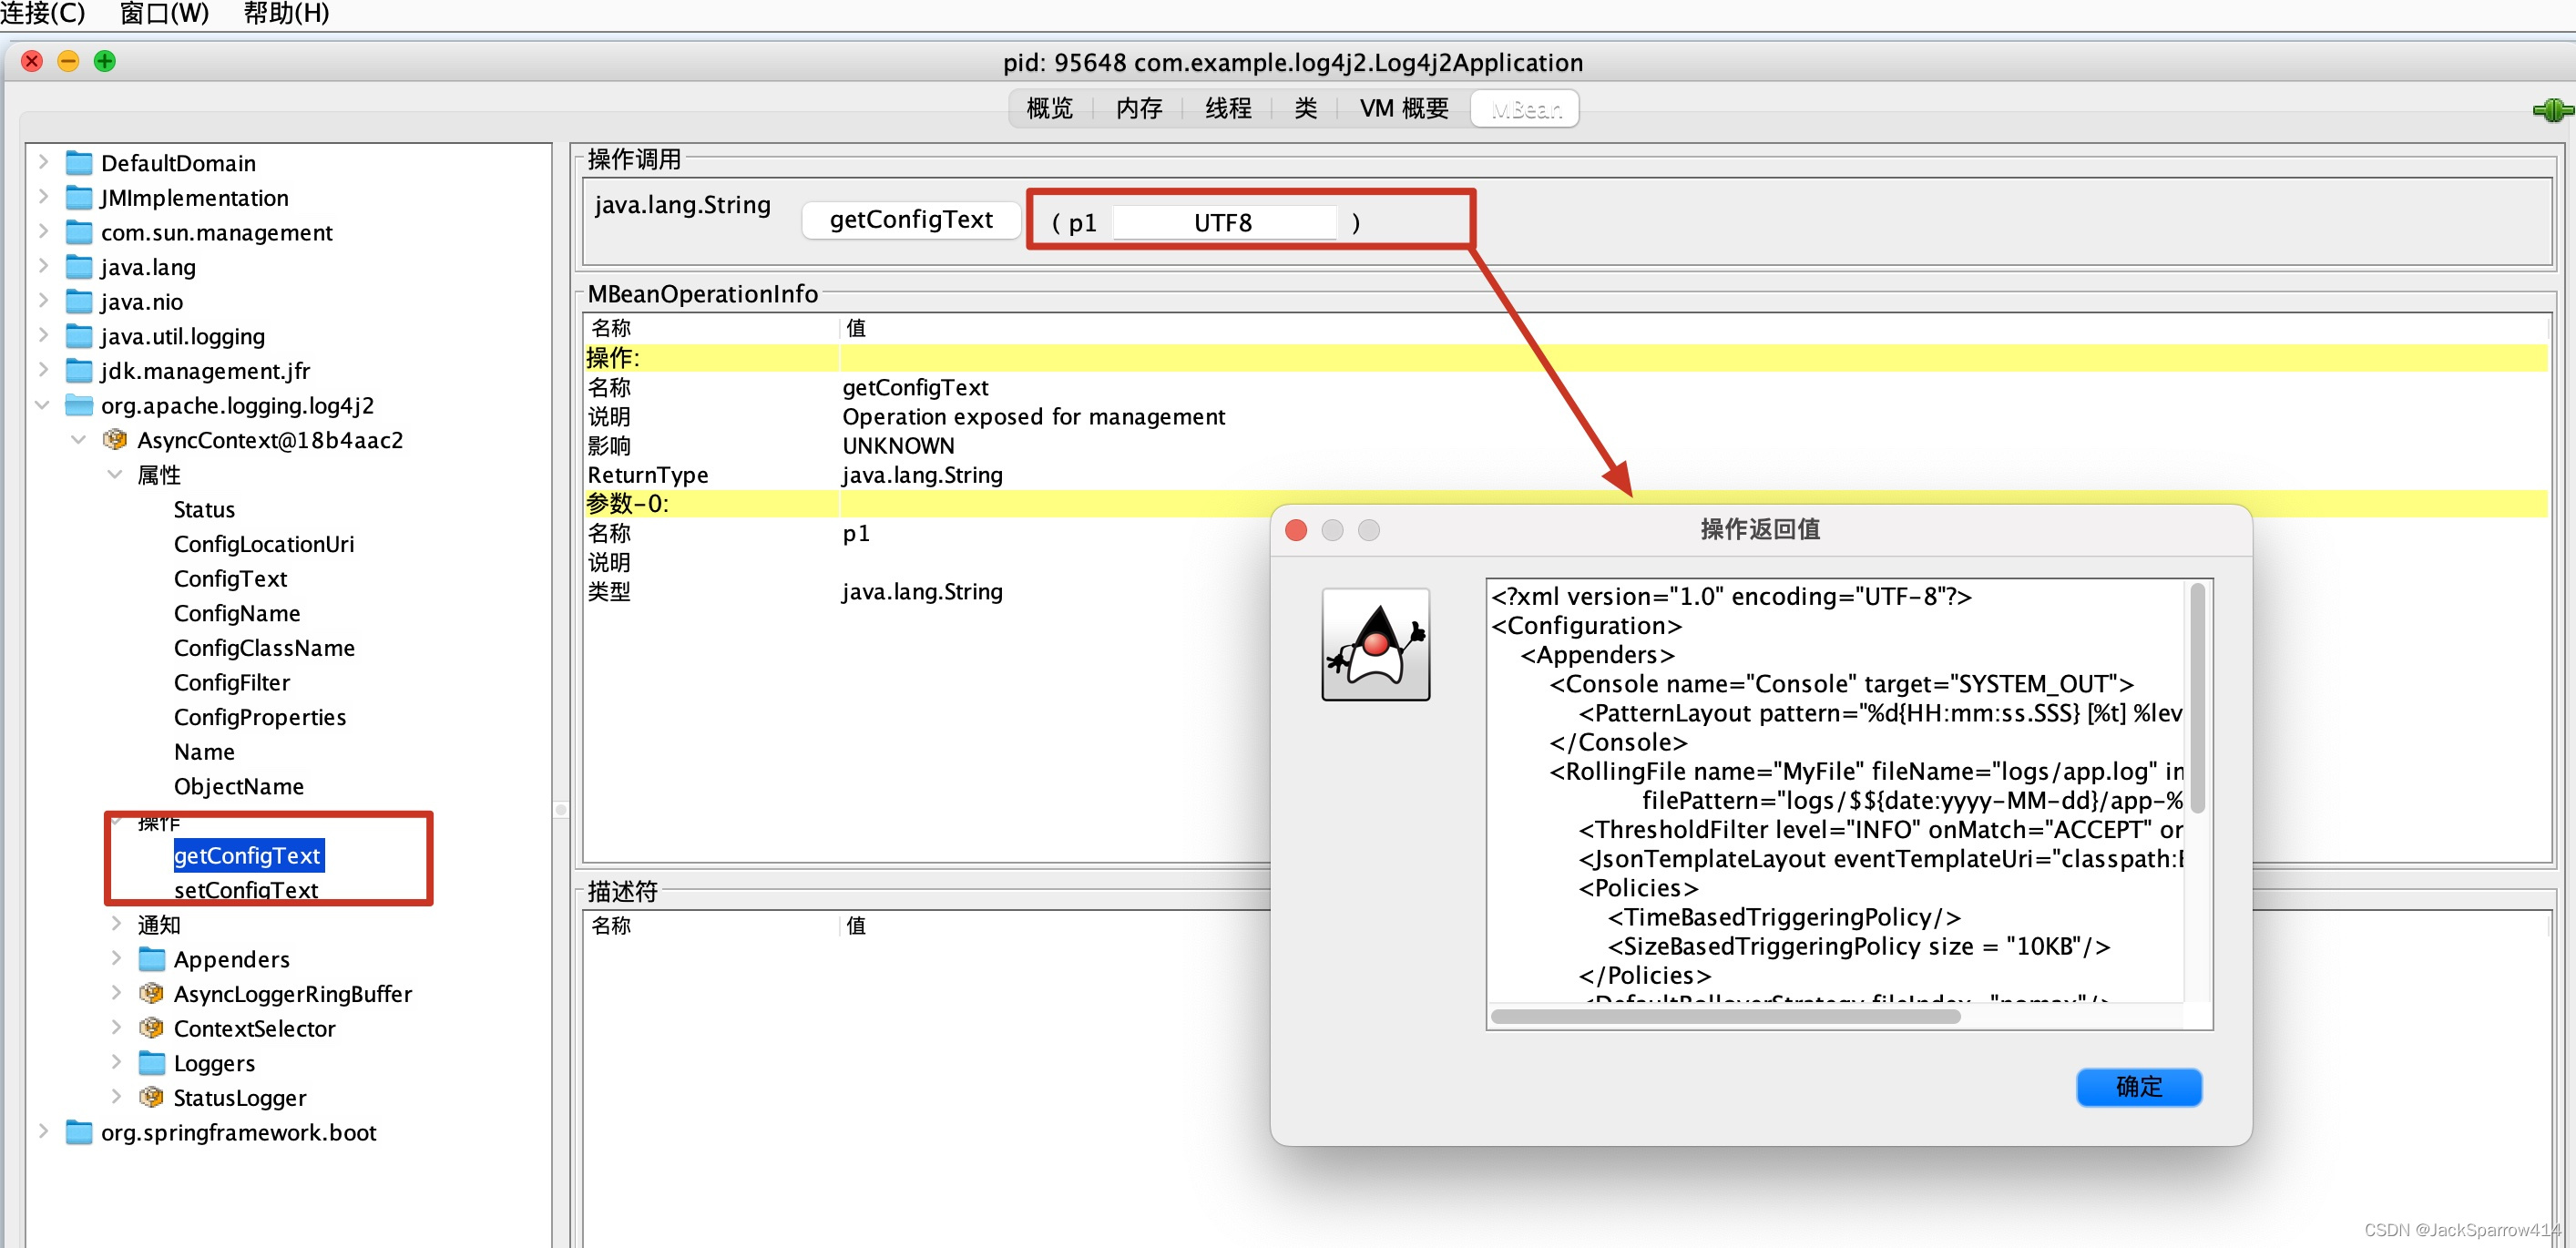
-
Access the application. INFO messages appear in the logs, showing that the application’s default level is currently INFO.
INFO com.example.log4j2.controller.LogController - Info level log message WARN com.example.log4j2.controller.LogController - Warn level log message ERROR com.example.log4j2.controller.LogController - Error level log message -
Change the log level of a particular Logger. Here, we change the level of com.example.log4j2.controller.LogController to DEBUG.
<?xml version="1.0" encoding="UTF-8"?> <Configuration> <Appenders> <Console name="Console" target="SYSTEM_OUT"> <PatternLayout pattern="%d{HH:mm:ss.SSS} [%t] %level %logger - %msg%n"/> </Console> <RollingFile name="MyFile" fileName="logs/app.log" immediateFlush="true" filePattern="logs/$${date:yyyy-MM-dd}/app-%d{yyyy-MM-dd}-%i.log.gz"> <ThresholdFilter level="INFO" onMatch="ACCEPT" onMismatch="DENY"/> <JsonTemplateLayout eventTemplateUri="classpath:EcsLayout.json"/> <Policies> <TimeBasedTriggeringPolicy/> <SizeBasedTriggeringPolicy size = "10KB"/> </Policies> <DefaultRolloverStrategy fileIndex="nomax"/> </RollingFile> </Appenders> <Loggers> <Root level="info"> <AppenderRef ref="Console"/> </Root> <Logger name="com.example.log4j2.controller" level="debug" > <AppenderRef ref="MyFile"/> </Logger> </Loggers> </Configuration> -
Call setConfigText through JConsole.
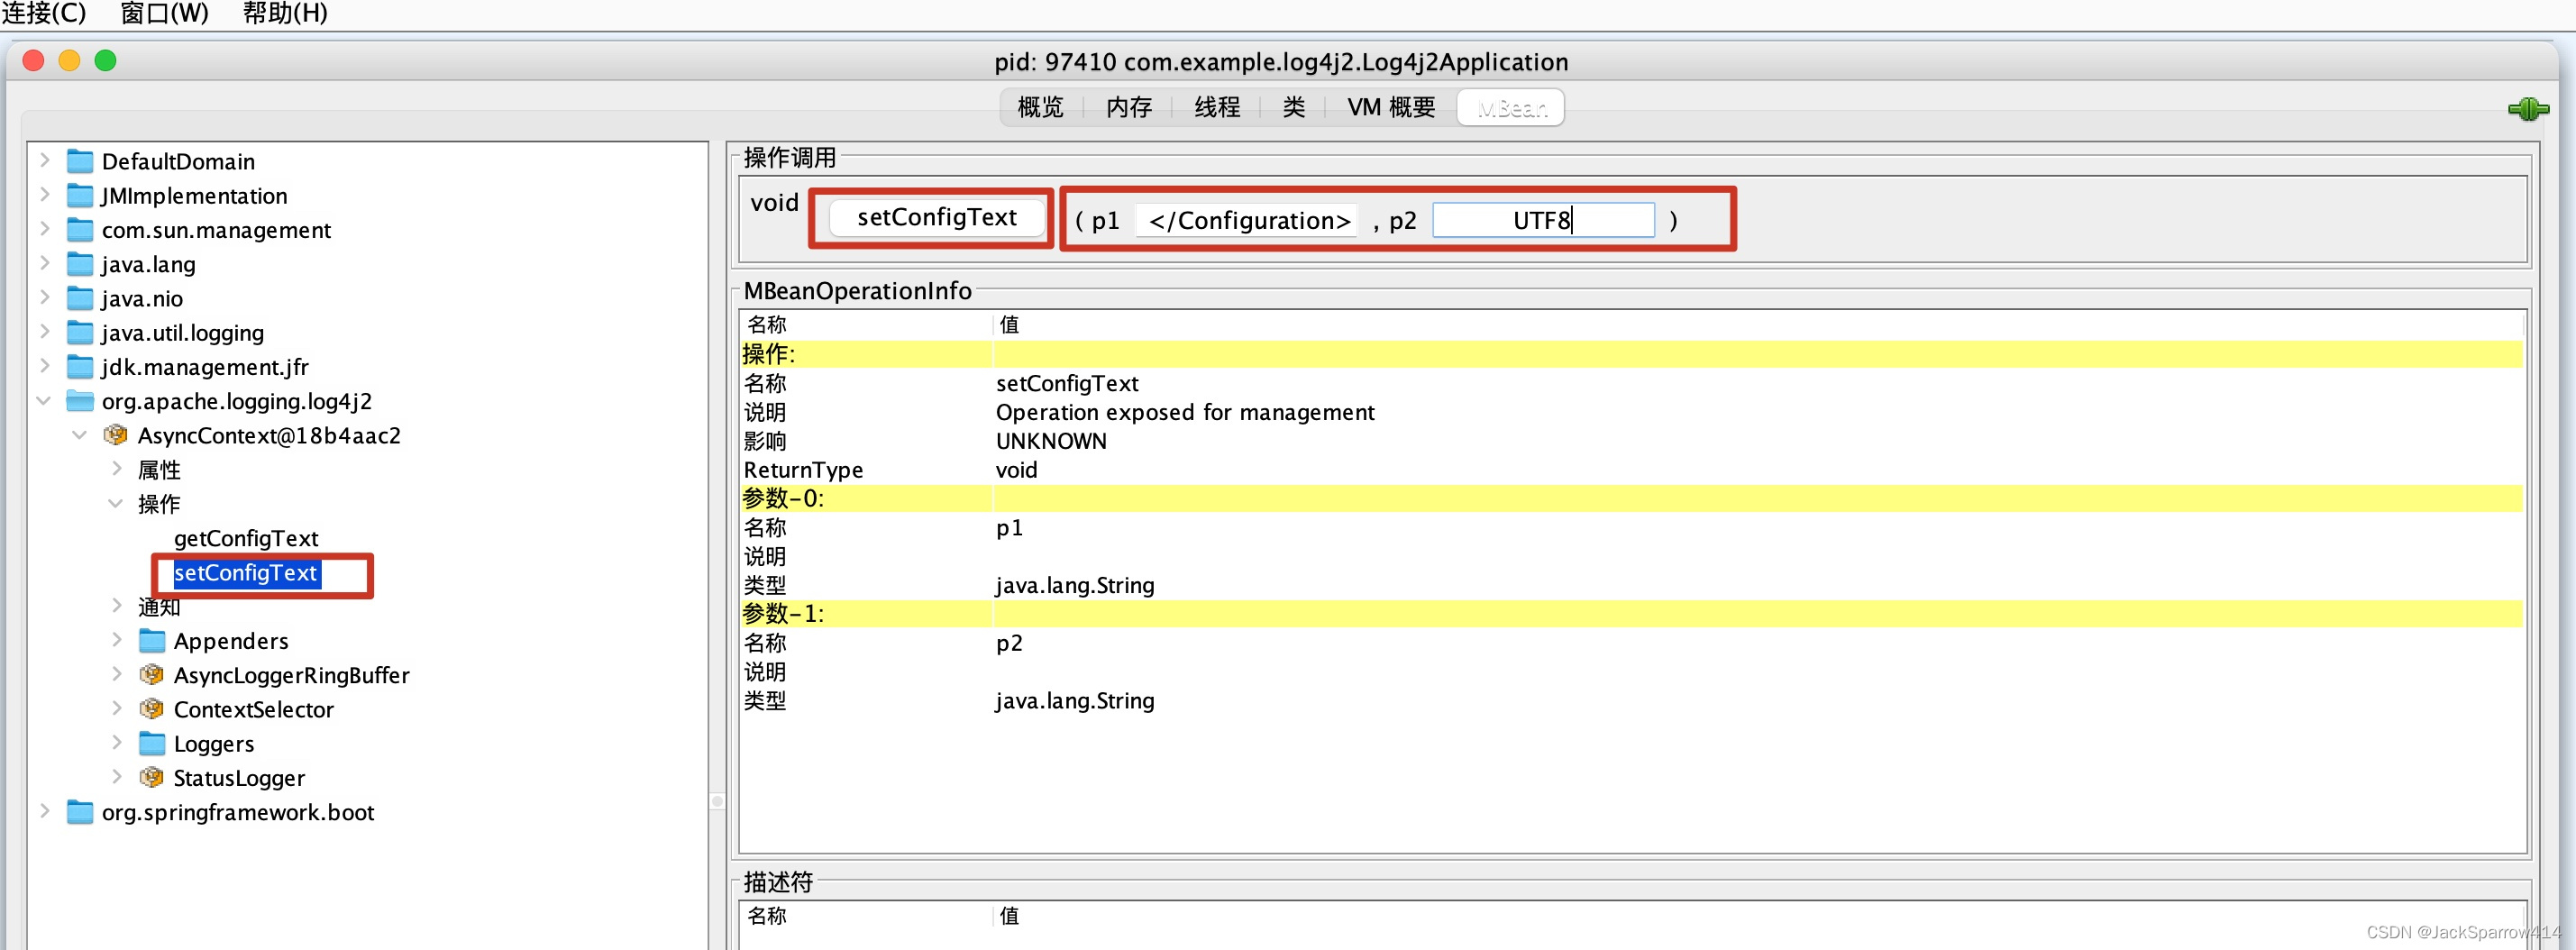
-
Access the application again. DEBUG messages now appear in the logs.
DEBUG com.example.log4j2.controller.LogController - Debug level log message INFO com.example.log4j2.controller.LogController - Info level log message WARN com.example.log4j2.controller.LogController - Warn level log message ERROR com.example.log4j2.controller.LogController - Error level log message -
You can also call getConfigText again to verify that it returns the configuration you just changed.
Using Code and a Web Page
We can change the level of a particular Logger programmatically by having a web page call an HTTP endpoint. The following code comes from the official documentation.
// org.apache.logging.log4j.core.config.Configurator;
Configurator.setLevel("com.example.Foo", Level.DEBUG);

// You can also set the root logger:
Configurator.setRootLevel(Level.DEBUG);
A more detailed discussion of this approach on Stack Overflow
Comparing the Two Approaches
If you only need to adjust logger levels and want a DevOps-friendly approach, I recommend the programmatic option. If you want to change other configuration settings at runtime, I recommend JMX.
Other Resources
- If you are unfamiliar with JMX, see Getting Started with JMX.