Table of contents
Open Table of contents
- Getting Started with React (Part 1): Building a Basic Application
Getting Started with React (Part 1): Building a Basic Application
Development Environment Setup
nvm
nvm stands for Node Version Manager, a tool for managing Node.js.
Strong recommendation: use nvm to manage Node.js versions so that you can install multiple versions locally and switch between them conveniently.
Installation
brew install nvmChecking the Installation
nvm -vDetailed Help
nvm helpnpm
npm stands for Node Package Manager and manages JavaScript packages. Backend developers can think of it as somewhat similar to Maven, although Maven has a broader role, including packaging.
Installation
Install the latest LTS (Long Term Support) version of Node.js through nvm.
nvm install --ltsYou can find that command with:
nvm helpChecking the Installation
node -v
npm -v
WebStrom
Use WebStorm as the development tool.
Building the Application
Initializing the Application
-
Create the application root directory and initialize a Git repository.
mkdir badminton-community git init -
Create .gitignore with the following contents.
vim .gitignorenode_modules dist *.iml *.xml .idea/ -
Run npm init in the application root.
npm initFill in the prompts. If unsure, press Enter to accept each default.
A package.json file then appears in the root directory.
-
Create public and src directories under the root.
mkdir public
mkdir src
public contains static assets and index.html, the page React uses to render our application.
src contains the code we write for the React application.
-
Create index.html inside public with the following contents.
cd public
vim index.html
<!-- sourced from https://raw.githubusercontent.com/reactjs/reactjs.org/master/static/html/single-file-example.html --> <!DOCTYPE html> <html> <head> <meta charset="UTF-8" /> <meta name="viewport" content="width=device-width, initial-scale=1, shrink-to-fit=no" /> <title>React Starter</title> </head> <body> <div id="root"></div> <noscript> You need to enable JavaScript to run this app. </noscript> <script src="../dist/bundle.js"></script> </body> </html>bundle.js is the name of the file produced by Webpack.
Configuring Babel
Babel is a compiler. Its main role is to let newer JavaScript code run in older browsers.
Installing Babel for This Project
Run this in the project root:
npm install @babel/core @babel/cli @babel/preset-env babel-preset-react --save-devpreset-react converts React JSX into JavaScript that browsers can execute.
—save-dev marks these as development dependencies. Without it, they are dependencies required at runtime.
Official npm install documentation
Adding Babel Configuration
The configuration section recommends naming the file babel.config.json.
vim babel.config.jsonContents:
{
  "presets": ["@babel/preset-env", "@babel/preset-react"]
}
See the full Babel documentation for further details.
Configuring Webpack
Webpack is a static module bundler for modern JavaScript applications. Backend developers can think of it as serving a role similar to a Maven packaging plugin.
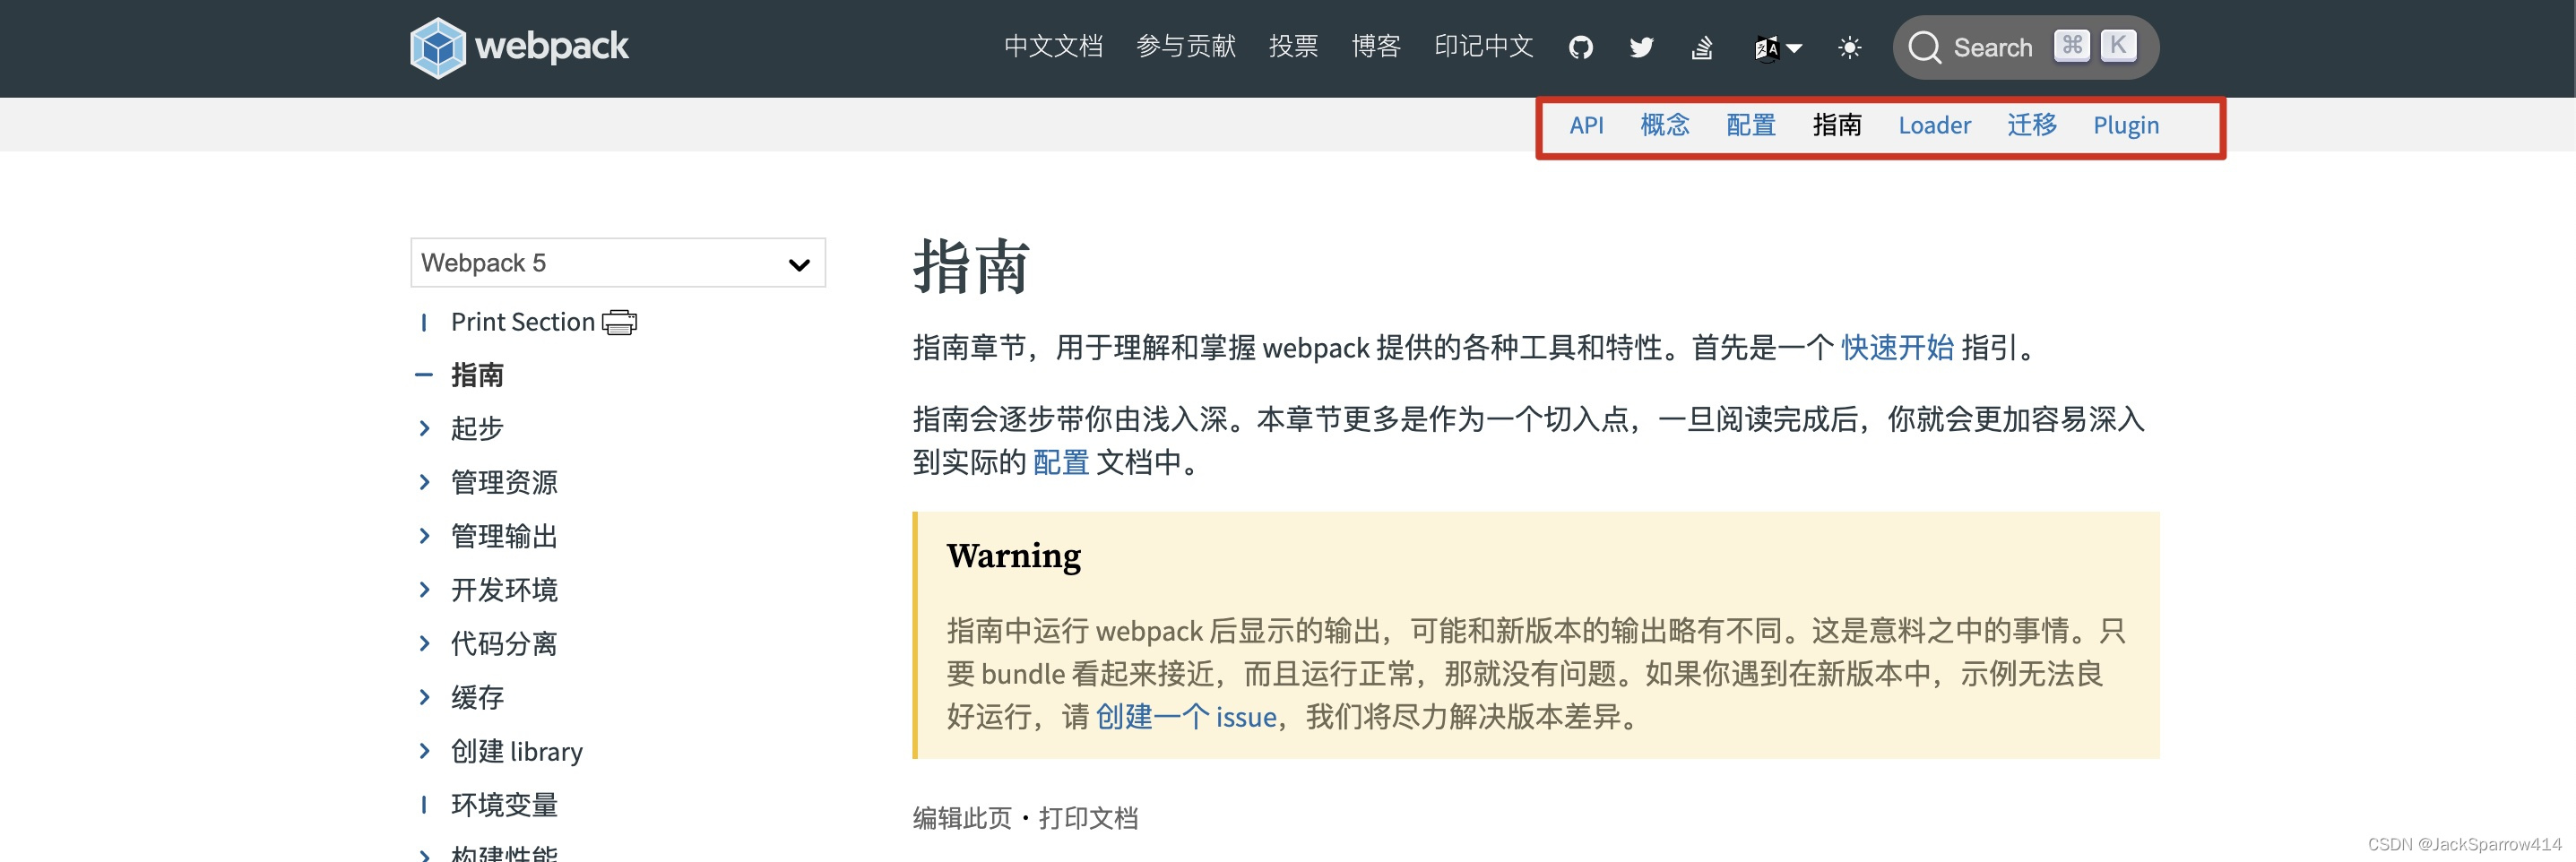
If you are unfamiliar with Webpack, switch between these tabs on its website to quickly find what you need.
Installing Webpack for This Project
npm install webpack webpack-cli webpack-dev-server style-loader css-loader babel-loader html-webpack-plugin --save-devwebpack-dev-server provides a basic web server with live reloading.
Adding Webpack Configuration
Name the file webpack.config.js.
vim webpack.config.jsContents:
const path = require("path");
const webpack = require("webpack");
const HtmlWebpackPlugin = require('html-webpack-plugin');

module.exports = {
  entry: "./src/index.js",
  mode: "development",
  module: {
    rules: [
      {
        test: /\.(js|jsx)$/,
        exclude: /(node_modules|bower_components)/,
        loader: "babel-loader",
        options: { presets: ["@babel/env"] }
      },
      {
        test: /\.css$/,
        use: ["style-loader", "css-loader"]
      }
    ]
  },
  resolve: { extensions: ["*", ".js", ".jsx"] },
  output: {
    path: path.resolve(__dirname, "dist/"),
    publicPath: "/dist/",
    filename: "bundle.js"
  },
  devServer: {
    server: 'http',
    port: 3000,
    host: "local-ipv4",
    hot: true,
    open: true,
  },
  plugins: [
    new webpack.HotModuleReplacementPlugin(),
    new HtmlWebpackPlugin({
      template: 'public/index.html',
    }),
  ]
};
Find the meaning and usage of each option in the tabs highlighted in the screenshot. For example, devServer is under Configuration, plugins under Plugins, and style-loader and similar tools under Loaders. I will not explain them in detail here.
Writing React Code
Installing React
Run this in the project root:
npm install react react-dom react-hot-loaderCreating index.js in src
vim index.jsContents:
import React from "react";
import ReactDOM from "react-dom";
import App from "./App.js";
ReactDOM.render(<App />, document.getElementById("root"));
These lines specify the DOM node where our React application is mounted: the node with id root in the index.html we just created.
ReactDOM.render is a function that tells React what to render and where to render it. Here, it renders a component called App at the DOM node whose ID is root.
Creating App.js in src
vim App.jsContents:
import React, { Component} from "react";
import { hot } from "react-hot-loader";
import "./App.css";

class App extends Component{
  render(){
    return(
      <div className="App">
        <h1> Hello, World! </h1>
      </div>
    );
  }
}

export default hot(module)(App);
react-hot-loader recompiles automatically when we modify the code.
Creating App.css in src
vim App.cssContents:
.App {
  margin: 1rem;
  font-family: Arial, Helvetica, sans-serif;
}
Starting the Application
The code above completes a basic application. Use webpack-dev-server to start and serve it.
Add this to scripts in package.json:
"start": "webpack-dev-server --mode development",Run:
npm run startThe browser opens automatically after successful startup.

Bundling
Configure html-webpack-plugin in webpack.config.js. We already did that above, so only one command needs adding here.
Add this to scripts in package.json:
"build": "webpack --mode development",Run:
npm run buildA dist directory appears in the project root, containing index.html and bundle.js.
Project Structure
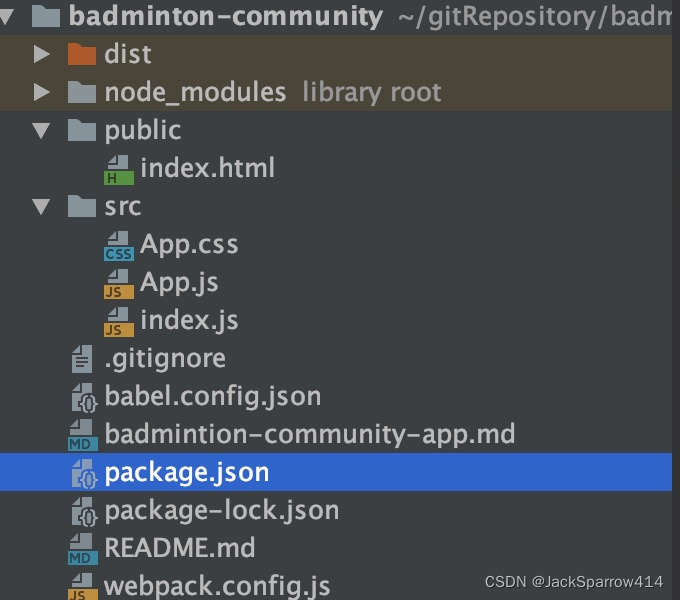
Project Repository
Further Questions
You may want to ask:
- How do bundle.js and index.html work together? It seems magical.
- Why can the bundle.js produced by Webpack run in a browser?
- What is the difference between package.json and package-lock.json? / What does package-lock.json do?
Please search online for these kinds of questions. I am not a frontend specialist and do not know how to answer them properly. I know how to use the tools, but I do not understand all the underlying frontend principles.