Table of contents
Open Table of contents
Getting Started with React (Part 2): Sending Requests and Mocking Data
The previous article built a simple form but did not cover sending requests from the frontend to the backend or handling the form after a response arrives. This article completes that part.
Preparing the Environment
Install axios, qs, and mockjs in the project root by running:
npm install axios qs mockjsCheck the console for errors.
Note: if npm install reports errors, resolve them before proceeding.
Sending Requests
axios
Axios is somewhat like AJAX. It is a promise-based HTTP library for browsers and Node.js, as described in the Chinese Axios guide.
Create an api folder under src to handle all calls to backend APIs. For project structure and setup, see Part 1 of this series.
mkdir apiA basic call looks like this:
axios.request({
  url: 'method url',
  method: 'POST GET DELETE PUT',
  header: {'Content-Type': 'application/json'},
  data: requestData,
  responseType: 'json'
}).then(response => {
  retrun response.data
}).catch(error => {
  error.message
})
For other forms of usage, see the official documentation, which explains them in detail.
A Shared Instance
Use one Axios instance for all backend API requests. This instance can configure a common URL prefix for every request.
Create request.js in the api folder. For now, its contents are:
import axios from "axios";
const service = axios.create({
  baseURL: "http://localhost:8081/badminton-community",
});
export default service;
Axios also supports request and response interceptors, but I have not added them here. Our current feature only needs a baseUrl. Introducing too many concepts would obscure the main idea of this article; I will explain interceptors later when we need them.
Individual API Requests
Create loginForm.js in the api folder to handle requests from the LoginForm component.
Our current scenario is:
- Fill in the form and validate the data.
- Click the login button to send a request.
We need to send that request and receive the response data. The file contents are:
import service from "./request";
import responseData from "../mocks/loginFormData";
const qs = require("qs");
export const login = loginFormData => {
  console.log("api---------------->");
  return service
    .request({
      url: "/login",
      method: "POST",
      headers: { "Content-Type": "application/x-www-form-urlencoded" },
      data: qs.stringify(loginFormData),
      responseType: "json",
    })
    .then(response => {
      console.log(response.data);
      // Return the data.
      return response.data;
    })
    .catch(error => {
      error.message;
    });
};
First import the shared Axios instance.
Then define a login function whose parameter is named loginFormData. Backend developers unfamiliar with arrow functions should read this frontend syntax guide. Its explanations are clear and its examples easy to understand.
-
We use qs to serialize the data.
-
Notice that I return data inside response and also return the Axios call. Why write it this way?
Axios returns a Promise and runs asynchronously. We need to return the received data from the asynchronous response handler so that later processing can access it.
For returning data from Axios, see the answers to this Stack Overflow question. They should make this clearer.
Calling the API Function from a Component
Now that we have a function for making the API call, we need to connect it to the component logic so the page responds accordingly.
Return to LoginForm and add response handling in onSubmit.
import { LoadingButton } from "@mui/lab";
import { IconButton, InputAdornment, Stack, TextField } from "@mui/material";
import { Icon } from "@iconify/react";
import eyeFill from "@iconify/icons-eva/eye-fill";
import eyeOffFill from "@iconify/icons-eva/eye-off-fill";
import { useFormik, Form, FormikProvider } from "formik";
import * as Yup from "yup";
import React from "react";
import { useState } from "react";
import { login } from "../../../api/loginForm";
export default function LoginForm() {
  const [showPassword, setShowPassword] = useState(false);
  const handleShowPassword = () => {
    setShowPassword(show => !show);
  };
  // Define validation rules.
  const LoginSchema = Yup.object().shape({
    email: Yup.string()
      .email("Email must be a valid email address")
      .required("Email is required"),
    password: Yup.string().required("Password is required"),
  });
  const formik = useFormik({
    initialValues: {
      email: "",
      password: "",
      remember: true,
    },
    validationSchema: LoginSchema,
    onSubmit: (values, props) => {
      console.log("request-------->");
      login(values).then(data => {
        console.log(data);
        // Set setSubmitting to false after success.
        props.setSubmitting(false);
      });
      console.log("response------->");
    },
  });
  const { errors, touched, values, isSubmitting, handleSubmit, getFieldProps } =
    formik;

  return (
    <FormikProvider value={formik}>
      <Form autoComplete="off" noValidate onSubmit={handleSubmit}>
        <Stack spacing={3}>
          <TextField
            autoComplete="username"
            type="email"
            label="Email Address"
            {...getFieldProps("email")}
            error={Boolean(touched.email && errors.email)}
            helperText={touched.email && errors.email}
          />
          <TextField
            autoComplete="current-password"
            type={showPassword ? "text" : "password"}
            label="Password"
            {...getFieldProps("password")}
            InputProps={{
              endAdornment: (
                <InputAdornment position="end">
                  <IconButton onClick={handleShowPassword} edge="end">
                    <Icon icon={showPassword ? eyeFill : eyeOffFill}></Icon>
                  </IconButton>
                </InputAdornment>
              ),
            }}
            error={Boolean(touched.password && errors.password)}
            helperText={touched.password && errors.password}
          />
        </Stack>
        <LoadingButton
          fullWidth
          size="large"
          type="submit"
          variant="contained"
          // Stop the loading animation when false.
          loading={isSubmitting}
        >
          Login
        </LoadingButton>
      </Form>
    </FormikProvider>
  );
}
The page logic is straightforward:
- Call login in api/loginForm.js from onSubmit to send the request, and put the form into its loading state.
- When the request succeeds, set submitting to false to stop the form’s loading state.
If the form code is unfamiliar, see Using React Form Components.
Mocking Data
At this point, sending the form request and handling the page after the response are complete. We need to verify that the backend call can be made and receives a normal response.
- There is no need to build a real backend application just for this frontend work.
- With separate frontend and backend development, integration does not have to wait until the backend endpoint is ready.
We therefore mock the data on the frontend.
I will not go into the different mock tools here; feel free to explore them if interested. The project is still small, so we will use a simple mocking approach without much complexity.
mockjs
I ultimately chose Mock.js. One frustration so far is that the official documentation has too few examples and lacks an example of a complete workflow. As a backend developer, I found that quite uncomfortable.
Create a mocks folder under src for all mock data.
mkdir mocksCreate loginFormData.js under mocks for the mock response to api/loginForm requests. Its contents are:
const Mock = require("mockjs");
export default Mock.mock(
  "http://localhost:8081/badminton-community/login",
  "post",
  option => {
    // Override mock in this case.
    return Mock.mock({
      code: 200,
      msg: "success",
    });
  }
);Note: a frustrating Mock.js pitfall is that the intercepted method type must be lowercase. I could not find this explained in the official documentation either.
Then import this file in api/loginForm.js.
Verification
Everything is in place. We will verify the flow through browser console output and by checking that the loading animation stops as expected.
npm run startFill in the form, click LOGIN, and observe the console output.
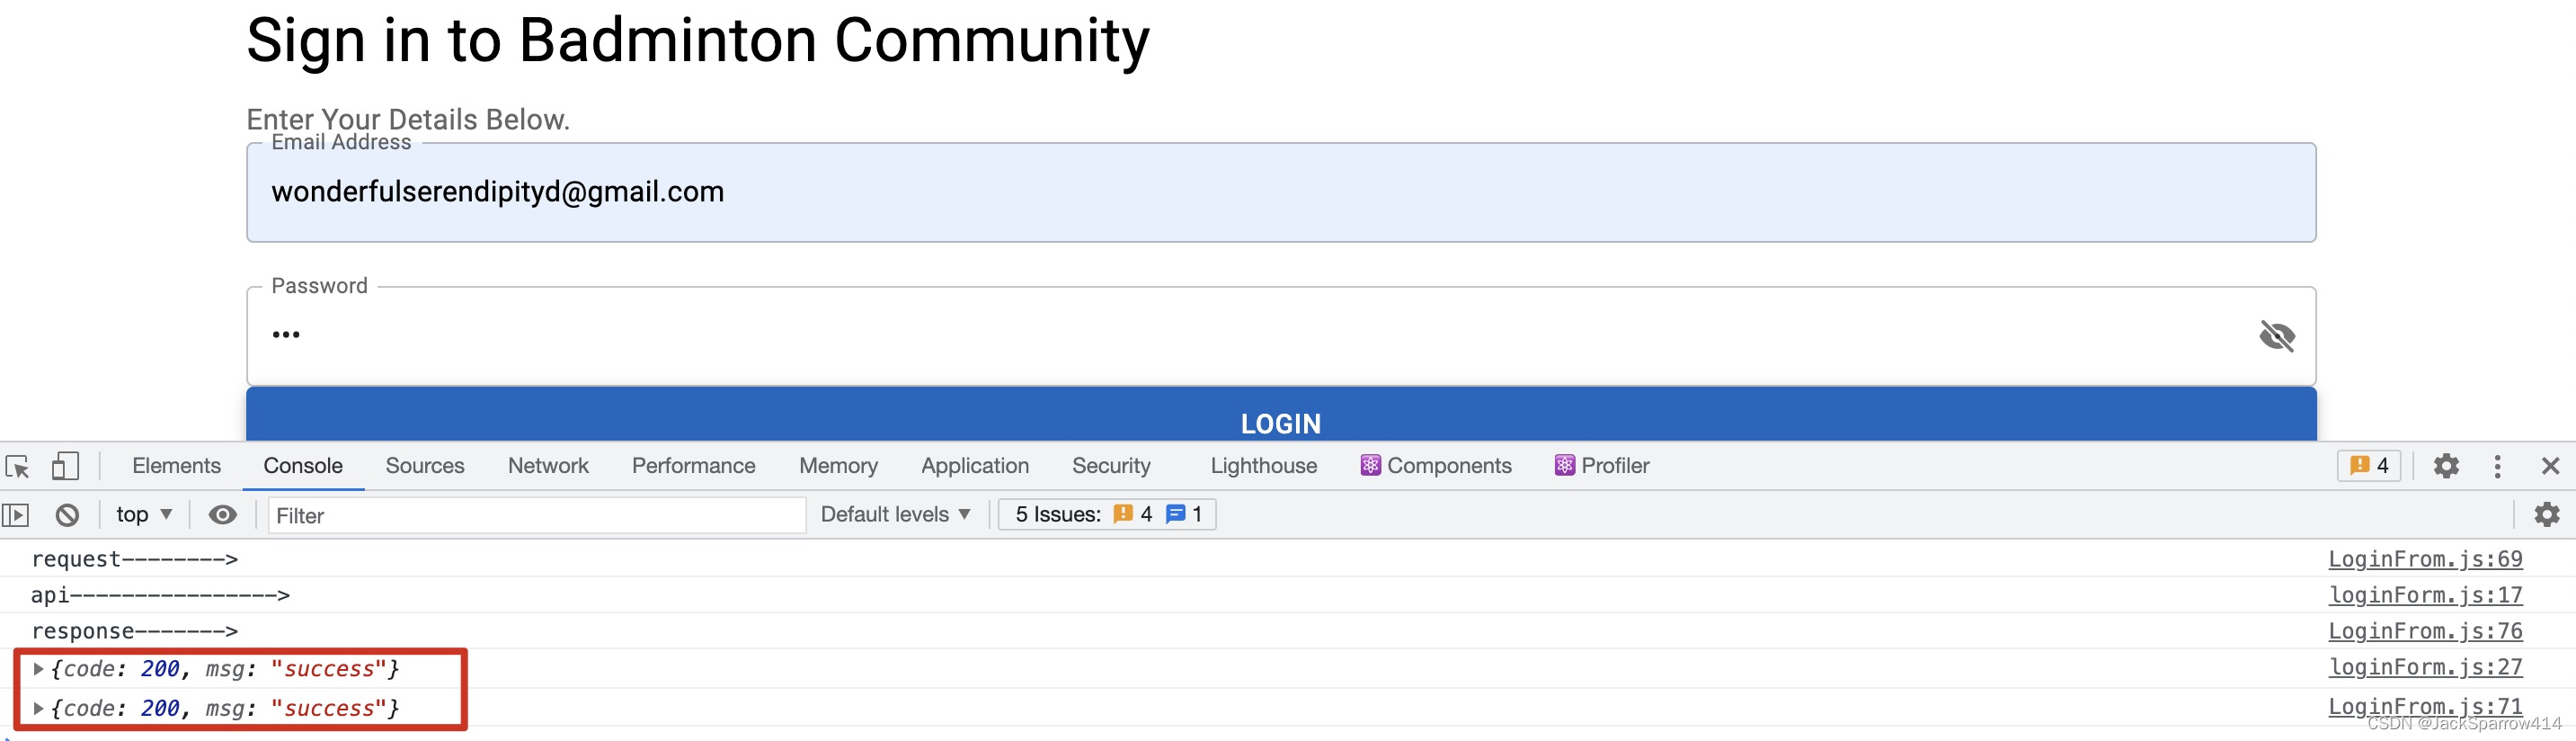
The flow works as expected.
What Comes Next
The form submission flow now works. This establishes a pattern that can also be used for subsequent API requests and mock interception.
After successful form submission, the next step should be entering the Dashboard through routing. The next article will therefore implement routing.