Table of contents
Open Table of contents
Custom Spring Boot Auto-Configuration and Starters
Introduction
In the article on custom Spring Boot properties, we defined properties and configured them in application.yml. Custom properties are often used with auto-configuration. Here we will look at defining our own auto-configuration.
Scenarios
When would we write auto-configuration classes and custom Spring Boot starters?
A large proportion of application development is currently based on Spring Boot.
- An open-source framework needs Spring Boot integration, as with Druid, MyBatis-Plus, or Feign.
- A mature in-house framework needs Spring Boot integration to support more scenarios.
Official Documentation
Spring Boot provides detailed documentation and an example project for custom auto-configuration. Auto-configuration is generally packaged in a spring-boot-starter JAR for others to use.
Project Structure
Framework starters generally follow one of two approaches:
- Framework source and starter are separate. The starter depends on the framework, so users only need the starter dependency rather than adding the framework separately. Alibaba’s Druid data source uses this approach.
- Framework source and starter are not independent in this way. Automatic configuration in a Spring Boot application requires two dependencies: the main framework and its starter. MyBatis-Plus uses this approach.
Here we use the first approach: adding the starter makes all framework features available. The example framework is a small custom project named my-app.
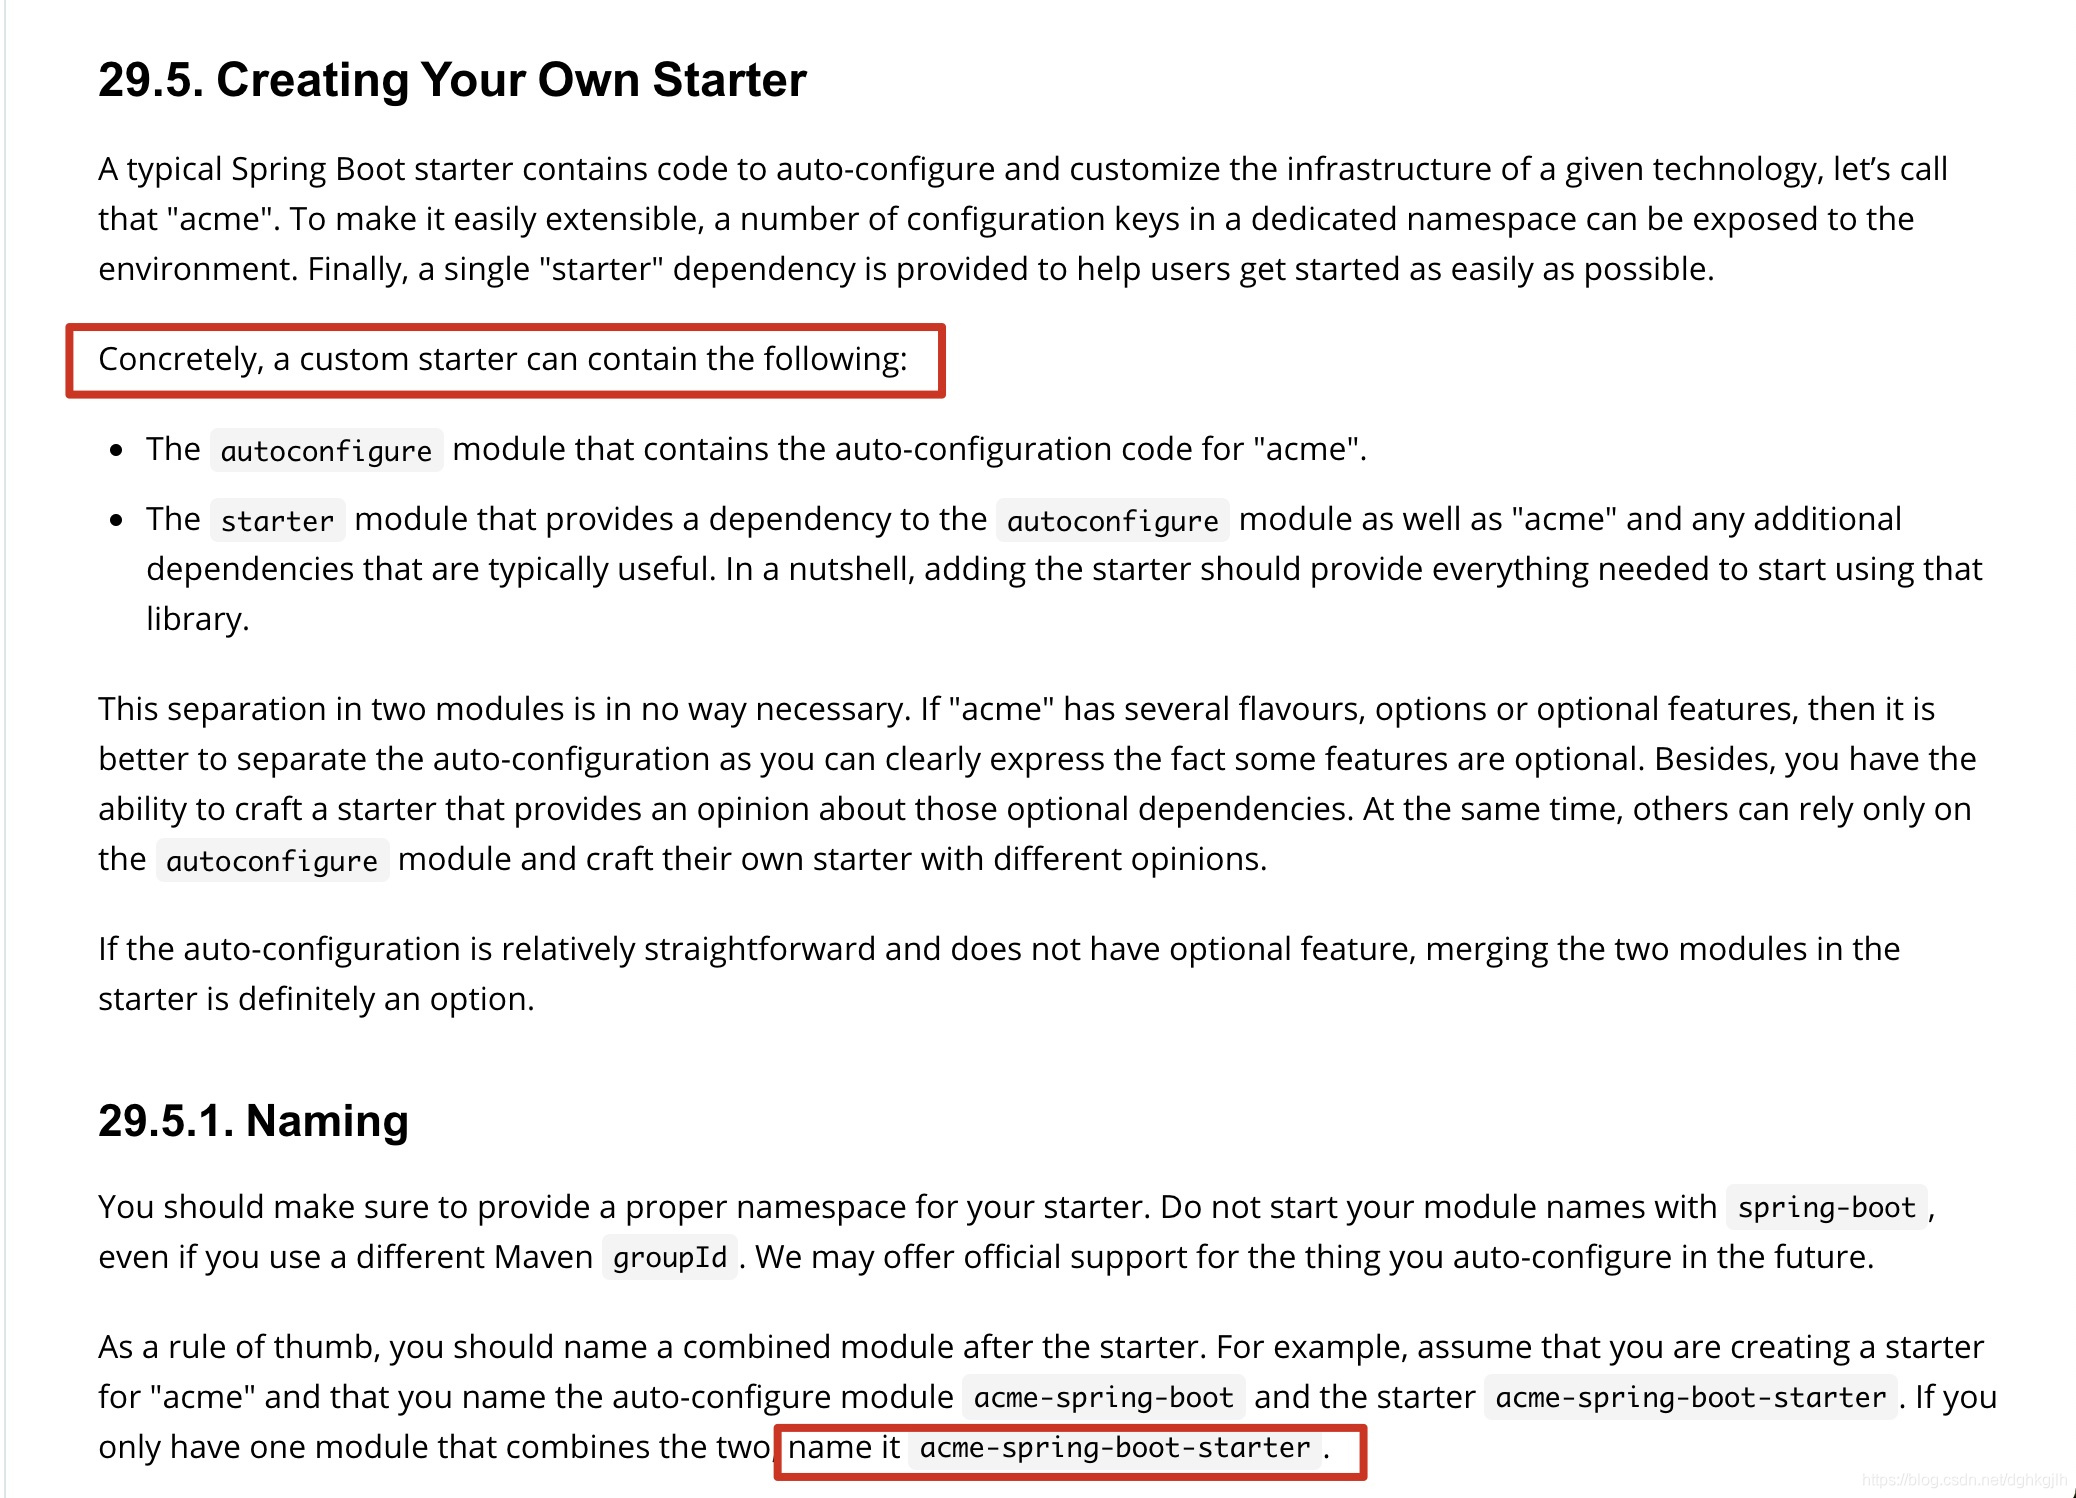
The basic conventions for a standard starter structure are:
-
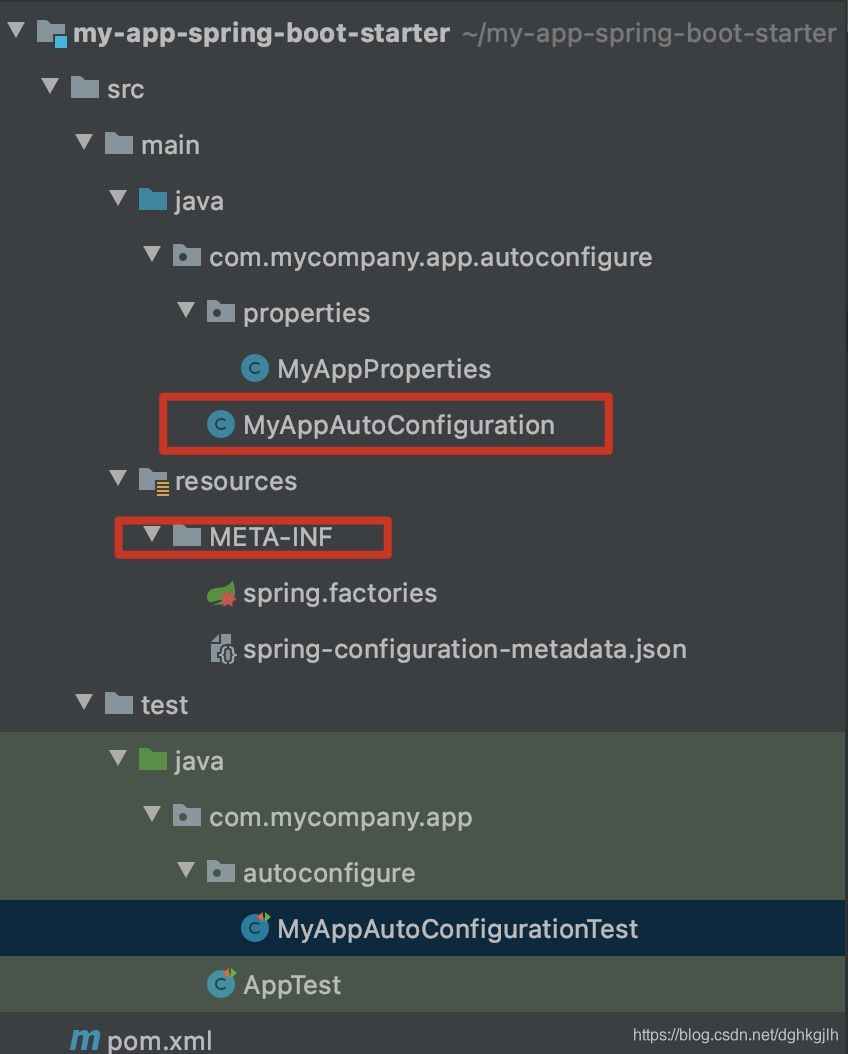
Name the POM artifact framework-spring-boot-starter. Here it is my-app-spring-boot-starter.
-
Include an autoconfigure package in the starter and put auto-configuration classes there.
-
Put other property classes in a subpackage of autoconfigure, with a name of your choice.
-
Create spring.factories under resources/META-INF.
Frameworks generally have configurable properties. For custom properties:
- Create spring-configuration-metadata.json under META-INF.
Implementation
Adding Dependencies
<?xml version="1.0" encoding="UTF-8"?>

<project xmlns="http://maven.apache.org/POM/4.0.0" xmlns:xsi="http://www.w3.org/2001/XMLSchema-instance"
  xsi:schemaLocation="http://maven.apache.org/POM/4.0.0 http://maven.apache.org/xsd/maven-4.0.0.xsd">
  <modelVersion>4.0.0</modelVersion>

  <groupId>com.mycompany.app</groupId>
  <artifactId>my-app-spring-boot-starter</artifactId>
  <version>1.0-SNAPSHOT</version>

  <name>my-app-spring-boot-starter</name>
  <!-- FIXME change it to the project's website -->
  <url>http://www.example.com</url>

  <properties>
    <project.build.sourceEncoding>UTF-8</project.build.sourceEncoding>
    <maven.compiler.source>1.8</maven.compiler.source>
    <maven.compiler.target>1.8</maven.compiler.target>
  </properties>

  <!-- Add the Spring Boot dependency inside dependencyManagement. For import usage, see the Maven article. -->
  <dependencyManagement>
    <dependencies>
      <dependency>
        <groupId>org.springframework.boot</groupId>
        <artifactId>spring-boot-dependencies</artifactId>
        <version>2.3.3.RELEASE</version>
        <type>pom</type>
        <scope>import</scope>
      </dependency>
    </dependencies>
  </dependencyManagement>

  <dependencies>
<!-- Dependency for auto-configuration classes; recommended by the official documentation. -->
    <dependency>
      <groupId>org.springframework.boot</groupId>
      <artifactId>spring-boot-autoconfigure</artifactId>
    </dependency>
<!-- Dependency for custom properties in application.yml. -->
    <dependency>
      <groupId>org.springframework.boot</groupId>
      <artifactId>spring-boot-configuration-processor</artifactId>
    </dependency>
<!-- Add the framework dependency. -->
    <dependency>
      <groupId>com.mycompany.app</groupId>
      <artifactId>my-app</artifactId>
      <version>1.0-SNAPSHOT</version>
    </dependency>
    <!-- Test dependencies. -->
    <dependency>
      <groupId>junit</groupId>
      <artifactId>junit</artifactId>
      <scope>test</scope>
    </dependency>
    <dependency>
      <groupId>org.springframework.boot</groupId>
      <artifactId>spring-boot-starter-test</artifactId>
      <scope>test</scope>
    </dependency>
  </dependencies>

  <build>
      <plugins>
        <!-- Packaging plugin. -->
        <plugin>
          <groupId>org.springframework.boot</groupId>
          <artifactId>spring-boot-maven-plugin</artifactId>
            <version>2.3.3.RELEASE</version>
        </plugin>
      </plugins>
  </build>
</project>
For questions about spring-boot-dependencies in the POM above, see Using Maven.
Writing spring-configuration-metadata.json
Place the file under resources/META-INF.
{
  "groups": [
    {
      "name": "my-app",
      "type": "com.mycompany.app.autoconfigure.properties.MyAppProperties",
      "sourceType": "com.mycompany.app.autoconfigure.properties.MyAppProperties"
    }
  ],
  "properties": [
    {
      "name": "my-app.enabled",
      "type": "java.lang.Boolean",
      "defaultValue": false,
      "sourceType": "com.mycompany.app.autoconfigure.properties.MyAppProperties"
    },
    {
      "name": "my-app.info",
      "type": "java.lang.String",
      "sourceType": "com.mycompany.app.autoconfigure.properties.MyAppProperties"
    }
  ]
}
The custom property metadata mainly consists of groups and properties. For details, see the official documentation.
Creating a Java Class for Custom Property Binding
As mentioned, starter classes belong under autoconfigure. For classes other than auto-configuration classes, create subpackages. Here we create a properties subpackage and a property-binding class named MyAppProperties, annotated with @ConfigurationProperties. prefix specifies the parent name of the properties, corresponding to the groups entry above.
/**
 * @author jacksparrow414
 * @date 2021/2/3
 */
@ConfigurationProperties(prefix = "my-app")
public class MyAppProperties {

    private Boolean enabled;

    private String info;

    public Boolean getEnabled() {
        return enabled;
    }

    public void setEnabled(final Boolean enabled) {
        this.enabled = enabled;
    }

    public String getInfo() {
        return info;
    }

    public void setInfo(final String info) {
        this.info = info;
    }
}
The fully qualified name of this class corresponds to sourceType in the JSON above.
Creating the Auto-Configuration Class
Spring Boot’s @ConditionalXXX annotations are commonly used in auto-configuration classes. See the conditional annotation documentation.
Goal
The goal is to configure automatically when the project includes my-app but the Spring container has no MyAppLog bean.
Java Class
@ConditionalOnProperty(prefix = "my-app", name = "enabled", havingValue = "true", matchIfMissing = false)
@ConditionalOnClass(MyAppLog.class)
@Configuration
@EnableConfigurationProperties(value = {MyAppProperties.class})
public class MyAppAutoConfiguration {

    @ConditionalOnMissingBean(MyAppLog.class)
    @Bean
    public MyAppLog myAppDefaultLog() {
        return new MyAppLogDefaultImpl();
    }
}
This auto-configuration takes effect when my-app.enabled is true.
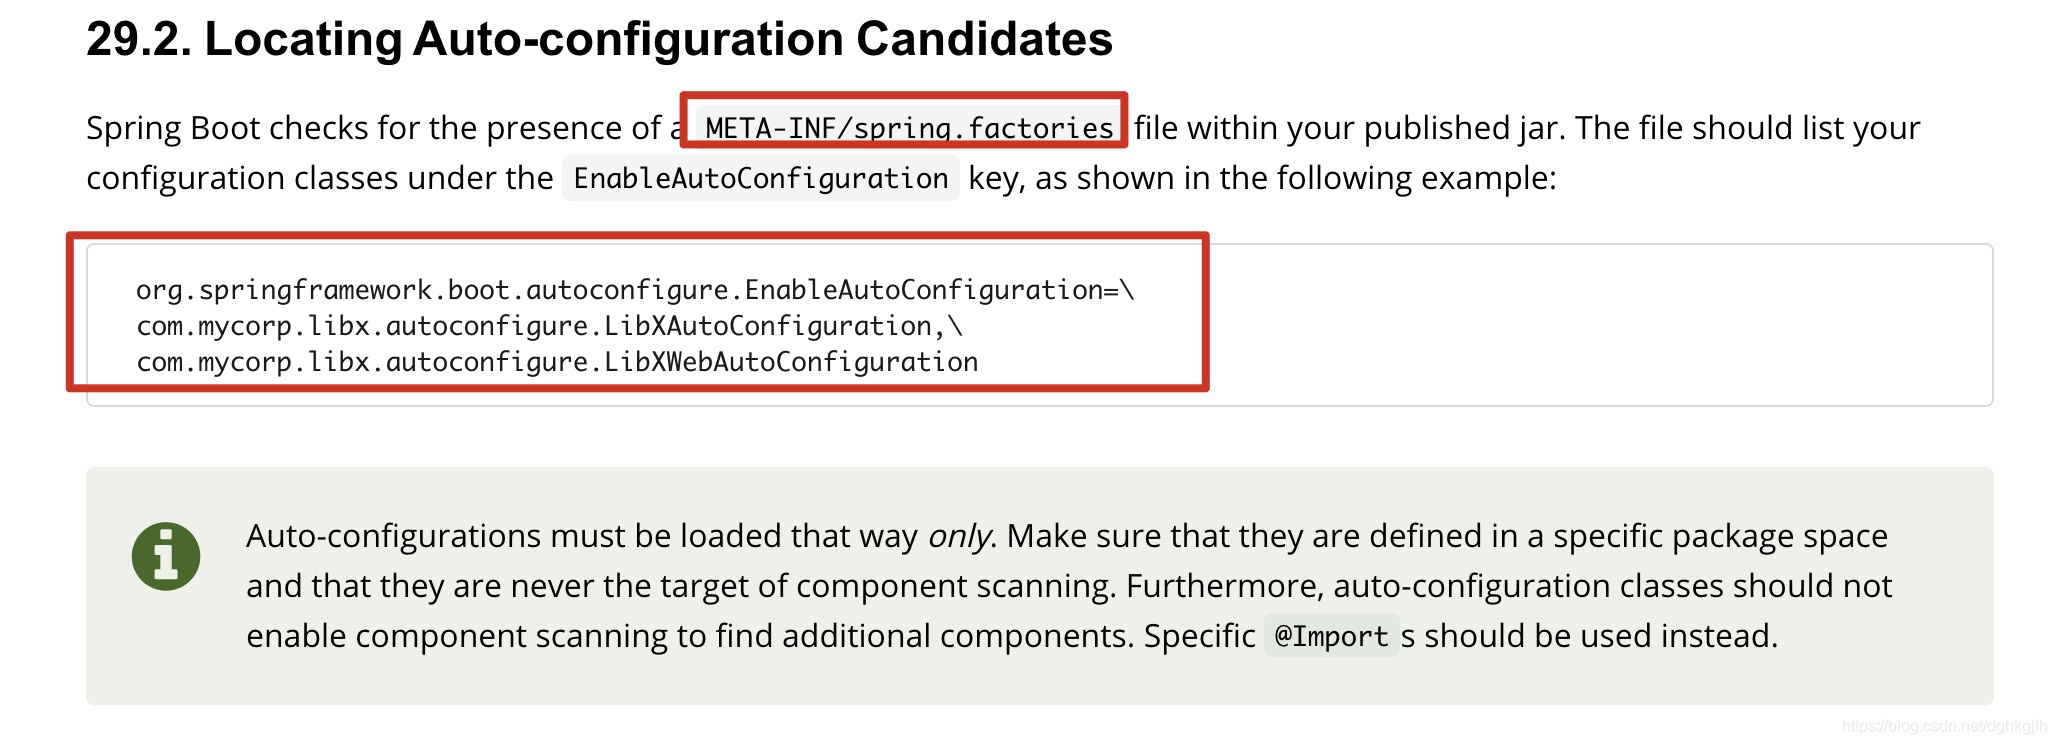
Creating spring.factories
After creating the auto-configuration class, register it in spring.factories. The file format is:
org.springframework.boot.autoconfigure.EnableAutoConfiguration=\
  com.mycompany.app.autoconfigure.MyAppAutoConfiguration
The fully qualified name of Spring Boot’s auto-configuration class = the fully qualified name of the custom auto-configuration class. Separate multiple entries with commas.
Complete Project Structure
Testing
Spring Boot provides ApplicationContextRunner for testing auto-configuration. See the detailed documentation.
The test class is:
public class MyAppAutoConfigurationTest {

    private final ApplicationContextRunner contextRunner = new ApplicationContextRunner();

    @Test
    public void assertMyAppAutoConfiguration() {
        contextRunner
            .withPropertyValues("my-app.enabled=true")
            .withUserConfiguration(MyAppAutoConfiguration.class)
            .run(context -> {
            context.getBean("myAppDefaultLog");
        });
    }
}
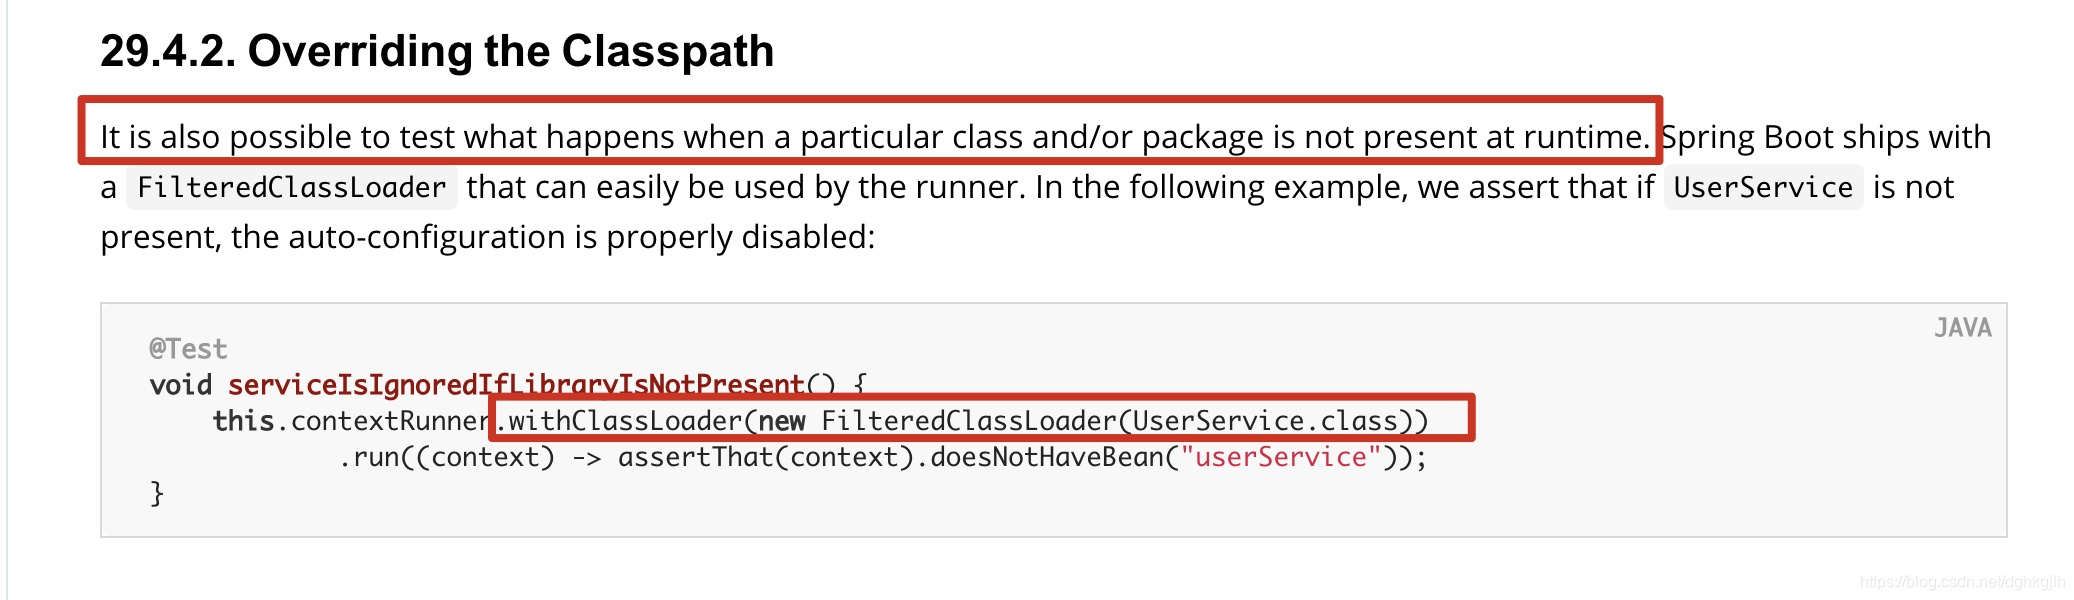
When testing our custom property conditions (@ConditionalOnProperty), use withPropertyValues to supply values. The test will not obtain them merely because they are set in the default application.yml.
For other special annotations such as @ConditionalOnMissingClass, Spring Boot also offers a corresponding testing method, withClassLoader.
Practical Usage
Package my-app-spring-boot-starter and use it in another project.
Adding the Dependency
        <dependency>
            <groupId>com.mycompany.app</groupId>-->
            <artifactId>my-app-spring-boot-starter</artifactId>-->
           <version>1.0-SNAPSHOT</version>-->
        </dependency>
Configuring Properties
Configure application.yml:
my-app:
  enabled: true
  info: "myAppTest"
Starting the Project
Add @EnableAutoConfiguration to the main application class. Newer Spring Boot versions do not require it separately because @SpringBootApplication already includes it.
Start the project. With no externally configured MyAppLog bean, my-app uses its default implementation and prints default Impl.
Overriding Defaults with Custom Configuration
my-app also supports extension: implement MyAppLog and configure it.
@Configuration
@AutoConfigureBefore(MyAppAutoConfiguration.class)
public class CustomMyAppConfiguration {

    @Bean
    public MyAppLog myCustomLog() {
        return new MyCustomLog();
    }
}
This configuration must take effect before auto-configuration. The custom implementation will then be used instead of the default.
Closing
This completes the entire flow: defining custom properties, using them to enable custom auto-configuration, testing it, and using it in an application.
Code Used in the Project
- my-app framework source download.
- my-app-spring-boot-starter source download.
- Usage example in an application.
Usage Notes
Download the source in order, then run the following command for each project in that order:
mvn installThis installs each source project’s dependency locally. Refresh the POMs that reference those dependencies afterward.