Table of contents
Open Table of contents
Learning RabbitMQ and Spring AMQP (Part 5): Delayed Queues
Use Cases
Most online examples of delayed message queues focus on the familiar case of orders that remain unpaid past their deadline. In practice, there are many other uses. In a teaching system, for instance, a teacher may choose when an assignment should be published, and it should only become available at that time. A delayed queue can handle this: the teacher sets the publication time, an assignment-publication event is pushed into the delayed queue, and the assignment is actually released to students when the time arrives.
Preparation
Choosing an Approach
- Most online RabbitMQ delayed-queue solutions use TTL plus a dead-letter queue. Set an expiration time when publishing a message, and send it to a queue with no consumers. When the message expires, it moves to a dead-letter queue monitored by the intended consumer, which then consumes it. This indirectly implements a delayed queue. Search for implementation details yourself; here is one example.
- Another approach uses the RabbitMQ delayed-message plugin.
Here we choose the second approach.
Installing the Plugin
For RabbitMQ plugin documentation, see the official community plugin page. First check whether the required plugin is already installed:
rabbitmq-plugins listIf not, search that page for the plugin you need—for example, delay.
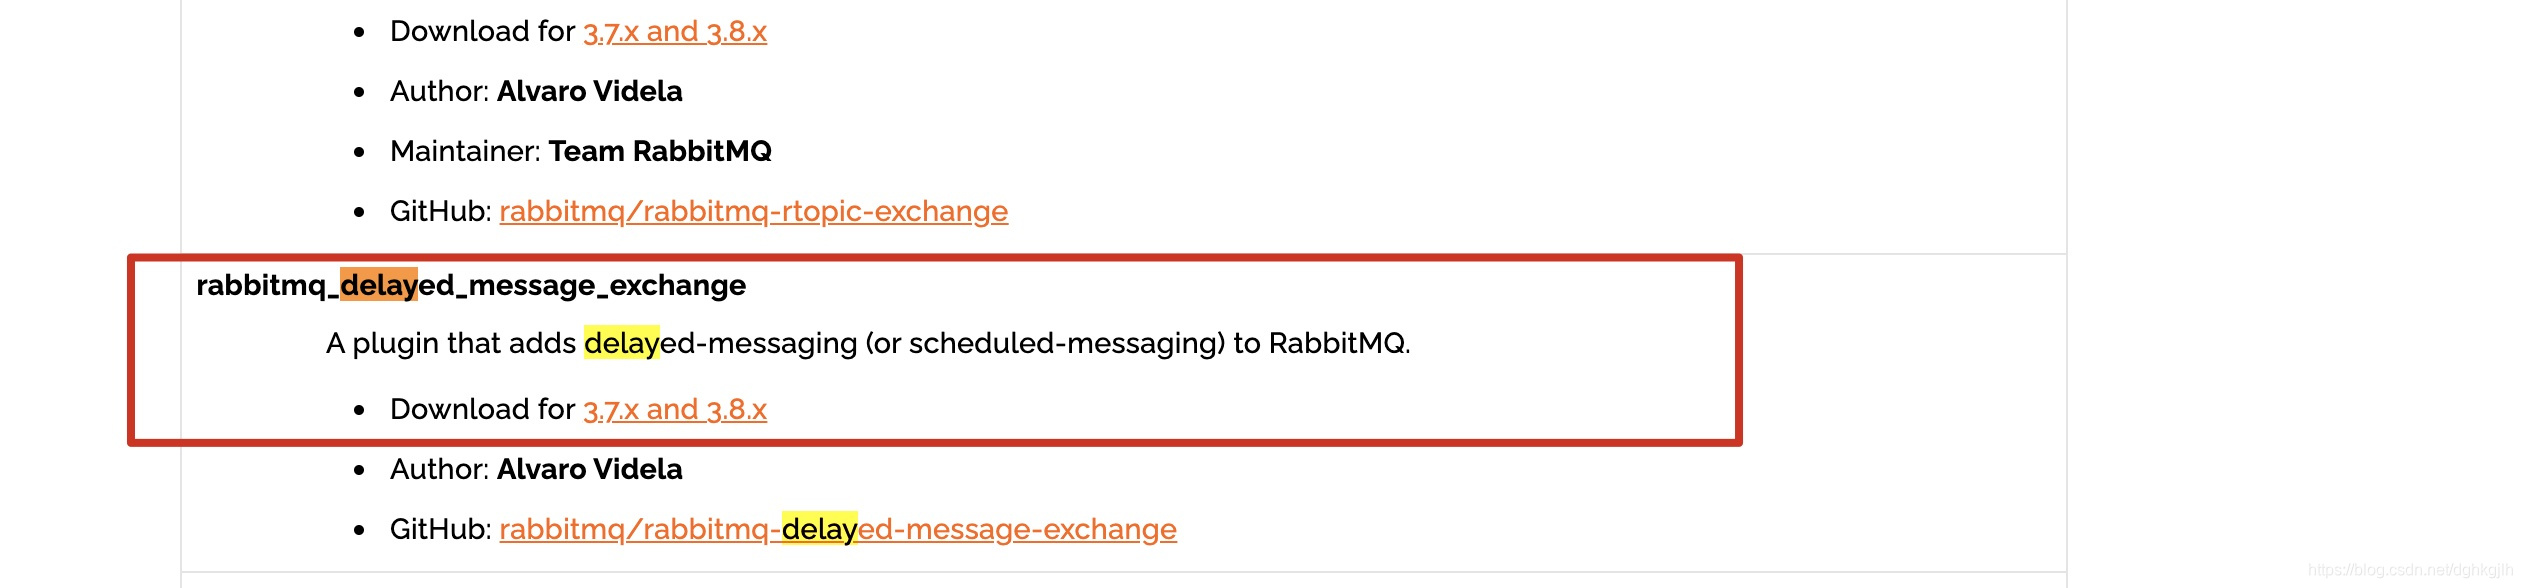
Under download, download the .ez file. Put it in the plugins directory of your RabbitMQ installation. The plugin locations for different operating systems are shown below:
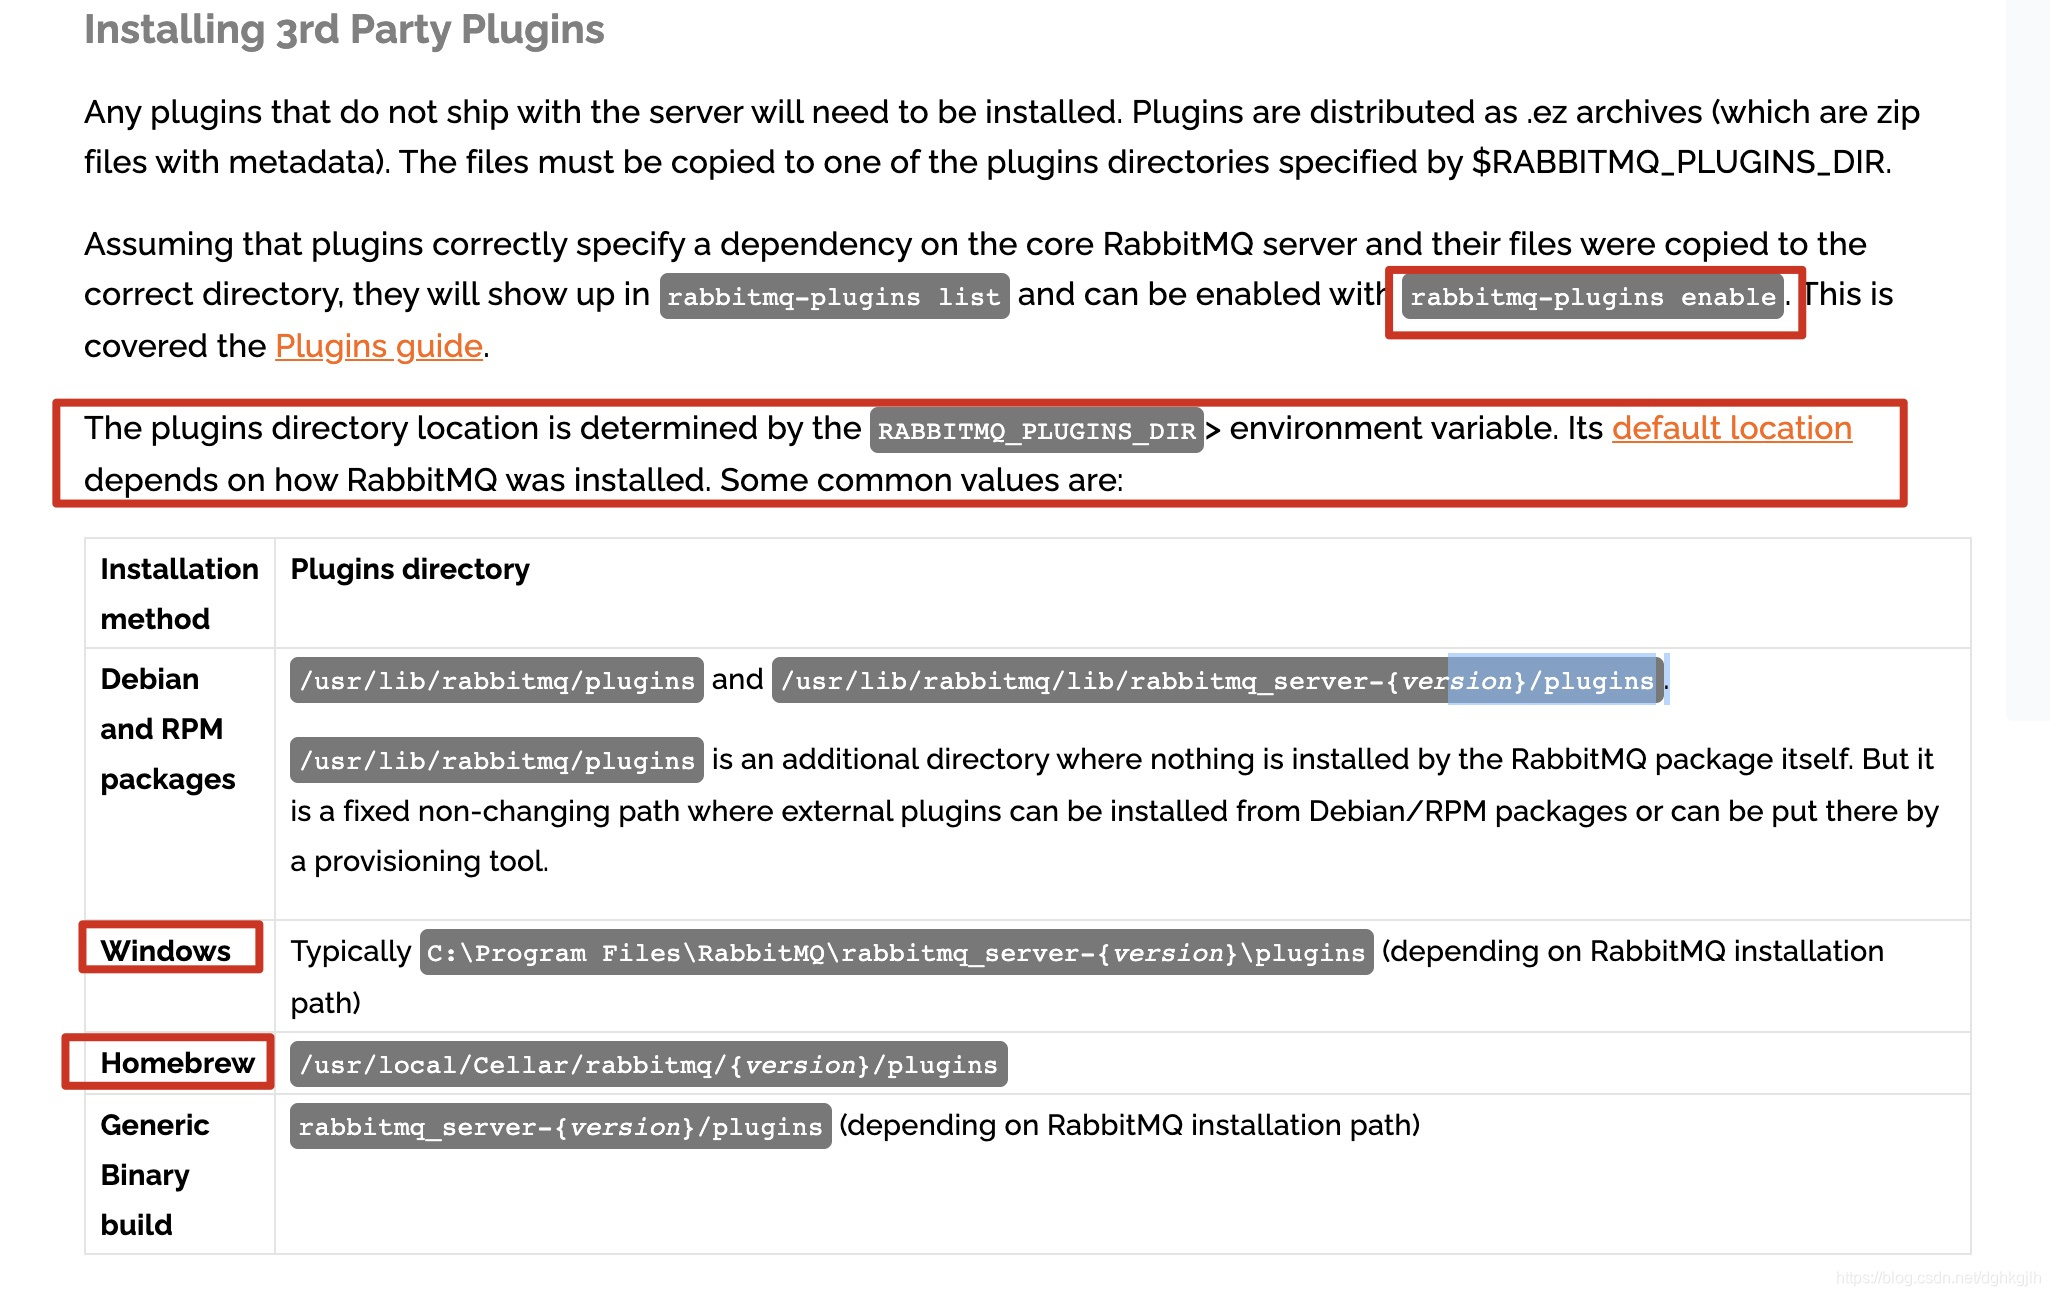
Enable the delayed-message plugin:
rabbitmq-plugins enable rabbitmq_delayed_message_exchangeImplementation
RabbitMQ’s blog post on using this plugin is here.
There are two main steps: declare a delayed exchange, then set a delay when sending messages.
Declare a Delayed Exchange
When declaring the exchange, add the x-delayed-type argument. With RabbitMQ Java Client:
Map<String, Object> args = new HashMap<>();
// The value is the exchange type: topic, direct, fanout, etc.
args.put("x-delayed-type", "topic");
channel.exchangeDeclare("delayExchange", true, false, args);
With Spring AMQP, we do not need to declare it this way. After declaring an exchange of the desired type, set its delayed property to true.
@Configuration
public class DelayExchangeConfig {

    @Bean
    public TopicExchange delayTopicExchange() {
        TopicExchange result = new TopicExchange("delay");
       // Mark this exchange as delayed
        result.setDelayed(true);
        return result;
    }
}
How does Spring AMQP handle this internally?
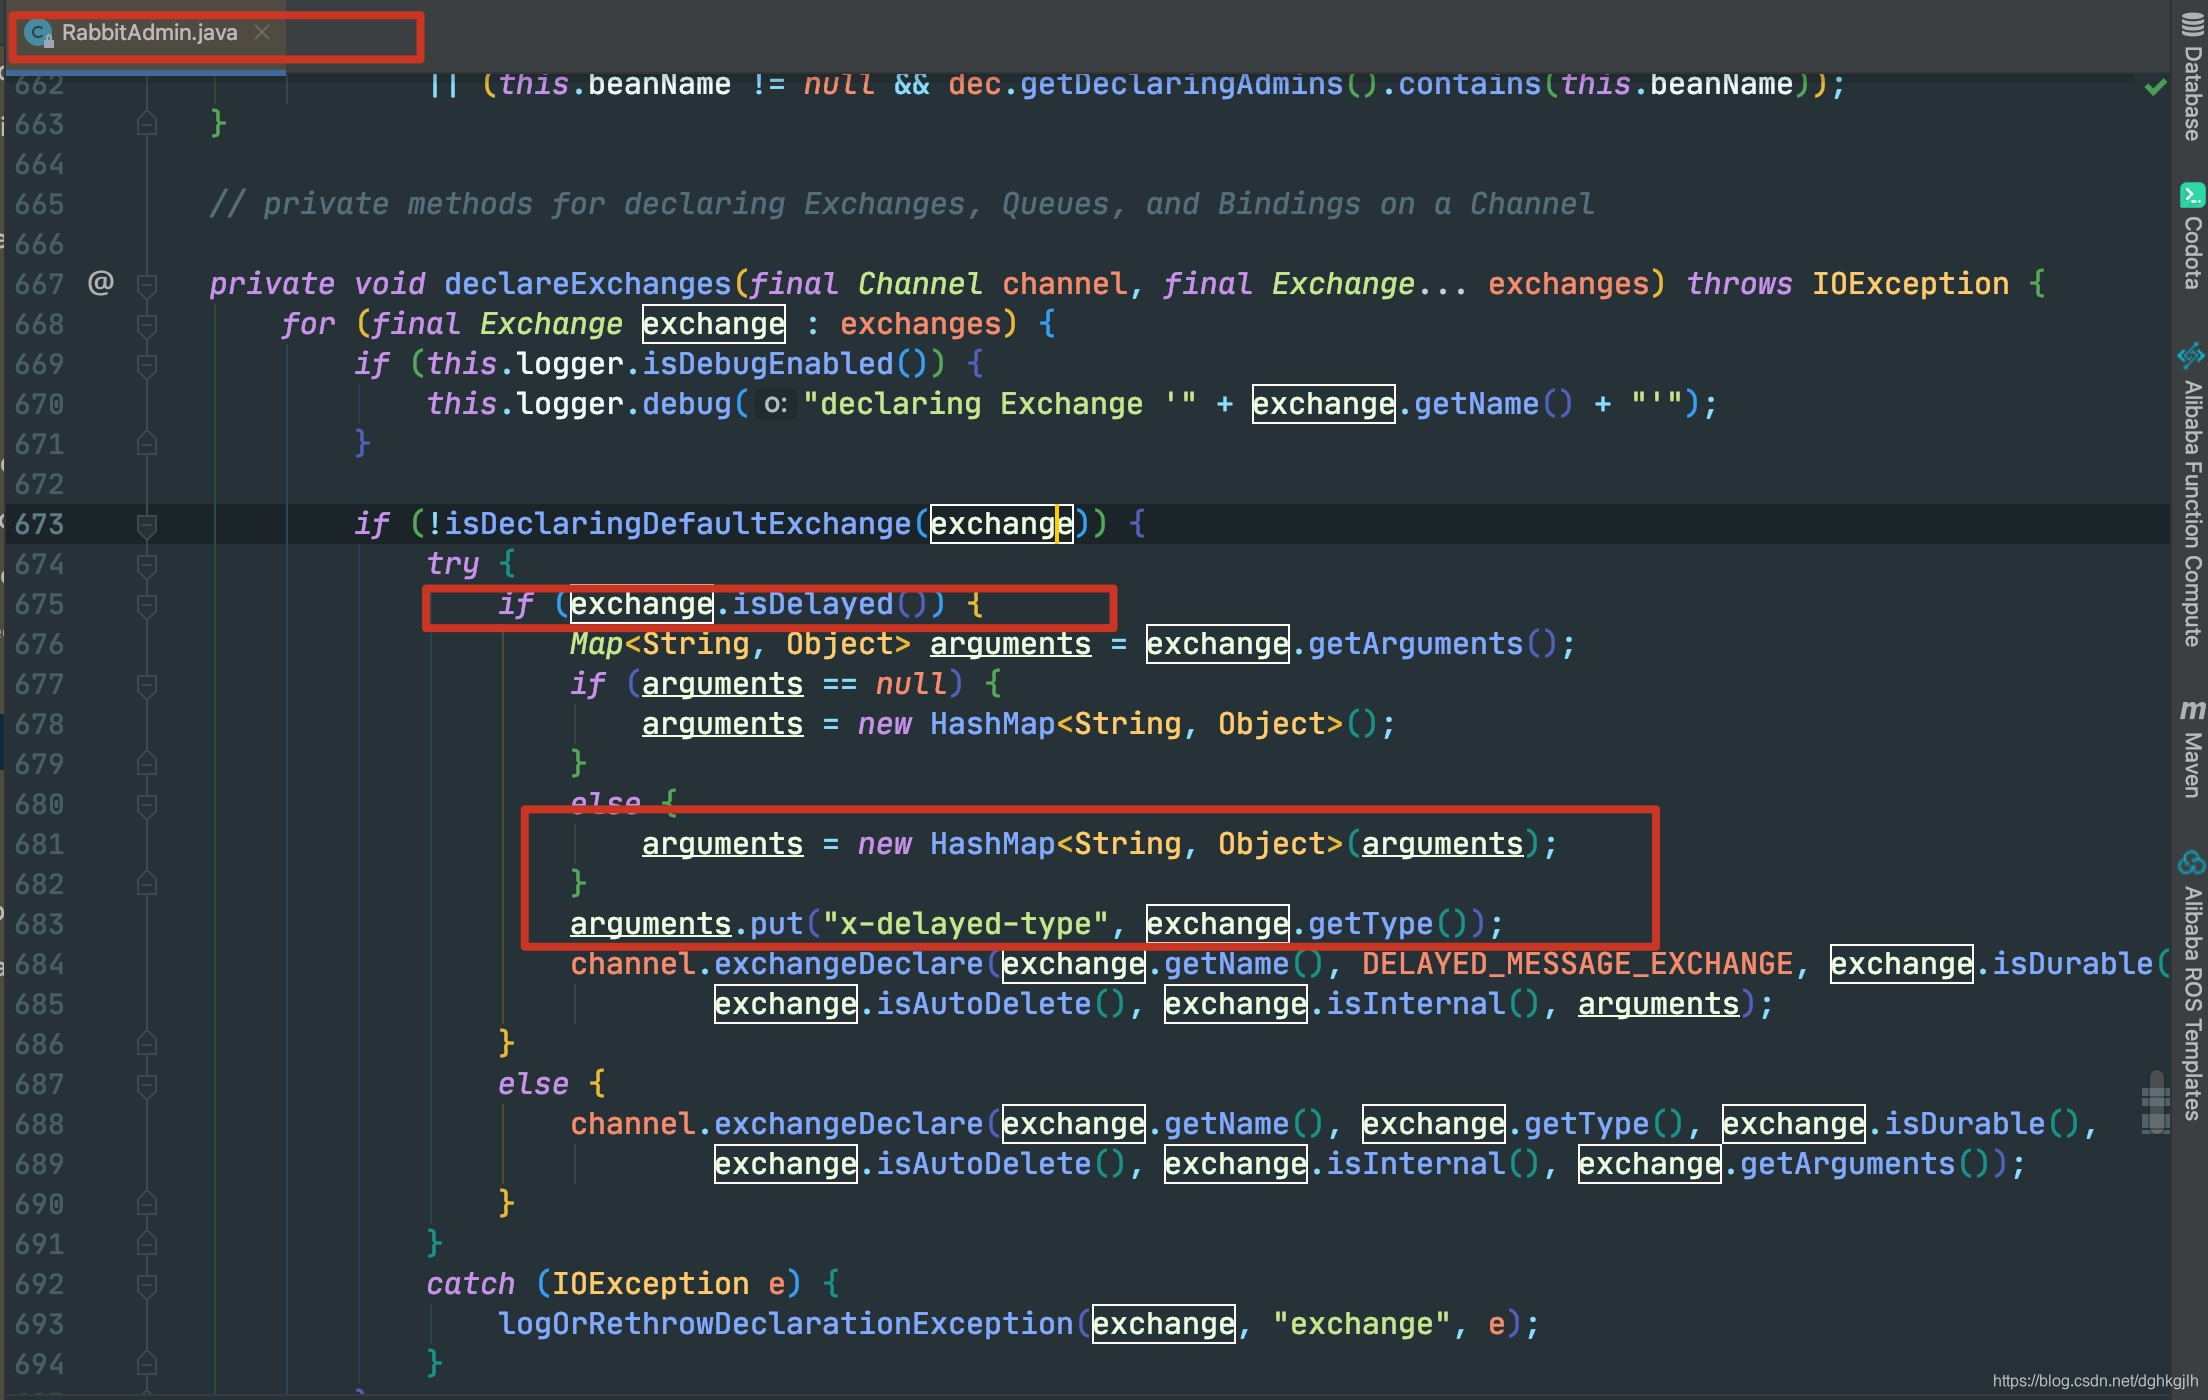
RabbitAdmin checks this when declaring an exchange. The highlighted part simply wraps the Java Client approach above. For when RabbitAdmin declares exchanges and queues, see this article.
Check the Console
After declaring the delayed queue, start the producer and inspect the RabbitMQ console.
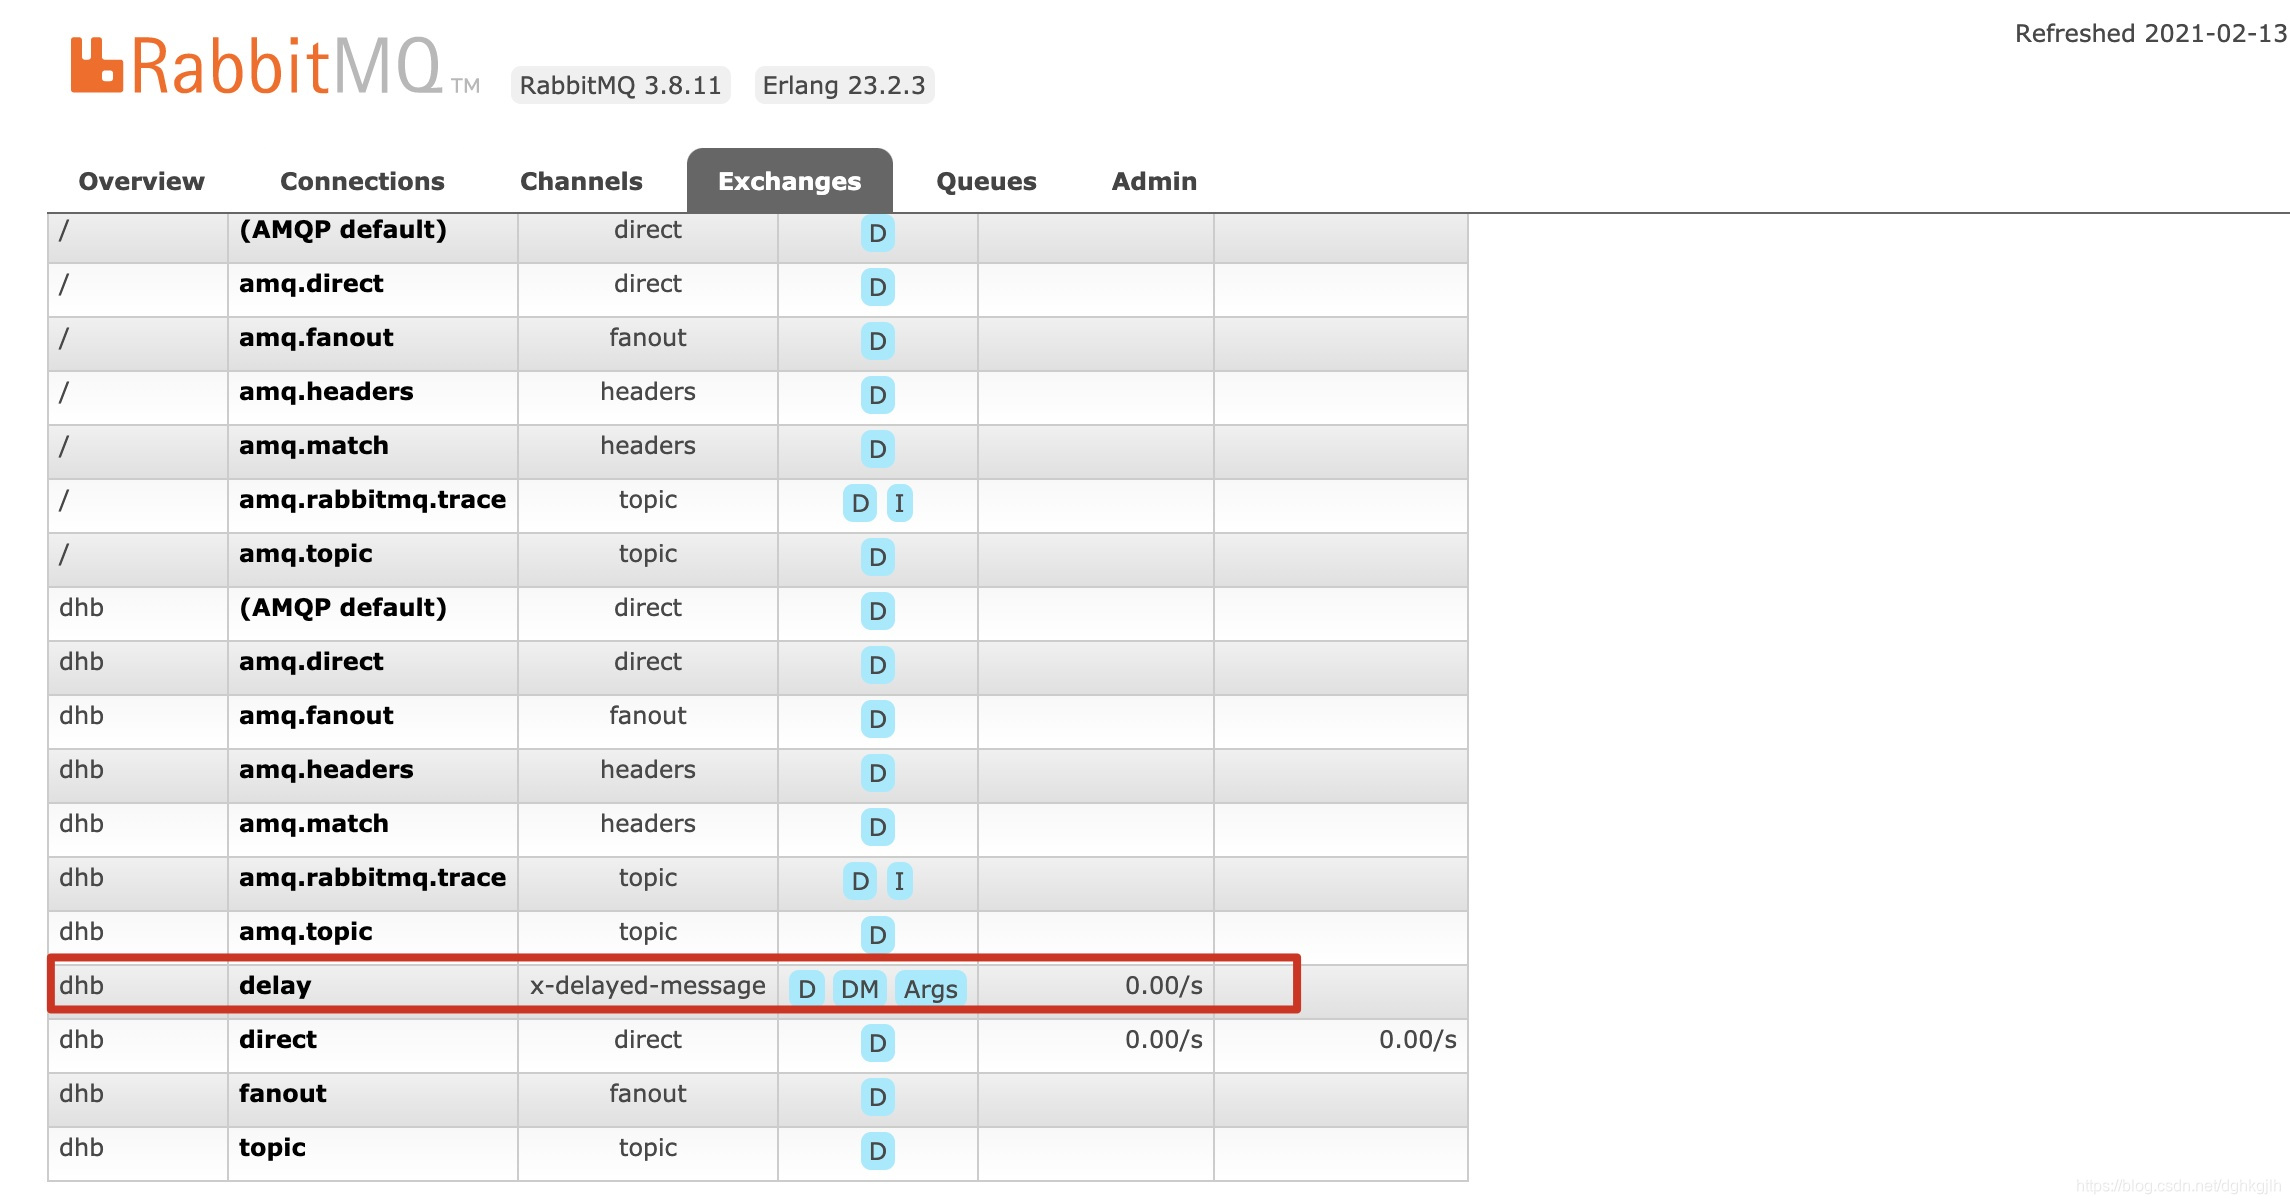
The exchange type has become x-deleayed-message.
Set the Delay When Sending a Message
With RabbitMQ Java Client, add x-delay to the message headers, with its value specifying the delay:
byte[] messageBodyBytes = "delayed payload".getBytes();
AMQP.BasicProperties.Builder props = new AMQP.BasicProperties.Builder();
headers = new HashMap<String, Object>();
headers.put("x-delay", 5000);
props.headers(headers);
channel.basicPublish("delayExchange", "", props.build(), messageBodyBytes);
With Spring AMQP:
After configuring the delayed exchange, specify the message delay when sending. Here is part of the sample code:
public void sendDelayExchange() {
        Message delayMessage = MessageUtils.buildStringMessage("this is delay message", MessageProperties.CONTENT_TYPE_TEXT_PLAIN);
        // Set the message delay when sending
        delayMessage.getMessageProperties().setDelay(10000);
        log.info("Sending delayed message {}, time {}", new String(delayMessage.getBody()), LocalDateTime.now().toString());
        rabbitTemplate.convertAndSend(delayTopicExchange.getName(), "message.delay", delayMessage);
    }
A Simple Verification
The consumer code is not repeated here. Declare a queue, bind it to the delayed exchange, and have the consumer listen to that queue.
After starting the producer and consumer:


With the code above, Spring AMQP automatically adds the x-delay header when sending.
The console now shows:
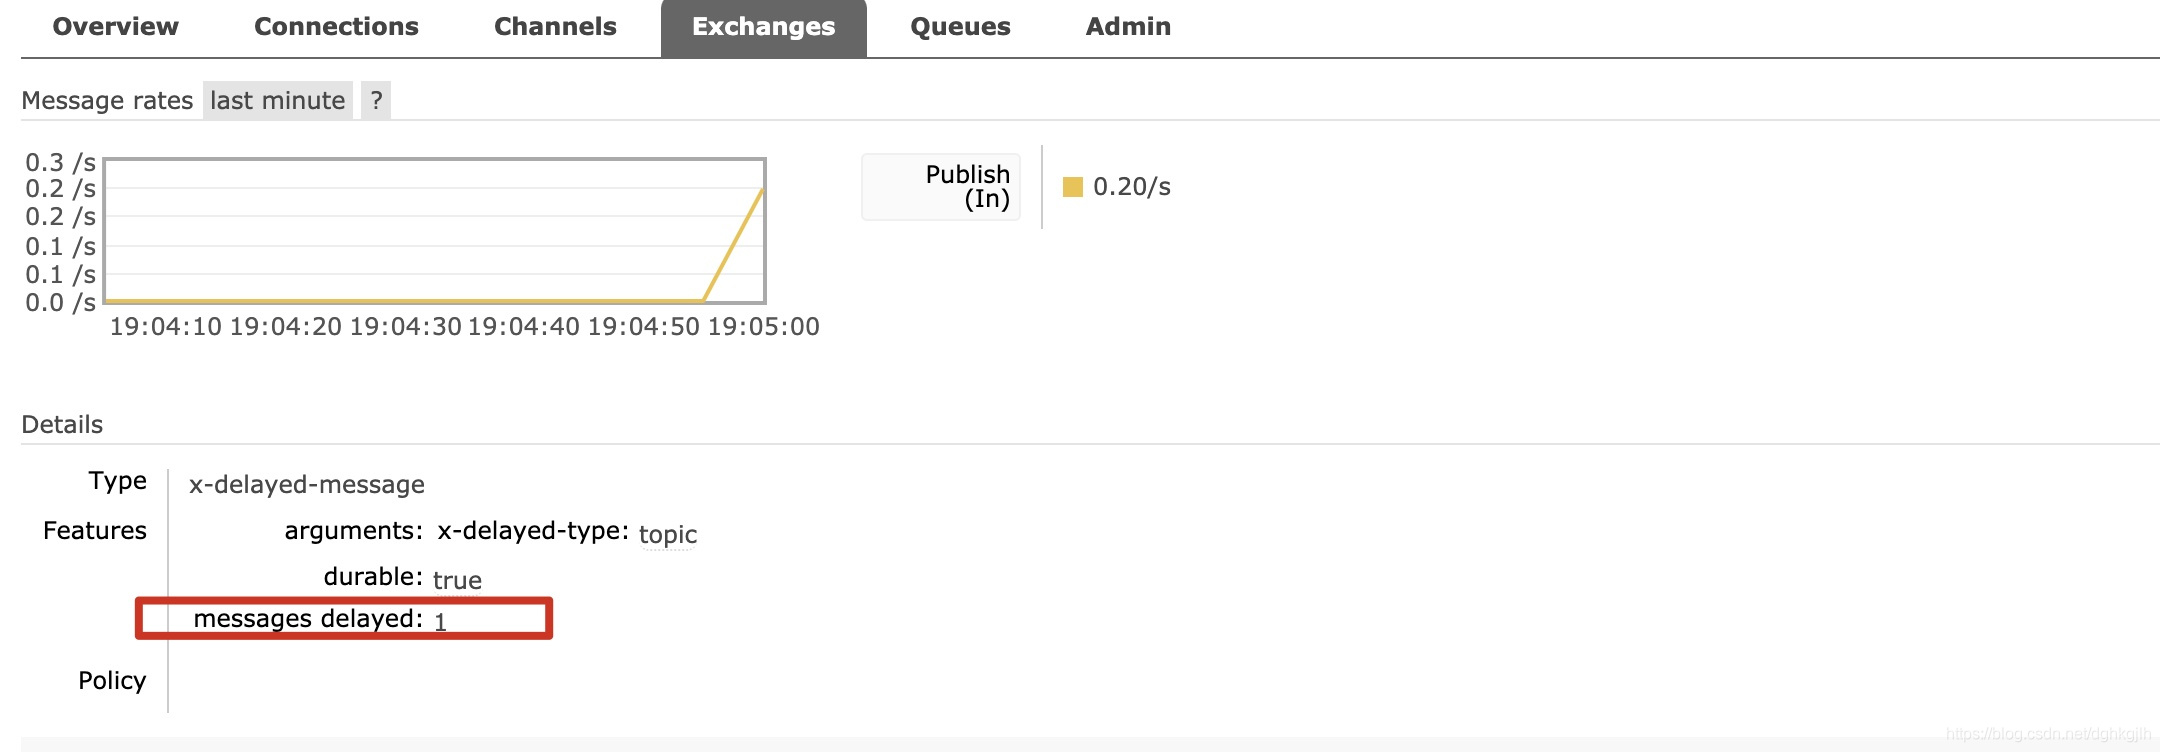 The delayed exchange contains one delayed message. After the delay—10 seconds in this article—the consumer console receives the following:
 The consumer receives the message only after a delay of 10 seconds.