Table of contents
Open Table of contents
Article body
If you are going to do it, do it carefully enough to be proud of your work!
For why to use tokens, see this article.
The approach:
-
Add a filter that validates the token on every request. Login requests can pass through.
-
Configure the filter in Shiro.
Step 1: implement a custom ShiroFilter. Here I extend FormAuthenticationFilter rather than AuthenticatingFilter; I will explain why later.
Get the current User information from Shiro, encrypt it, and compare the result with the token sent by the client to determine whether the token is valid.
public class ShiroFilter extends FormAuthenticationFilter {

    //The encryption string, serving as a signature
    private static final String SINGNATURE_TOKEN = "加密token";

    @Override
    protected boolean isAccessAllowed(ServletRequest request, ServletResponse response, Object mappedValue) {
        //onAccessDenied runs only when this returns false, because
       // return super.isAccessAllowed(request, response, mappedValue);
        return false;
    }

    @Override
    protected boolean onAccessDenied(ServletRequest request, ServletResponse response) throws Exception {

        String token = getRequestToken((HttpServletRequest) request);
        String login = ((HttpServletRequest) request).getServletPath();

        //Allow login requests through.
        if ("/user/login".equals(login)){
            return true;
        }
        if (StringUtils.isBlank(token)){
            System.out.println("No token");
            return false;
        }

        //Get the current user information from Shiro.
        User user = (User) SecurityUtils.getSubject().getPrincipal();
        //Encrypt the current ID using SHA256.
        String encryptionKey= DigestUtils.sha256Hex(SINGNATURE_TOKEN+user.getName());
        if (encryptionKey.equals(token)){
            return true;
        }else{
          System.out.println("Invalid token");
        }
        return false;
    }
    private String getRequestToken(HttpServletRequest request){
        //Get the token from the request header by default.
        String token = request.getHeader("token");
        //If the header contains no token, get it from the request parameters.
        if(StringUtils.isBlank(token)){
            token = request.getParameter("token");
        }
        return token;
    }
}
Explanation:
- Why override isAccessAllowed to return false directly? Looking at the source, you will find that the Shiro filter ultimately executes onPreHandle in AccessControlFilter. That method contains just one line:

All our token validation takes place in onAccessDenied. The expression uses an OR condition, so once isAccessAllowed returns true, onAccessDenied does not execute. Basic knowledge of AND, OR, and NOT makes this easy to understand.
- Why put the main token validation in onAccessDenied rather than isAccessAllowed, which can also return false or true? The source screenshot above makes this clear: if isAccessAllowed performs validation and returns false, onAccessDenied still executes afterward. That method is shown below:
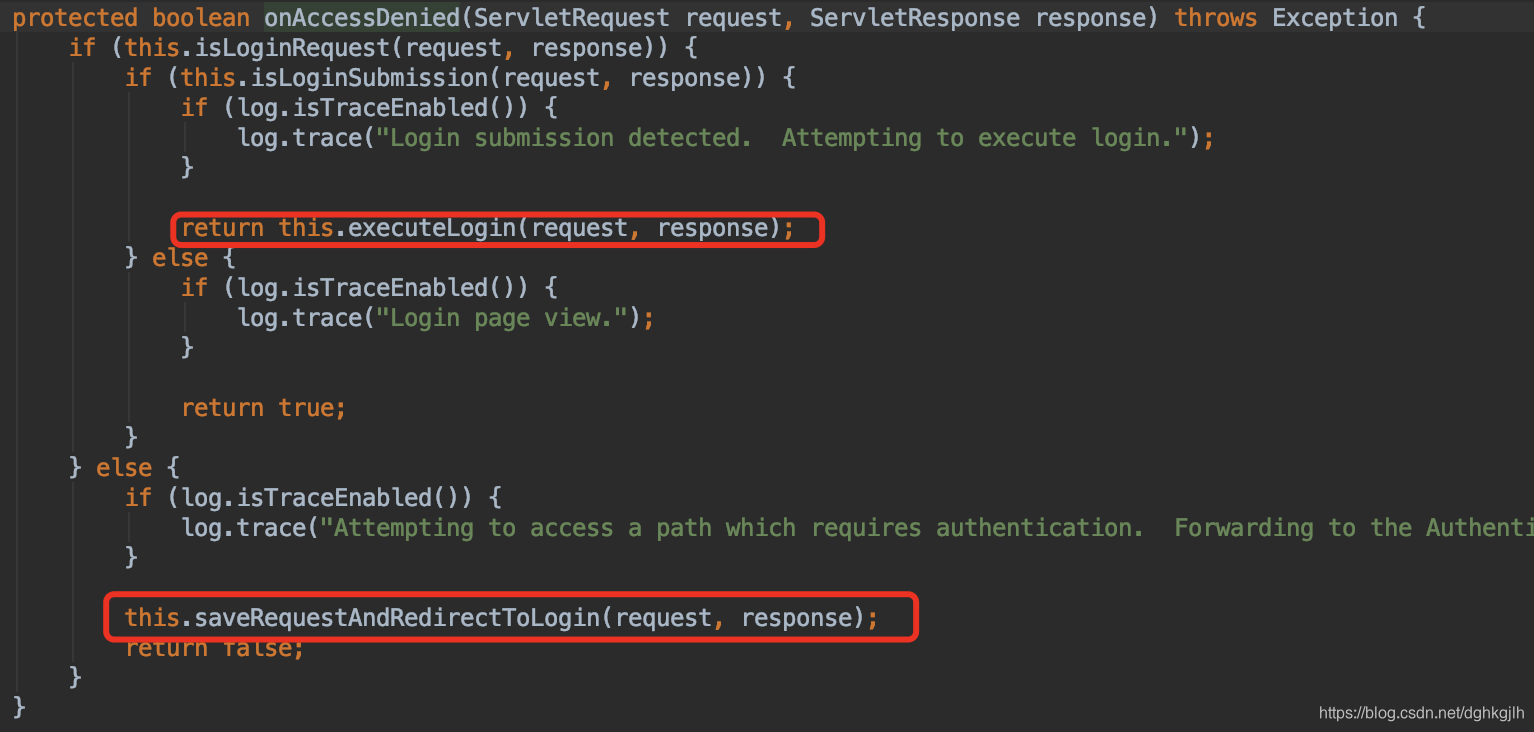
If token validation fails, we can simply return the result to the frontend; there is no need for another pointless check. Also, Shiro’s check in isAccessAllowed is broad: it only checks whether the user has logged in, after which all requests are considered valid. That clearly does not meet our requirements. Here is the source:

 After login, the red-highlighted expression is true. These two points explain why the code in Step 1 is written that way.
Step 2: after the user logs in successfully—that is, after subject.login(token) passes validation—we return the token to the client so it can be validated on the next request.
try{
            subject.login(token);
            //The token to return
            String encryptionKey= DigestUtils.sha256Hex(SINGNATURE_TOKEN+user.getName());
        }catch (Exception e){
            System.out.println("Handle the specific exception");
        }
Step 3: have Shiro execute our custom filter.
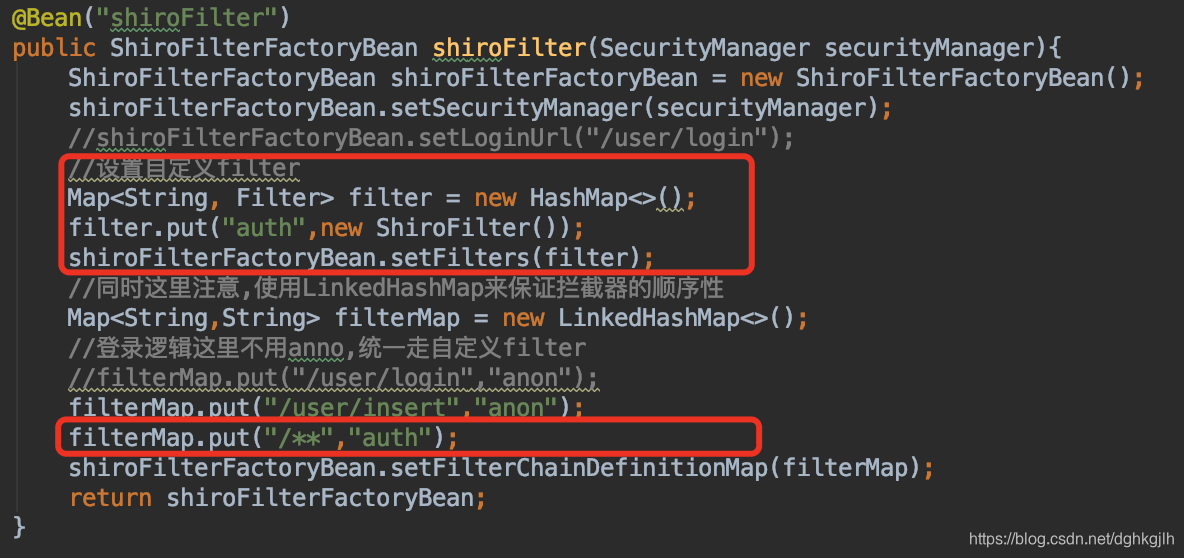
All operations except those that require no authentication are handled by the custom ShiroFilter.
After these three steps, all requests requiring authentication can be processed, avoiding the overhead of server-side memory use and database storage and queries.
Note: the implementation above uses the SHA256 encryption method in Apache Commons Codec, but there is no corresponding decryption method. It therefore cannot implement the timestamp-based token expiry check mentioned in the previous article; the code above currently has no expiry restriction. A simple solution would be to use Base64, which can be decoded, to encode a timestamp into the token and then decode it to check whether the token has expired.
Something to think about: how can multiple services in a distributed system share one token? My rough idea is to take inspiration from publish/subscribe and use a separate token authentication server responsible for creating, destroying, and validating tokens. Once the token is valid, it is returned to the client, which uses it to request different services such as A, B, and C.
JWT tokens also seem quite capable, but I have not researched them yet. If you know more, please leave a comment and teach me—I would appreciate it!
This series does not provide a complete standalone codebase, but one of my projects with separate frontend and backend components integrates Shiro. If you need it, the code is here.